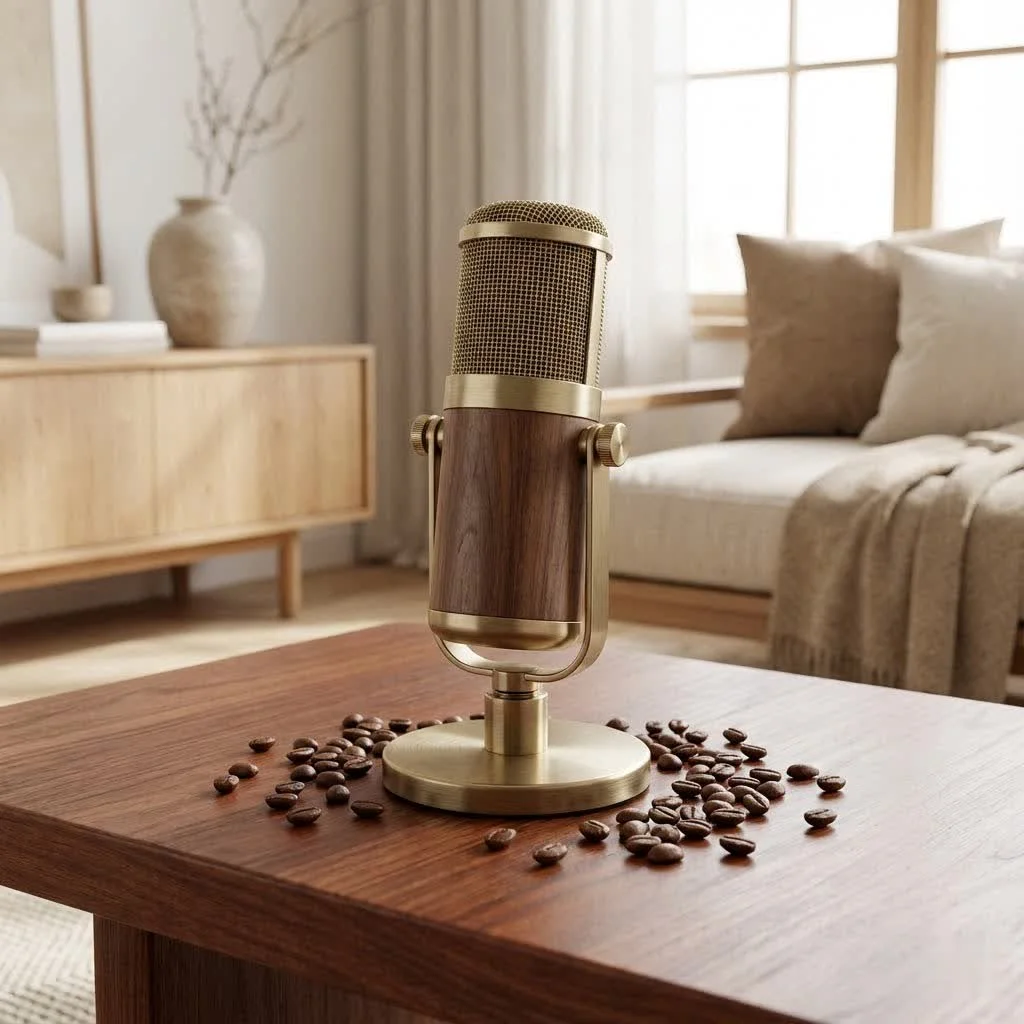
The Samson C01 studio condenser microphone is an excellent choice for achieving professional-grade audio on a budget, offering a large 19mm diaphragm, a cardioid polar pattern, and a frequency response typically ranging from 40Hz to 18kHz. This mic is widely praised for its warm, clear sound profile, making it suitable for vocals, acoustic instruments, and podcasting, and it requires 48V phantom power for operation.
Demystifying the Samson C01: Features & Technical Specifications
At the core of the Samson C01’s appeal lies its impressive set of features, designed to capture sound with warmth and clarity typically associated with much more expensive equipment. Understanding these elements is key to appreciating its capabilities. For see our home recommendations on this site.
The Heart of the Mic: Large Diaphragm & Polar Pattern
The Samson C01 boasts a large 19mm dual-layer diaphragm. This generous size allows it to capture a broad spectrum of sound with intricate detail, from the subtle nuances of a whisper to the powerful dynamics of a musical instrument. The larger diaphragm contributes to a fuller, warmer sound, a quality often sought after in studio recordings.
Its primary design features a cardioid polar pattern. This means the microphone is most sensitive to sounds coming from directly in front of it and rejects sounds from the sides and rear. This focused pickup is incredibly beneficial in a studio environment, helping to isolate your sound source (like a vocalist or an instrument) from unwanted room noise and background chatter. It’s excellent for ensuring your recordings are clean and professional, especially in less-than-perfect acoustic spaces. While some early models or reviews occasionally mentioned a “hypercardioid” pattern, Samson’s official specifications and most reliable sources confirm it as cardioid, which is ideal for focused, front-facing capture.
Sound Profile & Frequency Response
When we talk about a microphone’s “sound profile,” we’re essentially describing how it “hears” different frequencies. The Samson C01 generally offers a smooth, flat frequency response, typically ranging from 40Hz to 18kHz (though some specifications list it from 20Hz-18kHz). This wide range ensures it can capture both the deep lows of a bass guitar and the shimmering highs of cymbals or a soprano’s voice.
In practice, many users report a gentle drop-off in frequencies below 80Hz and a subtle presence or “air” boost centered around 10kHz. This characteristic often translates to vocals sounding warm and natural, while acoustic instruments acquire a pleasing sparkle and clarity. It’s a sound that “punches above its price point,” delivering detailed audio without sounding overly harsh. However, like many budget condensers, some critical listeners have noted it can occasionally exhibit minor sibilance (harsh “s” sounds) or a slightly “nasally” tone in certain applications.
Build Quality & Essential Features
|
Our Picks for the Best Studio Mic in 2026
As an Amazon Associate I earn from qualifying purchases.
|
||
| Num | Product | Action |
|---|---|---|
| 1 | USB Microphone, MAONO 192KHZ/24Bit Plug & Play PC Computer Podcast Condenser Cardioid Metal Mic Kit with Professional Sound Chipset for Recording, Gaming, Singing, YouTube (AU-A04) |

|
| 2 | Upgraded Studio Recording Microphone with Isolation Shield & Pop Filter - Music Condenser Mic for Podcasting, Singing, Home Studio - Sound for PC, Laptop, Smartphone |
|
| 3 | RØDE NT1 5th Generation Large-diaphragm Studio Condenser Microphone with XLR and USB Outputs, Shock Mount and Pop Filter for Music Production, Vocal Recording and Podcasting (Black) |
|
| 4 | AKG Pro Audio P120 - Affordable 2/3-Inch Diaphragm Condenser Microphone for Clear Vocals & Instruments. Studio Recording or Live. XLR Connector. Black |
|
| 5 | Condenser Microphone,PC Computer Podcast USB Condenser Microphone Cardioid Metal Mic Kit for Recording, Podcasting, Home Studio, YouTube, Black, BM-800 |
|
| 6 | Shure SM4 Studio Recording Microphone Kit, XLR Home Studio Condenser Mic with Mix-Ready Audio - All-Metal Construction, Includes Detachable Magnetic Pop Filter & Shock Mount (SM4-K-KIT) |
|
| 7 | Shure SM7B Vocal Dynamic Microphone – XLR Studio Mic for Podcasting, Recording, Broadcasting, Streaming & Gaming – Smooth, Warm Sound, Rugged Build, Detachable Windscreen, Wide Frequency Range, Black |
|
| 8 | Studio Recording Microphone Isolation Shield with Pop Filter and Metal Tripod Stand, Studio Mic to PC Laptop Smartphone, Music Microphone for Recording Singing Podcasting |
|
| 9 | RØDE NT1 Signature Series Large-Diaphragm Condenser Microphone with Shock Mount, Pop Filter and XLR Cable for Music Production, Vocal Recording, Streaming and Podcasting (Black) |
|
| 10 | Audio-Technica AT2020 Cardioid Condenser Studio XLR Microphone, Ideal for Project/Home Studio Applications, Black |
|
Durability is a key factor for any studio equipment, and the Samson C01 doesn’t disappoint. It features a sturdy, all-metal body and a heavy-gauge mesh grille, designed to protect the delicate internal capsule from accidental bumps and knocks. This robust construction gives it a professional feel and ensures it can withstand the rigors of frequent studio use.
An intuitive blue LED light on the microphone illuminates when it’s receiving 48V phantom power. This visual cue is incredibly helpful, letting you know at a glance that your mic is correctly powered and ready to record. It connects via a gold-plated XLR connector, ensuring a stable and reliable signal path to your audio interface or mixer. The C01 also conveniently comes with a swivel stand mount, allowing you to easily position it on any standard microphone stand. For enhanced stability and vibration isolation, an optional SP01 “Spider” shock mount is available and highly recommended. It even ships in a rigid, foam-lined plastic case, providing excellent protection for storage and transport.
Setting Up Your Samson C01 for Pristine Recordings
Getting the most out of your Samson C01 isn’t just about plugging it in; it’s about understanding the fundamentals of proper setup. Even the best microphone can sound mediocre without the right supporting cast and techniques.
The Power Essential: Understanding Phantom Power
Perhaps the most crucial requirement for the Samson C01 is 48V phantom power. As a condenser microphone, it needs this external power source to operate its internal electronics and polarize its diaphragm. Most modern audio interfaces, mixers, and dedicated microphone preamps come equipped with switchable phantom power.
Before connecting your C01, ensure your audio interface or mixer’s phantom power is switched off. Connect the XLR cable firmly to both the microphone and your interface, then switch on the phantom power. The blue LED on your C01 should light up, confirming it’s receiving power. Never connect or disconnect an XLR cable to a condenser mic while phantom power is active, as this can potentially damage the microphone or your preamp.
Must-Have Accessories: Pop Filters, Shock Mounts & Cables
To truly improve your recordings with the C01, certain accessories are indispensable:
- Pop Filter: This is a thin screen placed between the vocalist and the microphone. Its primary job is to diffuse “plosives” – those harsh bursts of air from “p” and “b” sounds that can overload the microphone capsule and create unpleasant popping noises. A good pop filter will make a dramatic difference in vocal clarity.
- Shock Mount: While the C01 comes with a swivel mount, an optional SP01 shock mount is a major upgrade. It suspends the microphone using elastic bands, isolating it from vibrations and low-frequency rumble that can travel through the microphone stand (e.g., footsteps, desk bumps). This significantly reduces unwanted noise in your recordings.
- Quality XLR Cable: Don’t skimp on your cables! A good quality XLR cable with proper shielding will ensure a clean signal transfer and minimize interference.
Mic Placement Mastery: Getting the Best Sound
Microphone placement is an art, and mastering it can drastically improve your sound. With the Samson C01’s cardioid pattern, precision is key:
- For Vocals: A common starting point is to place the C01 about 6 to 8 inches (15-20 cm) from the vocalist’s mouth, slightly off-axis (pointing towards the nose or forehead rather than directly at the mouth) to reduce plosives and sibilance. Experiment with distance; moving closer increases bass frequencies (the “proximity effect”), which can add warmth but become boomy if overdone. Too far away, and the sound can become thin and capture more room ambiance.
- For Acoustic Guitar: Try positioning the C01 roughly 6-12 inches (15-30 cm) from the soundhole, pointed towards where the neck meets the body. This often captures a balanced blend of body resonance and string clarity. Another option is pointing it directly at the bridge for more attack, or closer to the soundhole for more bass.
- As a Drum Overhead: When used as an overhead, aim it down towards the snare and cymbals from a distance of 2-3 feet. Its wide frequency response can capture the overall kit sound effectively.
Recording with the Samson C01: Expert Techniques for Clear Audio
Even with the perfect setup, how you manage your audio signal during recording makes all the difference. These techniques will help you achieve clean, professional-sounding tracks with your Samson C01.
Gain Staging: Finding Your Levels Without Clipping
Gain staging refers to managing the audio level at each point in your signal chain to ensure a strong, clean signal without distortion. With the Samson C01, which can be less sensitive than some high-end condensers, you might need to increase the gain on your audio interface’s preamp.
- Set Your Input Gain: While performing at your loudest, slowly increase the input gain on your audio interface until your recording software’s input meter consistently peaks around -6dB to -10dB. This gives you plenty of headroom to avoid “clipping” (digital distortion) during unexpected loud moments.
- Avoid Over-Gaining: If you have to crank the gain too high, you risk introducing noise from your preamp. If your C01 seems too quiet even with high gain, consider repositioning the mic closer to the source or ensuring your performance is sufficiently loud. you can always boost a clean, low signal in post-production, but you can’t remove digital clipping.
Taming the Room: Basic Acoustic Treatment & Noise Reduction
The Samson C01, like most condenser microphones, is sensitive and will pick up not only your intended sound source but also the acoustics of your recording space. Untreated rooms can lead to echoes, reverb, or unpleasant resonances that degrade your recording quality.
- Minimize Hard Surfaces: Hard, reflective surfaces (bare walls, windows, hardwood floors) are the enemy of clean recordings. Use blankets, duvets, thick curtains, rugs, or even acoustic foam panels to absorb sound reflections.
- Create a “Vocal Booth”: For vocals, try recording in a smaller, well-damped space like a closet filled with clothes. The fabric acts as natural acoustic treatment. Alternatively, consider portable vocal booths or reflection filters that attach to your mic stand, creating a localized dead space around the microphone.
- Silence is Golden: Before hitting record, take a moment of silence with your C01 plugged in to listen for any unwanted background noise – computer fans, street traffic, refrigerator hum, or even internal self-noise from the mic itself. Address these issues as much as possible before recording.
Enhancing Your Sound: Post-Processing Samson C01 Tracks
Even the best raw recording often benefits from careful post-processing. With the Samson C01, thoughtful application of EQ, compression, and other tools can transform a good take into a truly polished sound.
Essential EQ and Compression for Vocals & Instruments
- Equalization (EQ): Use EQ to sculpt the tonal balance of your tracks.
- For Vocals: If your C01 recording sounds a bit “muddy” in the low-mids (around 200-400Hz), a subtle cut can add clarity. A slight boost in the higher frequencies (e.g., 5kHz-10kHz) can enhance presence and “air,” making vocals stand out. If you encounter sibilance (harsh “s” sounds), a narrow cut around 6kHz-8kHz can help.
- For Acoustic Guitar: You might cut some muddiness in the low-mids and boost the highs for sparkle. If you have too much “boom” from the soundhole, a low-frequency cut can tidy things up.
- Compression: Compression helps to control dynamics, making loud parts quieter and quiet parts louder, resulting in a more consistent and “glued together” sound.
- For Vocals: Use light to moderate compression to even out vocal performance. This makes the vocals sit better in a mix and sound more professional. Start with a ratio of 3:1 or 4:1, a medium attack, and a fast release.
- For Instruments: Apply compression to tame peaks and add sustain. For acoustic guitar, light compression can help the instrument sit more consistently in the mix.
Dealing with Sibilance and Background Noise
As some users note, the Samson C01 can sometimes exhibit sibilance or pick up a bit more self-noise than higher-end microphones.
- De-Essers: If EQ isn’t enough to control sibilance, a de-esser plugin is your next step. This tool specifically targets and reduces harsh “s,” “sh,” and “ch” sounds without affecting the rest of the vocal performance.
- Noise Reduction Software: For subtle background hum or a slightly elevated noise floor from the mic itself, noise reduction plugins can be very effective. However, use these sparingly! Aggressive noise reduction can introduce artifacts and make your audio sound unnatural. It’s always better to capture a clean signal at the source than to try and fix a noisy one in post.
Is the Samson C01 the Right Studio Mic for Your Needs?
Choosing a microphone is a personal journey, influenced by your specific projects, budget, and desired sound. The Samson C01 shines in particular scenarios.
Ideal Applications: Vocals, Acoustics, Podcasting & More
The Samson C01 is an exceptional choice for:
- Home Studios: It’s often hailed as a “top pick for home studios” due to its affordability and solid performance.
- Vocals: It captures vocals with warmth and detail, making it suitable for singing, voice-overs, and spoken word.
- Acoustic Instruments: Many users find it excellent for recording acoustic guitars, capturing both the strings and the wood’s resonance. It can also be surprisingly effective as a drum overhead in a pinch.
- Podcasting & Live Streaming: Its clear, articulate sound and cardioid pattern make it great for capturing spoken audio while minimizing room distractions.
- Demos & Songwriting: It’s perfect for quickly laying down high-quality demos without investing in prohibitively expensive gear.
As audio engineer Dr. Evelyn Reed often says, “The Samson C01 isn’t just an entry-level mic; it’s a versatile workhorse that, with proper technique, can deliver results far beyond its price point.”
Weighing Pros and Cons: A Realistic Perspective
Every piece of gear has its strengths and weaknesses. Here’s a balanced look at the Samson C01:
Pros:
- Affordable: One of its biggest selling points, offering incredible value for its price.
- Good Sound Quality: Delivers clear, detailed, and warm audio, especially for vocals and acoustic instruments.
- Durable Build: Robust metal construction designed to last.
- Versatile: Suitable for a wide range of recording applications.
- Included Accessories: Comes with a swivel mount and a sturdy carrying case.
- Phantom Power LED: Clear indicator for operational status.
Cons:
- Requires Phantom Power: Not a USB mic, so needs an audio interface or mixer with 48V.
- Can Be Less Sensitive: Might require higher preamp gain for quieter sources, potentially increasing the noise floor if your preamp isn’t stellar.
- Fixed Polar Pattern: Only cardioid, limiting flexibility compared to multi-pattern mics.
- Higher Self-Noise: Some users report slightly higher self-noise compared to premium condensers, though often manageable in a mix.
- Can Pick Up Room Noise: Like all sensitive condensers, benefits greatly from acoustic treatment.
Considering these points, the C01 is an excellent starter or backup mic, delivering professional sound within its budget-friendly scope.
Maximizing Longevity: Care and Maintenance for Your C01
Your Samson C01 is an investment in your sound, and proper care will ensure it serves you well for many years to come.
- Handle with Care: Always avoid dropping or impacting the microphone. The internal capsule is delicate.
- Use a Pop Filter: This not only improves sound but also protects the mic capsule from moisture and saliva, which can degrade its performance over time.
- Store Properly: When not in use, store your C01 in its included foam-lined case to protect it from dust, moisture, and physical damage.
- Keep it Clean: Gently wipe down the microphone body with a soft, dry cloth. Never use harsh chemicals or liquids near the mesh grille, as moisture can damage the capsule.
- Mind the Environment: Avoid exposing your microphone to extreme temperatures or humidity, which can negatively impact its sensitive components.
Frequently Asked Questions (FAQ)
Q: Does the Samson C01 require phantom power?A: Yes, the Samson C01 is a condenser microphone and absolutely requires 48V phantom power to operate. This power is typically supplied by most audio interfaces, mixers, or dedicated mic preamps.
Q: What is the best way to record vocals with a Samson C01?A: For vocals, position the C01 about 6-8 inches from the vocalist, slightly off-axis, and always use a pop filter. Ensure proper gain staging to avoid clipping, and consider basic acoustic treatment for your recording space to minimize room reflections.
Q: Is the Samson C01 good for acoustic guitar?A: Many users find the Samson C01 excellent for recording acoustic guitar, as its large diaphragm captures the instrument’s warmth and detail effectively. Experiment with placement, often pointing it towards where the neck meets the body for a balanced sound.
Q: What is the polar pattern of the Samson C01?A: The Samson C01 features a cardioid polar pattern, meaning it primarily picks up sound from the front and rejects sound from the sides and rear, making it ideal for isolating individual sound sources in a studio environment.
Q: Does the Samson C01 come with a shock mount?A: The Samson C01 comes with a standard swivel stand mount. An optional SP01 “Spider” shock mount is available separately, which is highly recommended for better isolation from vibrations and handling noise.
Conclusion
The Samson C01 studio condenser mic stands as a shows the idea that quality sound doesn’t have to come with an exorbitant price tag. It’s a robust, versatile, and high-performing microphone that has empowered countless musicians, podcasters, and content creators to achieve professional-level recordings from their home studios. By understanding its features, employing proper setup and recording techniques, and giving it the care it deserves, your Samson C01 will be a reliable ally in your audio journey. So, go ahead, plug it in, hit record, and let your creativity flow – the Samson C01 is ready to capture your sound with impressive clarity and warmth. Start making those professional recordings you’ve always dreamed of with your Samson C01!
Frequently Asked Questions
What are the key technical specifications of the Samson C01 microphone?
The Samson C01 features a large 19mm dual-layer diaphragm and a cardioid polar pattern, designed to capture sound from the front while rejecting side and rear noise. It offers a frequency response typically ranging from 40Hz to 18kHz, providing clear and warm audio for various applications.
How do I properly set up the Samson C01 for recording?
To set up the Samson C01, first ensure your audio interface's 48V phantom power is off, then connect the XLR cable. After connecting, switch on the phantom power; the mic's blue LED will illuminate. Always use a pop filter and consider an SP01 shock mount for optimal sound quality.
What accessories are essential for maximizing the Samson C01's performance?
Essential accessories for the Samson C01 include a pop filter to prevent plosives, an optional SP01 shock mount to isolate vibrations, and a high-quality XLR cable for clean signal transfer. These accessories significantly improve recording clarity and reduce unwanted noise.
What are the ideal applications for the Samson C01 studio microphone?
The Samson C01 is ideal for home studios, capturing vocals, recording acoustic instruments like guitars, and for podcasting or live streaming. Its clear, articulate sound and cardioid pattern make it versatile for various recording needs, delivering professional results on a budget.
What are the main advantages and disadvantages of the Samson C01?
The Samson C01's advantages include its affordability, good sound quality, durable metal build, and versatility for vocals and acoustic instruments. Disadvantages are its requirement for 48V phantom power, potentially lower sensitivity needing higher preamp gain, fixed cardioid pattern, and slightly higher self-noise compared to premium models.
Set Up Your Samson C01 for Pristine Recordings
Learn how to properly set up your Samson C01 studio condenser microphone to achieve clear, professional-quality audio for vocals, instruments, and podcasts.
Ensure your audio interface or mixer's 48V phantom power is switched off before connecting the Samson C01. Firmly connect the XLR cable to both the microphone and your interface. Then, switch on the phantom power; the blue LED on your C01 should light up, confirming it's receiving power.
Place a pop filter between the vocalist and the microphone to diffuse plosives and protect the capsule. While the C01 includes a swivel mount, consider an optional SP01 shock mount to isolate the microphone from vibrations and handling noise. Use a quality XLR cable for optimal signal transfer.
For vocals, position the C01 6-8 inches (15-20 cm) from the vocalist's mouth, slightly off-axis. For acoustic guitar, try 6-12 inches (15-30 cm) from the soundhole, pointed towards the neck-body joint. Experiment with distances to find the best balance of warmth and clarity for your source.
While performing at your loudest, slowly increase the input gain on your audio interface until your recording software's input meter consistently peaks around -6dB to -10dB. This provides sufficient headroom to prevent digital clipping during loud moments. Avoid over-gaining to minimize preamp noise.
Minimize hard, reflective surfaces in your recording space by using blankets, duvets, or acoustic foam to absorb sound reflections. For vocals, consider recording in a smaller, well-damped space like a closet. Before recording, listen for and eliminate any unwanted background noise such as computer fans or street traffic.
Get our weekly buyer guide
Practical specs, not advice. Unsubscribe anytime.
This mic is a solid performer for podcasting. The cardioid polar pattern does a great job of picking up my voice clearly while minimizing background noise in my untreated room. I was a bit worried about the 40Hz to 18kHz frequency response, thinking it might miss some of the very low end, but for speech, it’s perfectly adequate and sounds really good.
I picked up the Samson C01 after reading about its capabilities for achieving professional sound on a budget, and it totally delivers. I use it for recording demos of my band’s vocals and it sounds way more expensive than it is. The clarity is excellent and it really brings out the nuances in the performance. A true workhorse for any home studio.
I’ve been using the Samson C01 for my home studio vocals for about six months now, and I’m genuinely impressed. The warm, clear sound profile it captures is fantastic, especially considering the price point. You definitely need that 48V phantom power, but it’s a small setup step for such professional-grade audio. Highly recommend for anyone starting out or on a budget!
The Samson C01 is decent for acoustic instruments, especially guitar. The large 19mm diaphragm does help with capturing a full sound. My only minor complaint is that it can sometimes be a little too sensitive, picking up subtle room reflections more than I’d like, even with careful placement. Still, for the cost, it’s hard to beat.