Welcome to Tmava.com, your trusted hub for all things studio microphone-related! As an audio engineer and recording specialist with over a decade in the trenches of music and broadcast, I’ve seen countless microphones come and go, but one constant remains: the robust, reliable, and revered Xlr Studio Mic. It’s the foundational piece for any serious recording artist, podcaster, or content creator aiming for truly professional audio. Today, we’re diving deep into the world of XLR studio microphones, covering everything from their diverse types and advanced recording techniques to essential processing, selection, and meticulous care, ensuring you can confidently harness their power to sculpt your perfect sound.
Why XLR Studio Mics Are the Heart of Professional Sound
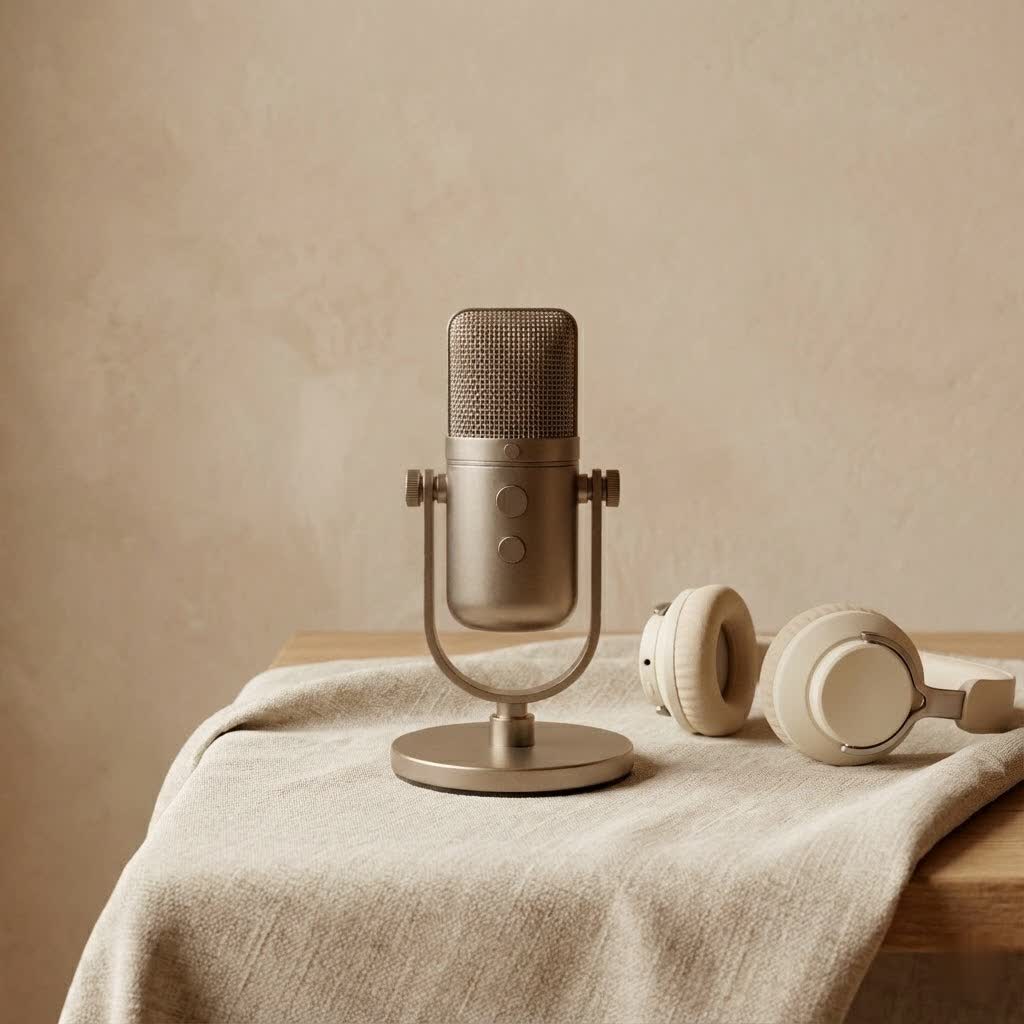
When you’re serious about capturing pristine audio, the conversation inevitably turns to XLR studio microphones. These aren’t just any mics; they’re the industry standard, built for durability, flexibility, and unparalleled sound fidelity. The magic often lies in their connection.
XLR vs. USB: The Pro’s Choice
|
Our Picks for the Best Studio Mic in 2026
As an Amazon Associate I earn from qualifying purchases.
|
||
| Num | Product | Action |
|---|---|---|
| 1 | RØDE NT1 Signature Series Large-Diaphragm Condenser Microphone with Shock Mount, Pop Filter and XLR Cable for Music Production, Vocal Recording, Streaming and Podcasting (Black) |

|
| 2 | Shure SM4 Studio Recording Microphone Kit, XLR Home Studio Condenser Mic with Mix-Ready Audio - All-Metal Construction, Includes Detachable Magnetic Pop Filter & Shock Mount (SM4-K-KIT) |
|
| 3 | AKG Pro Audio P120 - Affordable 2/3-Inch Diaphragm Condenser Microphone for Clear Vocals & Instruments. Studio Recording or Live. XLR Connector. Black |
|
| 4 | Upgraded Studio Recording Microphone with Isolation Shield & Pop Filter - Music Condenser Mic for Podcasting, Singing, Home Studio - Sound for PC, Laptop, Smartphone |
|
| 5 | RØDE NT1 5th Generation Large-diaphragm Studio Condenser Microphone with XLR and USB Outputs, Shock Mount and Pop Filter for Music Production, Vocal Recording and Podcasting (Black) |
|
| 6 | Audio-Technica AT2020 Cardioid Condenser Studio XLR Microphone, Ideal for Project/Home Studio Applications, Black |
|
| 7 | Studio Recording Microphone Isolation Shield with Pop Filter and Metal Tripod Stand, Studio Mic to PC Laptop Smartphone, Music Microphone for Recording Singing Podcasting |
|
| 8 | USB Microphone, MAONO 192KHZ/24Bit Plug & Play PC Computer Podcast Condenser Cardioid Metal Mic Kit with Professional Sound Chipset for Recording, Gaming, Singing, YouTube (AU-A04) |
|
| 9 | Shure SM7B Vocal Dynamic Microphone – XLR Studio Mic for Podcasting, Recording, Broadcasting, Streaming & Gaming – Smooth, Warm Sound, Rugged Build, Detachable Windscreen, Wide Frequency Range, Black |
|
| 10 | Condenser Microphone,PC Computer Podcast USB Condenser Microphone Cardioid Metal Mic Kit for Recording, Podcasting, Home Studio, YouTube, Black, BM-800 |
|
It’s a common dilemma for beginners: USB or XLR? While USB microphones offer convenience and plug-and-play simplicity, XLR mics stand as the undeniable champions for professional-grade audio. XLR microphones utilize a balanced cable system, which employs three wires (ground, hot, and cold) to effectively cancel out electromagnetic interference and noise picked up over longer cable runs. This results in a cleaner, noise-free signal, which is critical for studio recording where every detail matters.
Unlike USB mics, which integrate their analog-to-digital converters, XLR microphones connect to external audio interfaces or mixers. This modularity is a game-changer, allowing you to upgrade individual components like your mic, preamp, or interface independently, tailoring your setup precisely to your evolving needs and pushing your sound quality to new heights. They offer a wider frequency response and superior dynamic range, providing more control over your audio signal. This flexibility is why virtually every serious studio microphone, from the most affordable entry-level models to high-end classics, features an XLR connection.
Common Types of Studio Microphones: Finding Your Voice
The world of XLR studio mics is rich and varied, each type offering unique characteristics that can dramatically shape your sound. Understanding these differences is key to making the right choice for your specific recording goals.
Dynamic Microphones: The Workhorses
Dynamic microphones are the rugged, reliable workhorses of the audio world. Known for their durability and ability to handle high sound pressure levels (SPLs), they are excellent for loud sound sources such as drums, guitar amps, and powerful vocals. Their robust nature and typically lower sensitivity mean they are less prone to picking up unwanted background noise and handling sounds, making them a fantastic choice for untreated home studios or live performances. Dynamic mics are generally passive, meaning they don’t require phantom power to operate. Classic examples include the Shure SM58 and the Shure SM7dB, the latter being a popular choice for podcasts and broadcast due to its excellent off-axis noise rejection.
Condenser Microphones: Capturing Every Nuance
If detail and nuance are what you’re after, condenser microphones are your go-to. These mics are far more sensitive than dynamics, capturing a broader frequency response and subtle sonic details with incredible accuracy. This makes them ideal for recording vocals, acoustic instruments (like guitars and strings), and detailed voiceovers in acoustically treated environments. Condensers typically have active circuitry and almost always require phantom power (+48V) from your audio interface or mixer to function.
Condensers come in two main flavors:
- Large-Diaphragm Condensers: These are often favored for vocals, as they tend to add a pleasing warmth and richness to performances. They are also versatile for various studio applications. The Neumann TLM 102 and Rode NT1-A are celebrated examples, offering superb quality even at entry-level price points for the brand.
- Small-Diaphragm Condensers: Valued for their transparent sound and ability to capture fast transients (the initial attack of a sound), these are excellent for instruments like acoustic guitars, percussion, and orchestral strings. The AKG C451 B is a prime example, renowned for adding “shimmer” to recordings.
Ribbon Microphones: Vintage Warmth Reimagined
Ribbon microphones, once a staple of vintage recordings, have seen a resurgence in popularity for their uniquely smooth, warm, and natural sound. They excel at capturing an authentic, “buttery smooth” performance. Traditionally quite fragile and passive, modern ribbon mics like the sE Electronics Voodoo VR2 sometimes feature active circuitry, offering a wider frequency response, higher output, and improved signal-to-noise performance, while still requiring phantom power. Many ribbon mics inherently have a Figure-8 polar pattern, making them versatile for specific recording techniques.
Setting Up for Success: Professional Recording Techniques
Getting the most out of your XLR studio mic involves more than just plugging it in. A well-configured setup and thoughtful recording techniques are crucial.
The Essential Gear for Your XLR Setup
To connect your XLR microphone to a computer, you’ll need a few key components:
- XLR Microphone: Your chosen mic, of course!
- XLR Cable: A high-quality balanced XLR cable to transmit the audio signal.
- Audio Interface or Mixer: This device converts the analog signal from your mic into a digital signal your computer can process. Most interfaces also provide the necessary phantom power for condenser mics. Popular interfaces include the Focusrite Scarlett series.
- Computer: Your Mac or PC.
- Digital Audio Workstation (DAW): Software like Audacity, Adobe Audition, Logic Pro, or Ableton Live to record and edit your audio.
- Pop Filter or Windscreen: Essential for reducing harsh “plosive” sounds (P’s and B’s) and protecting the microphone capsule from moisture.
- Shock Mount: Isolates the microphone from vibrations and handling noise.
- Mic Stand or Boom Arm: Provides stable positioning for optimal sound capture.
- Studio Headphones: For accurate monitoring of your sound during recording.
Connecting Your XLR Mic: A Step-by-Step Guide
Connecting an XLR microphone is straightforward once you know the path:
- Connect the XLR Cable: Plug one end of your XLR cable into your microphone’s output and the other end into an XLR input on your audio interface.
- Power On Interface: Ensure your audio interface is connected to your computer (usually via USB or Thunderbolt) and powered on.
- Enable Phantom Power: If you’re using a condenser or active ribbon microphone, activate the +48V phantom power switch on your audio interface. Crucial Tip: Always connect the mic and cable completely before engaging phantom power, and disengage it before unplugging, especially with sensitive tube or ribbon mics.
- Adjust Gain: Start with the gain knob on your interface at a low setting (around halfway is a good starting point).
- Select Input: In your computer’s sound settings and your recording software (DAW), select your audio interface as the primary audio input source.
- Monitor: Use your studio headphones to monitor your sound as you speak or play into the microphone. Adjust the gain until your levels are healthy, typically peaking in the green to occasional orange on a meter, avoiding red (clipping).
Mic Placement and Gain Staging: The Art of Capture
Mic placement is a subtle art that significantly impacts your recording quality. For vocals, a pop filter placed a few inches from the mic and the vocalist positioned 6-12 inches from the filter is a good starting point. Experiment with distance and angle to find the “sweet spot” that best captures the voice’s character without excessive room reflections. For instruments, consider the sound source’s strongest points – for an acoustic guitar, try pointing the mic towards where the neck meets the body.
Gain staging, or setting the input level correctly, is paramount. You want a strong signal without clipping (distortion). A common practice is to have the input gain on your interface set so that your loudest peaks hit around -6dB to -10dB on your DAW’s meters, leaving enough “headroom” for processing.
Shaping Your Sound: Audio Processing with Studio Microphones
Once your audio is captured, processing tools can polish it to perfection.
Essential Software and Plugins
Your Digital Audio Workstation (DAW) is the command center for audio processing. Most DAWs come with a suite of built-in effects, but many engineers also rely on third-party plugins.
- EQ (Equalization): To sculpt the tonal balance of your sound. For instance, if your Rode NT1-A sounds a “little on the bright side,” a subtle EQ adjustment can easily fix it.
- Compression: To control dynamics, making loud parts quieter and quiet parts louder, resulting in a more consistent and impactful sound.
- Noise Reduction: While XLR mics reduce cable noise, ambient room noise can still be an issue. Plugins can help mitigate hum, hiss, or environmental sounds.
- Reverb/Delay: To add space and depth to your recordings.
Mastering the Mix: Volume, Noise, and Effects
“A great recording isn’t just about the microphone; it’s about the entire signal chain and how you treat it,” notes renowned audio expert, Clara Vance. “Proper gain staging prevents issues, and smart use of EQ and compression reveals the true potential of an XLR studio mic.”
When mixing:
- Balance Volume: Ensure all elements sit well together in the mix.
- Reduce Unwanted Noise: Address any remaining background noise or hum. Some mics, like the Shure SM7dB, are exceptional at off-axis noise rejection, making your job easier.
- Apply Effects Judiciously: Use EQ to clarify frequencies, compression to even out performances, and time-based effects (reverb, delay) to create atmosphere, always with the goal of enhancing, not overpowering, the natural sound captured by your XLR studio mic.
Choosing Your Perfect Match: Selecting the Right XLR Mic
With so many excellent XLR studio microphones available, finding “the one” can feel daunting. But by focusing on your specific needs, you can narrow down the choices.
Considering Your Needs: Genre, Voice, and Purpose
- Vocals: For most studio vocals in a treated room, a large-diaphragm condenser like the Neumann TLM 102 or Aston Spirit can offer warmth and detail. For a more robust, forgiving option, especially in untreated rooms, a dynamic mic like the Shure SM7dB is fantastic.
- Instruments: Small-diaphragm condensers like the AKG C451 B are excellent for acoustic guitars, cymbals, and strings, capturing transients with sparkle. For loud guitar cabs, a dynamic mic is often preferred due to its high SPL handling. Ribbon mics can offer a unique warmth for instruments.
- Podcasting/Voiceover: Dynamic mics such as the Rode Procaster or Shure SM7dB are favorites for spoken word, known for their vocal presence and ability to minimize room noise. Condensers like the Rode NT1-A also excel for clear voiceovers in quiet spaces.
- Budget: XLR mics range from entry-level (e.g., Rode NT1-A, Audio-Technica AT2020) to high-end (e.g., Neumann TLM 103). Consider what you can reasonably invest while prioritizing an audio interface, which is a crucial part of the signal chain.
Decoding Specifications: Polar Patterns, SPL, and Self-Noise
Understanding these technical terms will help you make an informed decision:
- Polar Pattern: Describes how a microphone picks up sound from different directions.
- Cardioid: Most common, picks up sound primarily from the front, rejecting sound from the sides and rear. Ideal for isolating a single source.
- Omnidirectional: Picks up sound from all directions. Great for capturing room ambience or multiple sources, but susceptible to room noise.
- Figure-8 (Bidirectional): Picks up equally from the front and back, rejecting sounds from the sides. Useful for recording two vocalists facing each other. Often found in ribbon mics.
- Supercardioid/Hypercardioid: More directional than cardioid, with a tighter front pickup and some sensitivity at the rear. Offers excellent feedback rejection.
- Maximum SPL (Sound Pressure Level): The loudest sound a mic can handle before distorting. Important for loud sources. Look for >130dB for versatility.
- Self-Noise (Equivalent Noise Level): The inherent electronic noise generated by the microphone itself, measured in dBA. Lower numbers (below 15 dBA) indicate quieter operation, crucial for clean recordings of quiet sources. The Rode NT1-A, with its 5dBA self-noise, is famously quiet.
Keeping Your Gear Pristine: Maintenance and Care for Studio Microphones
Your XLR studio mic is an investment, and proper care ensures its longevity and consistent performance.
Routine Cleaning for Longevity
Regular, gentle cleaning is your first line of defense against dust and grime.
- After Each Use: Gently wipe down the microphone body with a soft, dry microfiber cloth.
- Surface Dust: Use a soft-bristled brush (like a new, soft toothbrush) or a can of compressed air to dislodge dust from the grille, being careful not to spray directly into the capsule.
- Pop Filters/Windscreens: These should be cleaned regularly. If detachable, remove them and wash gently in a solution of mild soap and water, then rinse with distilled water and air dry completely.
Deep Cleaning and Connector Care
For more thorough cleaning and to address specific issues:
- Microphone Body/Handle: Dampen a microfiber cloth slightly with isopropyl alcohol (avoid spraying directly on the mic) and wipe down the handle and body, focusing on areas that come into contact with hands. Be extremely careful not to let any moisture enter the microphone’s internal components, especially the sensitive capsule.
- XLR Connector: Inspect the female XLR connector on your microphone for dust, dirt, or oxidation, which can cause intermittent connections or phantom power issues. Use a specialized contact cleaner spray for electronics; spray a small amount into the connector and then plug and unplug an XLR cable repeatedly to help clean the contacts. Avoid trying to bend or adjust the contacts yourself.
- Cables: Regularly inspect your XLR cables for signs of wear, kinks, or damage. Damaged cables can introduce noise or signal loss, so replace them if necessary.
Smart Storage and Environmental Protection
How you store your microphone is just as important as how you clean it.
- Protective Storage: Always store your microphone in a clean, dry case or pouch when not in use. Even placing it in a plastic bag can prevent airborne dust from settling on the capsule.
- Environmental Control: Keep your microphones away from extreme temperatures, high humidity, and direct sunlight, as these conditions can degrade components over time.
- Handling: Always handle your XLR mic with care. Avoid dropping it or subjecting it to harsh impacts, which can damage sensitive internal components, especially with condensers and ribbons.
Frequently Asked Questions About XLR Studio Microphones
What is phantom power, and why do I need it?
Phantom power (+48V) is a direct current (DC) electrical power that is transmitted through XLR cables to power microphones with active electronic circuitry, primarily condenser and active ribbon mics. It’s essential for these microphones to function and allows them to amplify their signal and operate. Dynamic microphones do not typically require phantom power.
Can I use an XLR mic without an audio interface?
No, an XLR microphone requires an audio interface or a mixer with a USB output to connect to a computer. The interface converts the analog signal from the microphone into a digital signal that your PC can process, and also provides the necessary gain and phantom power.
Is a more expensive XLR mic always better?
While higher-priced XLR microphones often offer superior build quality, components, and sound characteristics, the “best” mic is ultimately the one that suits your specific needs, recording environment, and budget. An expensive condenser mic in an untreated, noisy room may perform worse than a well-chosen budget dynamic mic.
How do I reduce background noise when using an XLR studio mic?
Background noise can be minimized by using dynamic microphones (which are less sensitive), choosing a microphone with a cardioid or supercardioid polar pattern, optimizing mic placement (close miking), acoustically treating your recording space, and using noise reduction software during post-production.
What’s the ideal distance to speak into an XLR studio mic?
For vocals, a good starting point is about 6 to 12 inches from the microphone, often with a pop filter in between. This distance helps prevent plosives and excessive proximity effect (a bass boost that occurs when close to the mic), while still capturing a clear and present vocal. Experimentation is key to finding the sweet spot for your voice and mic.
Conclusion
The XLR studio mic is more than just a piece of equipment; it’s the gateway to professional-grade audio, offering unmatched quality, versatility, and control. By understanding the different types of XLR microphones, mastering essential setup and recording techniques, embracing audio processing, making informed choices based on your needs, and committing to proper maintenance, you’re not just buying a microphone—you’re investing in the future of your sound. So go ahead, plug in that XLR, experiment, create, and let your voice be heard with the clarity and professionalism it deserves. Share your recording journey with us at Tmava.com; we’re always here to help you dial in that perfect sound.