A professional studio mic is the cornerstone of high-quality audio production, essential for capturing pristine vocals, instruments, and podcasts. Selecting the right microphone involves understanding types like condensers, dynamics, ribbons, and tubes, each offering distinct sonic characteristics and applications. Proper microphone placement, gain staging, and environmental control are crucial recording techniques, while post-production processing with EQ, compression, and reverb further refines the sound. Diligent maintenance, including cleaning and careful handling, ensures the longevity and consistent performance of these precision instruments.
The Core Contenders: Types of Professional Studio Microphones
Diving into the world of professional studio microphones can feel a bit like exploring a specialized toolbox, where each tool is designed for a specific job. Understanding the unique characteristics of each type is key to making informed choices for your recordings. For compare top home on this site.
Condenser Microphones: The Studio Workhorse
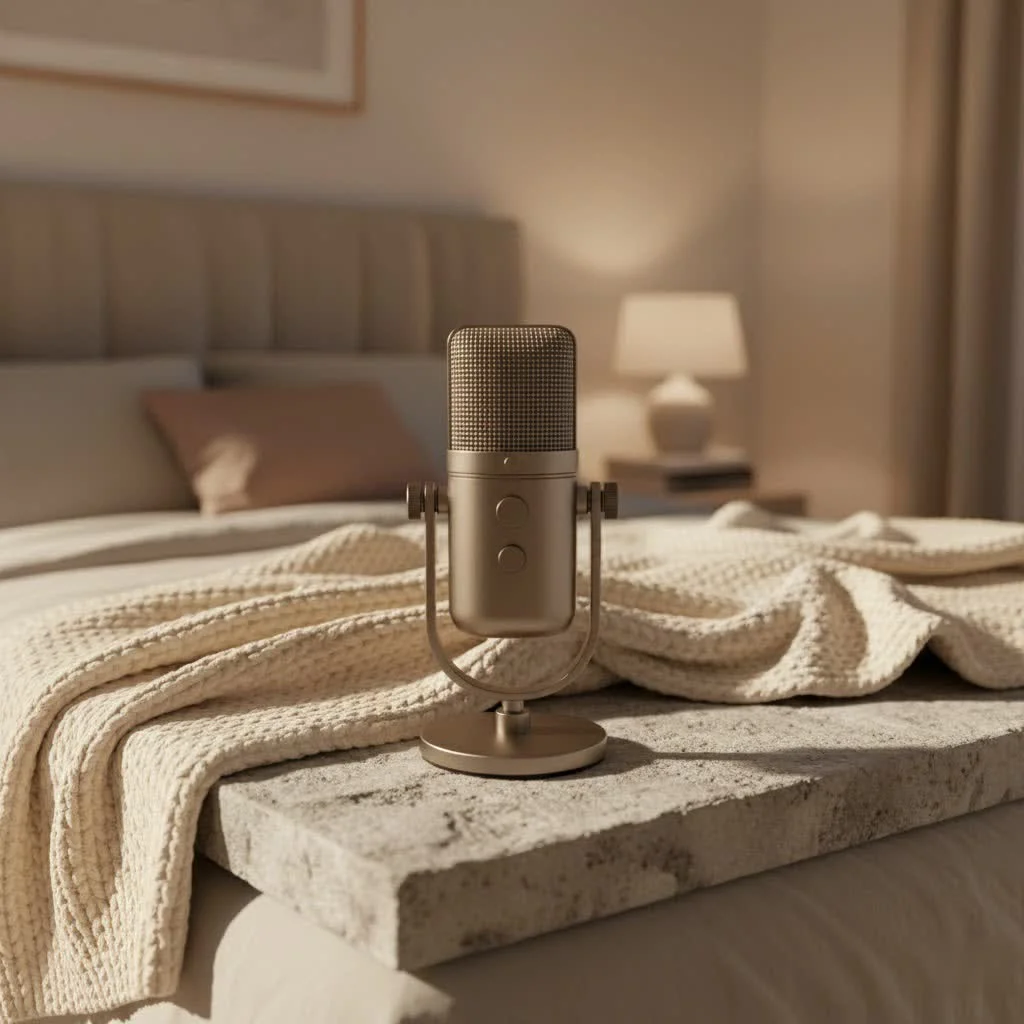
What makes condenser microphones the go-to for many professional studios?Condenser mics are renowned for their incredible sensitivity, detailed sound capture, and wide frequency response, making them the standard choice for professional studio recordings, especially for vocals and acoustic instruments. They require “phantom power” (+48V) to operate, typically supplied by your audio interface or mixer.
- Large-Diaphragm Condensers (LDCs): These are the stars for vocals, acoustic guitars, and any source where you want a rich, full-bodied sound with incredible detail. Their larger diaphragm offers a broader frequency response and often a pleasing “color” to the sound. Mics like the RØDE NT1 Signature Series or Neumann TLM 102 are often hailed as excellent choices for committed home studio owners looking to upgrade to pro-level equipment.
- Small-Diaphragm Condensers (SDCs): Known for their accuracy and fast transient response, SDCs excel at capturing sharp, precise sounds. Think drum overheads, cymbals, acoustic guitars, or orchestral instruments where fidelity and natural sound are crucial.
Dynamic Microphones: The Indestructible Powerhouses
When should you reach for a dynamic microphone in a professional studio setting?Dynamic microphones are built like tanks, making them incredibly durable and capable of handling very high sound pressure levels (SPLs) without distortion. This makes them ideal for recording loud sound sources such as drums, electric guitar cabinets, and powerful vocals. The Shure SM57, for instance, is an industry legend often found on drum overheads and instrument recording.
Ribbon Microphones: Warmth and Vintage Vibe
What unique sonic qualities do ribbon microphones bring to the studio?Ribbon microphones are prized for their smooth, warm, and natural sound, often evoking a vintage aesthetic. They typically have a figure-8 polar pattern, capturing sound equally from the front and back while rejecting sounds from the sides. This makes them excellent for recording electric guitars, brass instruments, and certain vocalists who benefit from a mellow, forgiving tone. However, they are generally more delicate than dynamic mics and require careful handling.
Tube Microphones: The Classic Sonic Signature
|
Our Picks for the Best Studio Mic in 2026
As an Amazon Associate I earn from qualifying purchases.
|
||
| Num | Product | Action |
|---|---|---|
| 1 | RØDE NT1 Signature Series Large-Diaphragm Condenser Microphone with Shock Mount, Pop Filter and XLR Cable for Music Production, Vocal Recording, Streaming and Podcasting (Black) |

|
| 2 | AKG Pro Audio P120 - Affordable 2/3-Inch Diaphragm Condenser Microphone for Clear Vocals & Instruments. Studio Recording or Live. XLR Connector. Black |
|
| 3 | Upgraded Studio Recording Microphone with Isolation Shield & Pop Filter - Music Condenser Mic for Podcasting, Singing, Home Studio - Sound for PC, Laptop, Smartphone |
|
| 4 | Studio Recording Microphone Isolation Shield with Pop Filter and Metal Tripod Stand, Studio Mic to PC Laptop Smartphone, Music Microphone for Recording Singing Podcasting |
|
| 5 | USB Microphone, MAONO 192KHZ/24Bit Plug & Play PC Computer Podcast Condenser Cardioid Metal Mic Kit with Professional Sound Chipset for Recording, Gaming, Singing, YouTube (AU-A04) |
|
| 6 | Condenser Microphone,PC Computer Podcast USB Condenser Microphone Cardioid Metal Mic Kit for Recording, Podcasting, Home Studio, YouTube, Black, BM-800 |
|
| 7 | RØDE NT1 5th Generation Large-diaphragm Studio Condenser Microphone with XLR and USB Outputs, Shock Mount and Pop Filter for Music Production, Vocal Recording and Podcasting (Black) |
|
| 8 | Shure SM4 Studio Recording Microphone Kit, XLR Home Studio Condenser Mic with Mix-Ready Audio - All-Metal Construction, Includes Detachable Magnetic Pop Filter & Shock Mount (SM4-K-KIT) |
|
| 9 | Audio-Technica AT2020 Cardioid Condenser Studio XLR Microphone, Ideal for Project/Home Studio Applications, Black |
|
| 10 | Shure SM7B Vocal Dynamic Microphone – XLR Studio Mic for Podcasting, Recording, Broadcasting, Streaming & Gaming – Smooth, Warm Sound, Rugged Build, Detachable Windscreen, Wide Frequency Range, Black |
|
Why do some engineers swear by tube microphones for vocals?Tube microphones, a specialized type of condenser, are celebrated for their distinctive warmth, rich harmonics, and an almost “larger than life” sonic character. The vacuum tube circuitry adds a subtle compression and saturation that can be incredibly flattering, especially for vocals, making them highly sought after for their classic, luxurious sound.
Professional Recording Techniques with Studio Mics
Having the right professional studio mic is only half the battle; knowing how to use it effectively is where the magic truly happens.
Microphone Placement: The Art of Capture
Why is microphone placement so critical for professional recordings?Proper microphone placement is perhaps the most impactful technique for achieving a great sound, as it dictates how the mic “hears” the source and its environment. Subtle adjustments can dramatically alter tone, presence, and room sound.
- For Vocals: Often, placing a large-diaphragm condenser mic 6-12 inches from the vocalist, slightly off-axis, can minimize plosives and sibilance while capturing a clear, intimate sound. Experiment with height and distance to find the sweet spot for a particular singer.
- For Acoustic Guitar: A common technique involves placing one small-diaphragm condenser near the 12th fret for clarity and another large-diaphragm condenser pointed towards the soundhole for body, blending them for a full sound.
- For Drum Overheads: A pair of small-diaphragm condensers or even versatile large-diaphragm condensers like the AKG C414 XLII can capture the overall kit sound, focusing on cymbals and the kit’s natural decay.
Gain Staging and Monitoring: Setting the Foundation
How do you set up your professional studio mic for optimal levels?Correct gain staging ensures you capture a strong, clean signal without distortion. Adjust the gain knob on your preamp or audio interface until the loudest parts of your performance peak around -6dB to -10dB on your meters. This leaves plenty of headroom, preventing unwanted clipping. Monitoring with high-quality headphones or studio monitors allows you to hear exactly what your microphone is capturing, helping you identify and correct issues in real-time.
Taming the Environment: Pop Filters and Isolation
What role do accessories like pop filters play in professional studio recording?Pop filters are essential for vocal recordings, acting as a barrier between the vocalist and the microphone to prevent harsh “plosive” sounds (like ‘P’ and ‘B’ bursts of air) from hitting the diaphragm. Consider acoustic treatment for your recording space, like bass traps and absorption panels, to minimize unwanted room reflections and noise, which can significantly impact the clarity of your professional studio mic’s capture.
Elevating Your Mix: Audio Processing with Studio Microphones
Even the best capture from a professional studio mic usually benefits from some post-production polish.
Essential Processing Tools: EQ, Compression, Reverb
How do processing tools enhance the sound captured by a professional studio mic?
- EQ (Equalization): This allows you to shape the tonal balance of your sound, cutting unwanted frequencies (e.g., muddy lows, harsh highs) and boosting desirable ones to make your tracks sit better in the mix.
- Compression: Compression helps control the dynamic range of a signal, making quiet parts louder and loud parts quieter, resulting in a more consistent and punchy sound. It’s crucial for professional-sounding vocals and instruments.
- Reverb: Adding a touch of reverb can place your sound in a more natural-sounding acoustic space, giving it depth and character, though it should be used judiciously to avoid muddiness.
Noise Reduction and Gateways: Cleaning Your Sound
How can you clean up unwanted noise from your studio mic recordings?Even with careful recording, some background noise can creep in. Noise reduction software can intelligently identify and remove consistent unwanted sounds. Noise gates, on the other hand, automatically mute a signal when it falls below a certain volume threshold, effectively eliminating silent sections where background noise might be present, making your recordings from a professional studio mic sound much cleaner.
Choosing Your Sonic Partner: Selecting the Right Professional Studio Mic
The sheer variety of professional studio mic options can be overwhelming. Here’s how to narrow down your choices and find the perfect match for your needs.
Matching Mic to Source: Vocals, Instruments, Podcasts
Which professional studio mic is best for specific recording tasks?
- For Vocals: A large-diaphragm condenser is almost always the first choice for its detail and warmth. Consider multi-pattern options like the Shure KSM44A for versatility in capturing different vocal styles or room sounds.
- For Acoustic Instruments: Small-diaphragm condensers are excellent for clarity, while large-diaphragm condensers can add richness. Ribbon mics can also offer a beautiful, smooth texture for strings or brass.
- For Podcasts/Voiceovers: A high-quality large-diaphragm condenser provides broadcast-ready clarity. Dynamic broadcast mics like the Shure SM7B (a common choice though not explicitly mentioned in snippets, it’s a known industry standard for podcasts) are also popular for their ability to reject room noise.
Budget vs. Performance: What to Expect
Can you get a professional sound without breaking the bank?Absolutely. While top-tier mics can cost thousands, there are many excellent professional studio mics at more accessible price points. The Audio Technica AT2020, for instance, regularly tops best-seller lists for its combination of great sound and reasonable price, making it perfect for budding engineers on a budget. Invest in the best you can afford, as a good microphone is a long-term investment that will elevate all your recordings.
Polar Patterns: Understanding Directionality
How do different polar patterns affect what a professional studio mic picks up?A microphone’s polar pattern describes its sensitivity to sounds coming from different directions.
- Cardioid: The most common pattern, sensitive to sounds from the front, rejecting most from the sides and rear. Ideal for isolating a single source in a busy environment.
- Omnidirectional: Sensitive to sounds from all directions equally. Great for capturing room ambiance or a group of performers, but less effective at rejecting unwanted noise.
- Figure-8 (Bidirectional): Sensitive to sounds from the front and back, rejecting sounds from the sides. Useful for recording two vocalists facing each other or for specific room miking techniques. Multi-pattern microphones, such as the AKG C414 XLII, offer several of these patterns, providing immense flexibility.
Longevity and Performance: Maintaining Your Professional Studio Mic
Your professional studio mic is a precision instrument, and like any fine tool, it requires proper care to ensure its longevity and consistent performance.
Cleaning and Storage: Keeping It Pristine
How should I clean and store my professional studio microphones?Always keep your microphones covered when not in use, ideally with a dust cover or in their original case. Dust can accumulate on the diaphragm and affect sound quality. For cleaning, gently wipe the body with a soft, dry cloth. Never spray cleaning solutions directly onto the microphone. Store your mics in a cool, dry place, away from extreme temperatures and humidity, which can damage internal components, especially for condenser and ribbon mics.
Handling with Care: Protecting Your Investment
What are the best practices for handling professional studio mics?Treat your microphones with respect. Avoid dropping them, as even a short fall can cause irreparable damage to delicate capsules. When moving mics, especially condensers and ribbons, always do so gently and consider removing them from stands during transport. Ensure proper cable management to prevent accidental tugs or trips that could send a valuable mic crashing down. “A professional studio mic is an investment in your craft,” says Dr. Elara Vance, a renowned audio engineer with over 20 years in the industry. “Proper handling isn’t just about protecting the equipment; it’s about safeguarding the consistency and quality of your future recordings.”
Conclusion
Choosing, using, and maintaining a professional studio mic is a journey that significantly impacts the quality of your audio. From the nuanced capture of a condenser to the robust reliability of a dynamic mic, each type offers distinct advantages. By mastering recording techniques, understanding basic audio processing, making informed selections based on your specific needs, and committing to diligent maintenance, you empower yourself to achieve truly remarkable sound. Invest wisely, practice diligently, and listen critically – your ears, and your audience, will thank you for it. The path to professional-grade audio begins with the right microphone and the knowledge to wield it effectively.
Mastering Your Sound with a Professional Studio Mic
This guide outlines essential steps for selecting, using, and maintaining a professional studio microphone to achieve high-quality audio recordings.
Choose between condenser, dynamic, ribbon, or tube microphones based on your recording needs. Condensers are ideal for detailed vocals, while dynamics suit loud sources like drums. Consider the specific sonic characteristics each type offers for your desired sound.
Position your microphone strategically to capture the best sound. For vocals, place a large-diaphragm condenser 6-12 inches away, slightly off-axis. For acoustic guitars, try a small-diaphragm condenser near the 12th fret and a large-diaphragm condenser towards the soundhole.
Adjust your preamp or audio interface gain so that the loudest parts of your performance peak between -6dB and -10dB. This ensures a clean signal with adequate headroom. Monitor your recordings with high-quality headphones or studio monitors to identify and correct issues in real-time.
Enhance your recorded sound using EQ, compression, and reverb. Use EQ to shape tonal balance, compression to control dynamic range for a consistent sound, and reverb to add depth. Judicious application of these tools can significantly polish your tracks.
Protect your investment by cleaning and storing your microphones properly. Keep them covered when not in use, wipe the body with a soft, dry cloth, and store them in a cool, dry place. Handle mics gently to prevent damage to delicate capsules and ensure longevity.
Get our weekly buyer guide
Practical specs, not advice. Unsubscribe anytime.
I picked up a ribbon mic based on some recommendations for capturing guitar amps, and while the warmth is incredible, it’s definitely more fragile than I expected. I have to be super careful with phantom power and handling. It sounds great for what it does, but the delicate nature makes me a bit nervous for everyday use in a busy studio.
I finally upgraded to a large-diaphragm condenser mic after years of using a basic dynamic, and the difference is night and day. My vocals sound so much richer and detailed, especially for acoustic tracks. The clarity it brings to my home studio recordings is exactly what I was looking for. Definitely worth the investment for anyone serious about their sound.
I’ve been using a tube mic for my lead vocals, and the subtle harmonic richness it adds is just beautiful. It gives my voice a certain ‘sheen’ that’s hard to achieve with other types. Maintenance is a bit more involved with the tube replacement, but for that classic, warm sound, it’s absolutely worth the extra care. My go-to for professional-sounding tracks.
The section on proper microphone placement really helped me dial in my setup. I used to just plop my mic down, but adjusting the distance and angle for my podcast recordings made a huge difference in reducing room echo. My co-host even commented on how much clearer I sound now. Still experimenting with different techniques, but it’s a solid improvement.