Choosing the right home studio mic is crucial for capturing high-quality audio, with condenser microphones excelling at detailed sound for vocals and acoustic instruments, while dynamic microphones are robust for loud sources and untreated rooms. The ideal microphone depends on your specific recording needs, environment, and budget, with options ranging from sensitive condensers requiring phantom power to plug-and-play USB microphones.
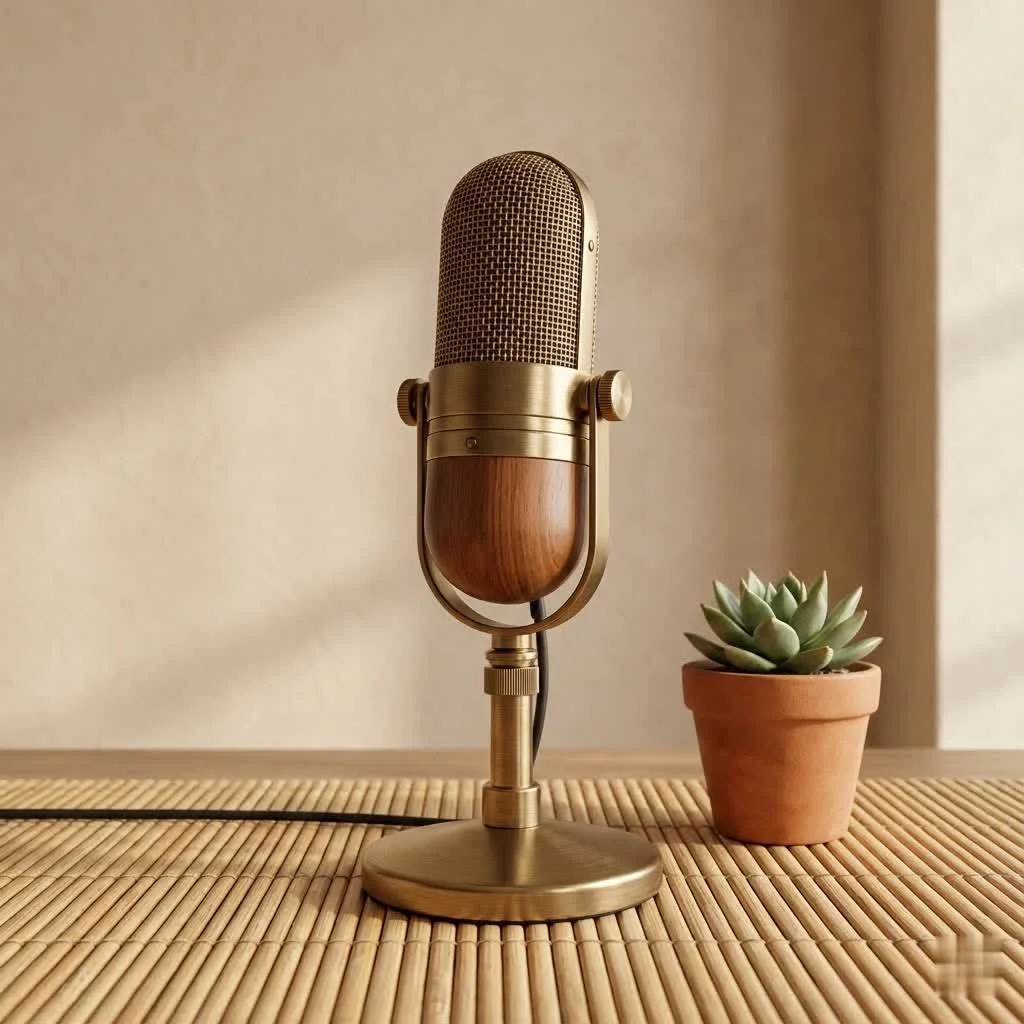
Decoding Home Studio Mics: What Are Your Options?
Before you even think about hitting that “add to cart” button, let’s break down the main types of microphones you’ll encounter for your home studio. Each has its own personality, strengths, and ideal use cases. Understanding these will be your first step toward sonic success. For expert home reviews on this site.
Condenser Microphones: The Detail Magnets
If you’re after crisp, detailed, and nuanced sound capture, condenser microphones are often your go-to. They are incredibly sensitive, picking up even the faintest whispers and the subtle harmonics of acoustic instruments. This sensitivity makes them fantastic for vocals, acoustic guitars, piano, and string instruments.
- Large Diaphragm Condensers: These are the big, classic studio mics you often see. They’re known for producing a warm, rich sound, particularly excellent for vocals and instruments that benefit from a solid low-end presence. Think of mics like the Audio-Technica AT2020 or the Rode NT1-A – staples in many home studios for their balance of quality and affordability.
- Small Diaphragm Condensers: While less common for lead vocals in a home setup, these offer a wider and more even frequency response, making them superb for capturing sources from a distance, like drum overheads or acoustic ensembles.
Key Considerations: Condenser mics typically require +48V “phantom power” from an audio interface or mixer to operate. They are also generally more delicate than dynamic mics, so handle them with care! If your recording space isn’t acoustically treated, their sensitivity can pick up unwanted room reflections, which might not be ideal.
Dynamic Microphones: The Workhorses
Dynamic microphones are the rugged heroes of the mic world. Built like tanks, they can handle high sound pressure levels (SPLs) without distortion and are far more forgiving in less-than-perfect acoustic environments. They don’t require phantom power, making them simpler to set up.
Best for: Loud vocals (rock, rap), electric guitar amps, drums, and general live performance. The legendary Shure SM57 and SM58 are prime examples, found in countless studios and on stages worldwide. The Shure SM7B is another popular dynamic mic, renowned for its smooth, warm sound, especially favored by podcasters and vocalists in untreated rooms due to its directional and insensitive nature.
Ribbon Microphones: Vintage Warmth
|
Our Picks for the Best Studio Mic in 2026
As an Amazon Associate I earn from qualifying purchases.
|
||
| Num | Product | Action |
|---|---|---|
| 1 | RØDE NT1 Signature Series Large-Diaphragm Condenser Microphone with Shock Mount, Pop Filter and XLR Cable for Music Production, Vocal Recording, Streaming and Podcasting (Black) |

|
| 2 | Shure SM7B Vocal Dynamic Microphone – XLR Studio Mic for Podcasting, Recording, Broadcasting, Streaming & Gaming – Smooth, Warm Sound, Rugged Build, Detachable Windscreen, Wide Frequency Range, Black |
|
| 3 | RØDE NT1 5th Generation Large-diaphragm Studio Condenser Microphone with XLR and USB Outputs, Shock Mount and Pop Filter for Music Production, Vocal Recording and Podcasting (Black) |
|
| 4 | Audio-Technica AT2020 Cardioid Condenser Studio XLR Microphone, Ideal for Project/Home Studio Applications, Black |
|
| 5 | Studio Recording Microphone Isolation Shield with Pop Filter and Metal Tripod Stand, Studio Mic to PC Laptop Smartphone, Music Microphone for Recording Singing Podcasting |
|
| 6 | Shure SM4 Studio Recording Microphone Kit, XLR Home Studio Condenser Mic with Mix-Ready Audio - All-Metal Construction, Includes Detachable Magnetic Pop Filter & Shock Mount (SM4-K-KIT) |
|
| 7 | AKG Pro Audio P120 - Affordable 2/3-Inch Diaphragm Condenser Microphone for Clear Vocals & Instruments. Studio Recording or Live. XLR Connector. Black |
|
| 8 | Upgraded Studio Recording Microphone with Isolation Shield & Pop Filter - Music Condenser Mic for Podcasting, Singing, Home Studio - Sound for PC, Laptop, Smartphone |
|
| 9 | USB Microphone, MAONO 192KHZ/24Bit Plug & Play PC Computer Podcast Condenser Cardioid Metal Mic Kit with Professional Sound Chipset for Recording, Gaming, Singing, YouTube (AU-A04) |
|
| 10 | Condenser Microphone,PC Computer Podcast USB Condenser Microphone Cardioid Metal Mic Kit for Recording, Podcasting, Home Studio, YouTube, Black, BM-800 |
|
For a smooth, natural sound with a distinctly warm, vintage character, ribbon microphones are a beautiful choice. They excel at capturing the richness of vocals, guitar amplifiers, and orchestral instruments, offering a mellow tone without emphasizing harsh high frequencies.
Important Note: Ribbon mics are delicate and often require more gain from a high-quality preamp. While perhaps not the absolute first choice for a bare-bones home studio mic setup, they offer unique sonic flavors for those looking to expand their palette.
USB Microphones: Plug-and-Play Simplicity
If ease of use is your top priority, especially for beginners, a USB microphone might be your best bet. These mics plug directly into your computer, bypassing the need for an audio interface or external power.
Ideal for: Podcasting, streaming, voiceovers, online meetings, and casual music recording. Popular options include the Blue Yeti and the Audio-Technica ATR2100X.
Caveat: While convenient, USB mics generally offer less control and upgradeability compared to XLR microphones, and their sound quality might not reach the fidelity of a good condenser paired with an interface.
Choosing Your Perfect Home Studio Mic: A Step-by-Step Approach
Selecting the right home studio mic isn’t about finding the “best” mic overall, but rather the best mic for you and your specific needs. Let’s walk through the key factors.
What Will You Be Recording?
This is the foundational question. Different sound sources benefit from different mic types.
- Vocals (Singing): Condenser mics (especially large-diaphragm) are generally favored for their detail and clarity. For aggressive vocals or in untreated rooms, a dynamic mic like the Shure SM7B can be an excellent choice.
- Acoustic Instruments (Guitar, Piano, Strings): Condensers capture the nuances beautifully. Small-diaphragm condensers can be great for broader sound capture.
- Electric Guitars/Bass (Amps): Dynamic mics like the Shure SM57 are industry standards for their ability to handle high SPLs.
- Drums: A combination of dynamic mics (for kick and snare) and condenser mics (for overheads) is common.
- Podcasting/Streaming/Voiceovers: USB mics offer convenience, but dynamic XLR mics (like the SM7B) paired with an interface provide superior quality and control for a more professional sound.
Understanding Your Space: The Untreated Room Challenge
Honestly, your room is often more important than the mic itself. A fantastic microphone in a terrible-sounding room will still produce a terrible recording.
- Treated Room: If you have acoustic treatment (panels, bass traps), you have more flexibility. Condenser mics will shine here.
- Untreated Room: If you’re recording in a bedroom with hard, reflective surfaces, a sensitive condenser mic will likely pick up too much room echo and background noise. In such cases, a more directional dynamic mic can often yield better results by focusing solely on your voice or instrument and rejecting ambient sound.
XLR vs. USB: Connecting to Your Creativity
Your connectivity choice impacts your setup’s flexibility and potential sound quality.
- XLR Microphones: These are the professional standard. They connect via an XLR cable to an audio interface, which then connects to your computer. An audio interface not only provides the necessary phantom power for condenser mics but also converts the analog mic signal into a digital one your computer can understand, often with better preamps for clearer sound.
- USB Microphones: As mentioned, these are simpler. They plug directly into your computer’s USB port. Great for simplicity, but less flexible for future upgrades or complex recording setups.
Polar Patterns: Shaping Your Sound Field
A microphone’s polar pattern describes how it picks up sound from different directions.
- Cardioid: The most common pattern for home studios. It picks up sound primarily from the front, rejecting sound from the sides and rear. Ideal for isolating a single vocalist or instrument.
- Supercardioid/Hypercardioid: Even narrower pickup patterns, offering greater isolation and rejection of off-axis sounds, but might pick up a small amount of sound directly from the rear.
- Bidirectional (Figure-8): Picks up sound equally from the front and back, rejecting sound from the sides. Useful for recording two vocalists facing each other or for certain instrument miking techniques.
- Omnidirectional: Picks up sound equally from all directions. Great for capturing room ambience or multiple sources in a well-treated space, but not ideal for isolating a single source in an untreated room.
Budgeting for Brilliance: Getting the Most Bang for Your Buck
The good news is you don’t need to break the bank to get a great home studio mic. There are fantastic options at every price point. Start with the highest quality microphone you can reasonably afford, as it’s a foundational piece of your setup. a good mic combined with decent recording technique and acoustic awareness will always outperform an expensive mic used improperly.
Essential Techniques for Home Studio Mic Mastery
Having the right home studio mic is only half the battle. How you use it makes all the difference.
Mic Placement Principles
This is an art, not a science, but here are some starting points:
- Vocals: For most cardioid mics, aim the mic directly at the singer’s mouth, about 6-12 inches away. Experiment with distance and angle to find the “sweet spot” that captures their unique tone.
- Acoustic Guitar: Try aiming the mic towards where the neck meets the body, about 6-12 inches away, to get a good balance of body and string sound.
- Instrument Amps: Place a dynamic mic close to the speaker cone, experimenting with positions from the center (brighter) to the edge (warmer).
Taming Plosives and Sibilance: The Pop Filter Advantage
When recording vocals, “plosives” (harsh ‘p’ and ‘b’ sounds) and “sibilance” (sharp ‘s’ sounds) can be a nightmare. A pop filter, placed a few inches in front of your mic, is an absolute must-have. It effectively diffuses these bursts of air before they hit the microphone, resulting in much smoother, more professional-sounding vocals.
Gain Staging Basics: Getting Your Levels Right
Your microphone’s signal needs to be at an optimal level for recording – not too quiet (which introduces noise when boosted) and not too loud (which causes distortion). Adjust the gain (input level) on your audio interface so that your loudest peaks are comfortably below clipping (often around -6dB to -3dB on your DAW’s meter). This is crucial for a clean recording.
Acoustic Treatment: Your Mic’s Best Friend
Even simple acoustic treatment can dramatically improve your recordings. Things like heavy blankets, thick curtains, or DIY acoustic panels can reduce unwanted room reflections and create a drier, more controlled sound. a less sensitive dynamic mic can help in an untreated room, but treatment will benefit any mic.
Caring for Your Home Studio Mic: Longevity and Performance
Your microphone is an investment, and proper care will ensure it serves you well for years to come.
- Cleaning: Gently wipe down your mic with a soft, dry cloth after use. For grilles, a soft brush can remove dust. Avoid moisture, especially with condenser and ribbon mics.
- Storage: Store your microphone in its original case or a dedicated mic pouch when not in use to protect it from dust, humidity, and accidental knocks.
- Handling: Always handle microphones carefully, especially delicate condenser and ribbon mics. Avoid dropping them or exposing them to extreme temperatures.
“Many aspiring producers get caught up in chasing the ‘perfect’ mic, but the truth is, the magic often happens when you truly understand the mic you have and how it interacts with your unique recording environment,” advises Liam O’Connell, a seasoned audio engineer with two decades of experience crafting pristine soundscapes in both professional studios and intimate home setups. “Focus on technique and room acoustics first, and your recordings will thank you.”
Frequently Asked Questions About Home Studio Mics
Q: What’s the absolute best home studio mic for beginners?
A: For beginners, a large-diaphragm condenser like the Audio-Technica AT2020 is often recommended due to its versatility and detailed sound quality at an accessible price. If your room isn’t treated, a versatile dynamic mic like the Shure SM58 or SM7B could be a better starting point to minimize room noise.
Q: Do I need an audio interface for my home studio mic?
A: If you’re using an XLR microphone, yes, an audio interface is essential. It provides phantom power (for condensers), converts the analog signal to digital, and often includes quality preamps. USB mics, however, plug directly into your computer without an interface.
Q: Can I get professional-sounding vocals with a budget home studio mic?
A: Absolutely! While high-end mics offer subtle improvements, excellent recordings are more about proper mic technique, a good recording environment (even a treated closet!), and careful mixing. A solid budget home studio mic combined with these factors can yield impressive results.
Q: What’s the main difference between condenser and dynamic mics for home recording?
A: Condenser mics are more sensitive and capture greater detail, making them ideal for vocals and acoustic instruments in treated environments. Dynamic mics are more robust, handle loud sounds well, and are less sensitive to room acoustics, making them good for loud vocals, instruments, and untreated rooms.
Q: How important is acoustic treatment for a home studio?
A: Acoustic treatment is extremely important. Even the best microphone will pick up unwanted echoes and background noise in an untreated room. Simple solutions like heavy blankets or DIY panels can make a significant difference in the quality of your home studio mic recordings.
Unleash Your Inner Sound Engineer
Choosing the right home studio mic is an exciting journey, and it’s a crucial step toward achieving your recording goals. By understanding the different types of microphones, evaluating your specific needs and recording environment, and applying fundamental recording techniques, you’ll be well on your way to capturing professional-quality audio from the comfort of your own space. Don’t be afraid to experiment, listen critically, and enjoy the process of bringing your creative vision to life. Your unique sound is waiting to be heard, and with the right home studio mic, you’re ready to share it with the world!
Frequently Asked Questions
What is the best home studio microphone for beginners?
For beginners, a large-diaphragm condenser like the Audio-Technica AT2020 is often recommended due to its versatility and detailed sound quality at an accessible price. If your room isn't acoustically treated, a versatile dynamic mic such as the Shure SM58 or SM7B could be a better starting point to minimize unwanted room noise.
Is an audio interface necessary for a home studio microphone setup?
Yes, an audio interface is essential if you are using an XLR microphone. It provides +48V phantom power for condenser mics, converts the analog signal to digital, and often includes quality preamps for clearer sound. USB microphones, however, plug directly into your computer without needing an interface.
Can professional-quality vocals be achieved with a budget home studio microphone?
Absolutely, professional-sounding vocals can be achieved with a budget home studio mic. Excellent recordings depend more on proper mic technique, a good recording environment (even a treated closet), and careful mixing rather than just the microphone's price. A solid budget microphone combined with these factors can yield impressive results.
What are the key differences between condenser and dynamic microphones for home recording?
Condenser microphones are more sensitive and capture greater detail, making them ideal for vocals and acoustic instruments in treated environments. Dynamic microphones are more robust, handle loud sounds well, and are less sensitive to room acoustics, making them suitable for loud vocals, instruments, and untreated rooms.
How important is acoustic treatment for improving home studio recordings?
Acoustic treatment is extremely important for home studio recordings. Even the best microphone will pick up unwanted echoes and background noise in an untreated room. Simple solutions like heavy blankets, thick curtains, or DIY acoustic panels can make a significant difference in the quality of your home studio mic recordings.
Choosing Your Perfect Home Studio Mic
Selecting the right home studio microphone involves evaluating your recording needs, understanding your space, and considering connectivity and polar patterns.
Identify what you will be recording most often, such as vocals, acoustic instruments, electric guitars, or podcasts. Different sound sources benefit from specific microphone types; for example, large-diaphragm condensers are great for vocals, while dynamic mics suit loud amps.
Consider whether your recording space is acoustically treated or untreated. In an untreated room, a more directional dynamic microphone can help minimize unwanted room reflections and background noise, whereas sensitive condenser mics shine in treated spaces.
Decide between XLR and USB microphones. XLR mics are professional standard, requiring an audio interface for phantom power and analog-to-digital conversion, offering flexibility. USB mics provide plug-and-play simplicity directly to your computer, ideal for beginners or basic setups.
Learn about polar patterns like cardioid, omnidirectional, and bidirectional. Cardioid is common for isolating a single source, picking up sound primarily from the front and rejecting sounds from the sides and rear.
Allocate a reasonable budget for your microphone, as it's a foundational piece of your setup. Focus on getting the highest quality microphone you can afford, remembering that good technique and acoustic awareness often outweigh the cost of the mic itself.
Get our weekly buyer guide
Practical specs, not advice. Unsubscribe anytime.
The breakdown of mic types was super helpful. I was torn between a condenser and a dynamic mic for my untreated room. Ended up going with a dynamic mic, and it’s been great for cutting down on background noise. It’s not as ‘detailed’ as some of the high-end condensers, but for my budget and space, it’s a solid choice for recording my band’s demos.
I’ve been using a cheap USB mic for ages and finally decided to upgrade after reading about condenser microphones. The difference in capturing my vocals and acoustic guitar is night and day. It really picks up all the nuances I was missing before. Definitely worth investing in a good condenser if you’re serious about home recording.
I appreciated the mention of phantom power for condenser mics. I almost bought one without realizing I’d need an interface that supplied it. Once I got that sorted, my new condenser mic has been incredible for recording my podcast. The clarity and detail it captures are exactly what I needed to sound professional.
I picked up a dynamic microphone for my home studio, mostly for recording drums and some louder guitar amps. It’s definitely robust and handles the volume well, but I’m finding it a bit less sensitive than I’d hoped for some of my quieter vocal takes. It’s good for what it is, but I might need to look into a separate mic for vocals down the line.