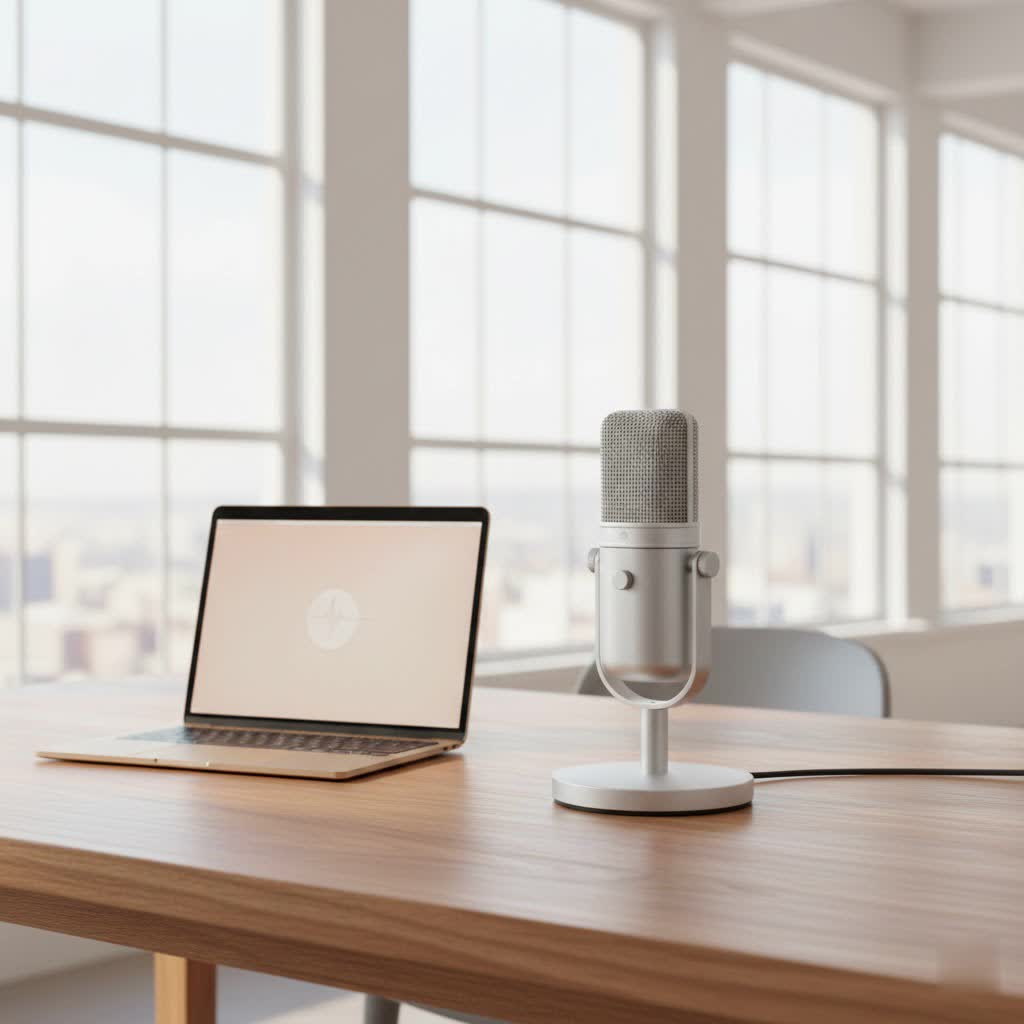
Stepping into the world of professional audio recording can feel like navigating a complex maze, especially when it comes to choosing the Best Studio Mic. As an audio engineer with over a decade in the music and broadcast industries, and a dedicated content creator for Tmava, I’ve seen countless artists and producers grapple with this exact challenge. The right microphone isn’t just a piece of equipment; it’s the gateway to capturing the essence of your sound, translating your performance into pristine audio. A great mic can make all the difference, transforming a good take into an unforgettable one, while the wrong choice can leave you frustrated, chasing an elusive perfect sound through endless post-production. But don’t worry, finding your ideal studio companion doesn’t have to be a mystery. This comprehensive guide will demystify the process, helping you understand the different types, proper techniques, and essential care, ensuring you confidently select and utilize the best studio mic for your unique creative journey.
Popular Types of Studio Microphones: Decoding Your Options
When you’re looking for the best studio mic, understanding the fundamental differences between microphone types is crucial. Each design offers unique characteristics, making them suitable for specific recording applications.
Dynamic Microphones: The Workhorses
Dynamic microphones are the rugged, reliable workhorses of the audio world. They operate using electromagnetic induction, where a diaphragm attached to a voice coil moves within a magnetic field, converting sound waves into an electrical signal.
- Pros: Exceptionally durable, capable of handling very high sound pressure levels (SPLs) without distortion, and generally more affordable. Their lower sensitivity makes them excellent at rejecting unwanted background noise, making them ideal for untreated rooms or live environments.
- Cons: Tend to have a more limited frequency response and capture less fine detail compared to condensers.
- Ideal Uses: Perfect for loud sound sources like drums, electric guitar amps, and aggressive vocals. They are also a go-to for broadcasting, podcasting in less-than-ideal acoustic spaces, and live performances.
- Examples: The Shure SM57 is legendary for instruments, and the Shure SM58 is a staple for vocals. The Electro-Voice RE20 is another classic, often favored for broadcast and deep vocals.
|
Our Picks for the Best Studio Mic in 2026
As an Amazon Associate I earn from qualifying purchases.
|
||
| Num | Product | Action |
|---|---|---|
| 1 | Upgraded Studio Recording Microphone with Isolation Shield & Pop Filter - Music Condenser Mic for Podcasting, Singing, Home Studio - Sound for PC, Laptop, Smartphone |

|
| 2 | Studio Recording Microphone Isolation Shield with Pop Filter and Metal Tripod Stand, Studio Mic to PC Laptop Smartphone, Music Microphone for Recording Singing Podcasting |
|
| 3 | Condenser Microphone,PC Computer Podcast USB Condenser Microphone Cardioid Metal Mic Kit for Recording, Podcasting, Home Studio, YouTube, Black, BM-800 |
|
| 4 | Shure SM4 Studio Recording Microphone Kit, XLR Home Studio Condenser Mic with Mix-Ready Audio - All-Metal Construction, Includes Detachable Magnetic Pop Filter & Shock Mount (SM4-K-KIT) |
|
| 5 | RØDE NT1 Signature Series Large-Diaphragm Condenser Microphone with Shock Mount, Pop Filter and XLR Cable for Music Production, Vocal Recording, Streaming and Podcasting (Black) |
|
| 6 | RØDE NT1 5th Generation Large-diaphragm Studio Condenser Microphone with XLR and USB Outputs, Shock Mount and Pop Filter for Music Production, Vocal Recording and Podcasting (Black) |
|
| 7 | Audio-Technica AT2020 Cardioid Condenser Studio XLR Microphone, Ideal for Project/Home Studio Applications, Black |
|
| 8 | USB Microphone, MAONO 192KHZ/24Bit Plug & Play PC Computer Podcast Condenser Cardioid Metal Mic Kit with Professional Sound Chipset for Recording, Gaming, Singing, YouTube (AU-A04) |
|
| 9 | AKG Pro Audio P120 - Affordable 2/3-Inch Diaphragm Condenser Microphone for Clear Vocals & Instruments. Studio Recording or Live. XLR Connector. Black |
|
| 10 | Shure SM7B Vocal Dynamic Microphone – XLR Studio Mic for Podcasting, Recording, Broadcasting, Streaming & Gaming – Smooth, Warm Sound, Rugged Build, Detachable Windscreen, Wide Frequency Range, Black |
|
Condenser Microphones: Capturing Every Nuance
Condenser microphones are renowned for their sensitivity and ability to capture intricate detail. They work by using a thin, conductive diaphragm placed close to a metal backplate, forming a capacitor. Sound waves cause the diaphragm to vibrate, changing the capacitance and producing an electrical signal that requires external power (phantom power, typically +48V).
- Pros: Offer a wide, extended frequency response, high sensitivity, and exceptional clarity, capturing the subtlest nuances of a performance.
- Cons: Generally more fragile than dynamics, require phantom power, and due to their sensitivity, they tend to pick up more room ambiance and background noise, making acoustically treated spaces crucial for optimal results.
- Ideal Uses: The preferred choice for studio vocals, acoustic guitars, piano, orchestral instruments, and anything requiring a pristine, detailed sound.
Condensers come in two main flavors:
- Large-Diaphragm Condensers (LDCs): These are studio staples, known for their warm, rich sound and often featuring multiple polar patterns (cardioid, omnidirectional, figure-8) for versatile applications. They excel at capturing vocals, string instruments, and brass.
- Examples: Neumann U87 (a benchmark), Neumann TLM 102, AKG C414 XLII. For those starting out, the Audio-Technica AT2020 is a fantastic budget-friendly option that punches above its weight.
- Small-Diaphragm Condensers (SDCs): Valued for their accuracy, transient response, and consistent pickup patterns. They are often used in pairs for stereo recording of instruments like acoustic guitar, piano, or as drum overheads.
- Example: Rode M5 matched pair.
Ribbon Microphones: Vintage Warmth and Smoothness
Ribbon microphones utilize a thin, corrugated metal ribbon suspended in a magnetic field. When sound waves move the ribbon, it generates an electrical current.
- Pros: Known for their natural, warm, and smooth sound, particularly in the high frequencies, which can sound less harsh than some condensers. They often have a figure-8 polar pattern, making them great for capturing room sound or two sources simultaneously.
- Cons: Traditionally very fragile (though modern designs are more robust), generally have lower output, and some passive ribbon mics can be damaged by phantom power, so caution is advised.
- Ideal Uses: Excellent for vocals, brass instruments, guitar amps (for a smoother tone), and anything where a natural, slightly vintage character is desired.
USB vs. XLR Microphones: Connectivity Matters
Beyond the transducer type, how your microphone connects to your computer or audio interface is a key consideration.
- USB Microphones: These offer plug-and-play convenience, connecting directly to your computer via a USB cable.
- Pros: Easy setup, often budget-friendly, ideal for beginners, podcasters, streamers, and simple home recording setups.
- Cons: Typically offer less flexibility and lower sound quality compared to XLR microphones, with fewer options for external processing.
- XLR Microphones: These use standard XLR cables and require an audio interface (which converts the analog signal to digital) or a mixer with phantom power (for condensers).
- Pros: Deliver professional-grade sound quality, offer more control over signal chain, and are standard in any serious studio setup.
- Cons: Require additional equipment (audio interface, cables), which adds to the cost and complexity.
“The choice between USB and XLR often comes down to your priorities,” explains our resident expert, Sarah Chen, Lead Audio Engineer at Tmava. “For quick, convenient recording and streaming, USB is fine, but for any serious music production, XLR is the undisputed champion due to its superior audio fidelity and versatility.”
Professional Recording Techniques: Getting the Most From Your Mic
Even the best studio mic can sound mediocre if not used with proper technique. The way you position your microphone and manage your recording environment profoundly impacts the final sound.
Mastering Microphone Placement: Where to Put Your Mic
Microphone placement is both an art and a science, demanding experimentation and a keen ear.
- Distance and Position: A general rule of thumb is to start with your microphone about 6-12 inches (15-30 cm) from the sound source. Closer placement tends to yield a more direct, intimate sound with less room ambiance and a more pronounced proximity effect (boost in bass frequencies). Moving the mic further back will capture more of the room’s sound, adding a sense of space. Always listen through good studio monitors or headphones while adjusting to hear the impact in real-time.
- Vocal Placement: For vocals, pointing the mic between the singer’s nose and mouth usually captures the full frequency range. Placing it slightly off-axis (pointing a little above or below the mouth) can help minimize harsh plosives (“p” and “b” sounds) and sibilance (sharp “s” sounds).
- Instrument Placement:
- Acoustic Guitar: Try placing a condenser mic near the 12th fret for a balanced sound, or experiment with different distances to capture more body or strumming detail.
- Guitar Amplifiers: A dynamic mic like a Shure SM57 placed a few inches from the speaker cone, either centered or slightly off-center, is a classic approach. Experiment with distance and angle for different tonal qualities.
- Drums: Close miking (e.g., SM57 on snare, kick drum mic on kick) captures direct impact, while overhead condensers (like a pair of small-diaphragm condensers) capture the overall kit and cymbals.
Taming Unwanted Sounds: Pop Filters, Shock Mounts & Room Acoustics
Unwanted noise can quickly derail a great recording.
- Pop Filters: Essential for vocal recording, a pop filter (a mesh screen placed between the singer and the mic) effectively diffuses harsh plosives, preventing them from “popping” the microphone diaphragm.
- Shock Mounts: These suspend the microphone in an elastic cradle, isolating it from vibrations transmitted through the microphone stand, such as foot tapping or bumps.
- Room Acoustics: The sound of your recording space is just as important as your microphone. Untreated rooms can cause flutter echoes, excessive reverb, or standing waves. Acoustic treatment (bass traps, diffusers, absorption panels) can significantly improve your recordings. If a treated room isn’t an option, close-miking techniques with directional microphones can help minimize unwanted room sound.
Understanding Gain Staging: The First Step in Signal Flow
Proper gain staging is critical. This involves setting the input level (gain) on your audio interface or mixer so that the signal is strong enough to be clear but not so strong that it “clips” or distorts. Aim for healthy levels that peak around -6dB to -10dB during the loudest parts of your performance, leaving headroom for unexpected peaks.
Stereo Miking Techniques: Adding Depth and Space
For instruments or ensembles, stereo miking can create a sense of width and realism. Some common techniques include:
- X-Y (Coincident Pair): Two directional microphones (usually condensers) angled at 90-130 degrees, with their capsules as close as possible. This minimizes phase issues and creates a strong stereo image.
- ORTF: Developed by French radio, this uses two cardioid mics spaced 17 cm apart, angled at 110 degrees, mimicking human hearing for a natural stereo spread.
- Spaced Pair: Two microphones placed several feet apart, capturing a wider, more expansive stereo image, though it can introduce phase issues when collapsed to mono.
- Mid/Side (M/S): This technique uses a cardioid mic (Mid) pointed at the source and a figure-8 mic (Side) oriented 90 degrees to the source. It allows for flexible stereo width adjustments during mixing and excellent mono compatibility.
Audio Processing with Studio Microphones: Refining Your Sound
Once you’ve captured your audio with the best studio mic and solid techniques, audio processing helps to polish and enhance your sound.
Basic Signal Processing: EQ and Compression
- Equalization (EQ): Used to adjust the tonal balance of a sound. You might cut harsh high frequencies, boost a vocal’s presence, or tame boomy low-ends.
- Compression: Reduces the dynamic range of a signal, making the loud parts quieter and the quiet parts louder. This helps vocals sit better in a mix and makes instruments sound more consistent.
Noise Reduction and Effects
While good recording technique is the first line of defense against noise, sometimes additional processing is needed.
- Noise Gates/Reducers: These tools can help eliminate constant background hum or hiss when no sound is present.
- Reverb and Delay: These time-based effects add spaciousness, depth, and character to recordings. Applied sparingly, they can make a track sound more professional and engaging.
Choosing the Right Best Studio Mic for Your Needs: A Tailored Approach
Selecting the best studio mic isn’t a one-size-fits-all decision. It’s about matching the microphone’s characteristics to your specific needs, budget, and creative goals.
For Vocals: Capturing the Voice’s Soul
- Detailed & Nuanced Vocals: A large-diaphragm condenser is often the preferred choice for studio vocals, capturing every breath, inflection, and detail of a singer’s voice. Models like the Neumann TLM 102 or AKG C414 are fantastic, but even the Audio-Technica AT2020 can yield excellent results.
- Aggressive or Loud Vocals: For rock, metal, or dynamic performances, a robust dynamic mic like the Shure SM7B or Electro-Voice RE20 might be preferred. Their ability to handle high SPLs and their inherent warmth can complement powerful voices.
- Consider Vocal Type: A bright condenser might enhance a darker voice, while a smoother ribbon mic could tame a naturally piercing vocalist. Experimentation is always key.
For Instruments: Amplifying Authenticity
- Loud Instruments (Drums, Guitar Amps): Dynamic microphones such as the Shure SM57 or Sennheiser MD421 are industry standards for their durability and ability to capture powerful sound without distorting.
- Acoustic Guitars, Piano, Overheads: Small-diaphragm or large-diaphragm condensers are usually best for their detailed and accurate capture of acoustic instruments. A pair of AKG C414s makes excellent drum overheads, capturing the natural liveliness of a kit.
- Brass and Strings: Ribbon microphones can impart a beautiful, smooth warmth, while condensers offer crisp detail.
For Podcasting and Streaming: Clear Communication
Clarity and noise rejection are paramount here.
- Untreated Rooms: A dynamic microphone, like the Shure SM7B or Electro-Voice RE20, is highly recommended. Their tight polar patterns and lower sensitivity minimize room reflections and background noise.
- Treated Rooms or Detailed Capture: A good quality large-diaphragm condenser can provide exceptional vocal clarity and richness, assuming your room is acoustically sound.
- Convenience: USB microphones like the Rode NT-USB+ or Blue Yeti can be great for quick, high-quality audio in home podcasting setups, though they lack the professional flexibility of XLR.
Budget Considerations: Quality at Every Price Point
You don’t need to empty your wallet to find a high-quality studio mic.
- Entry-Level (Under $200): The Audio-Technica AT2020 (condenser) and Shure SM57/SM58 (dynamic) are excellent, versatile choices that offer incredible value.
- Mid-Range ($200-$700): This range opens up to more professional options like the Rode NT1, Warm Audio WA-47jr (condensers), or the Shure SM7B (dynamic), which offer significant upgrades in sound quality and features.
- High-End ($700+): This is where you find the industry standard workhorses like the Neumann TLM 102, AKG C414, and various tube microphones (Lewitt Pure Tube), offering unparalleled performance and character.
“Don’t fall into the trap of thinking the most expensive mic is automatically the best studio mic for you,” advises Sarah Chen. “It’s about finding the right tool for the job. A budget dynamic mic in a noisy room will often sound better than a high-end condenser picking up every unwanted echo.”
Maintenance and Care for Your Best Studio Mic: Longevity and Performance
Your best studio mic is an investment, and proper care will ensure its longevity and consistent performance.
- Cleaning: Gently wipe the microphone body with a soft, dry, lint-free cloth after each use. For grilles, a soft brush can remove dust and debris. Avoid using harsh chemicals or excessive moisture.
- Storage: Always store your microphones in their original cases or padded pouches when not in use. This protects them from dust, humidity, and physical damage. Many condensers and ribbon mics are particularly sensitive to moisture.
- Handling: Always handle microphones by the body, not the cable. Avoid dropping them, especially condensers and ribbons, which are very delicate. When connecting or disconnecting XLR cables, ensure phantom power is turned off to prevent potentially damaging electrical spikes.
- Environmental Control: If possible, store microphones in a climate-controlled environment to protect them from extreme temperature changes and humidity fluctuations.
Frequently Asked Questions (FAQ)
1. What is the best studio mic for beginners?
For beginners, the Audio-Technica AT2020 (condenser) or the Shure SM58 (dynamic) are excellent starting points due to their affordability, versatility, and reliable sound quality. The AT2020 is great for home studio vocals, while the SM58 is robust for general use.
2. Do I need phantom power for my studio mic?
Yes, if you are using a condenser microphone or an active ribbon microphone, you will need a power source, typically +48V phantom power, which is usually supplied by your audio interface, mixer, or a dedicated power supply. Dynamic and passive ribbon microphones do not require phantom power.
3. Can I use a dynamic mic for vocals in a studio?
Absolutely! While condensers are often the default for studio vocals, dynamic mics like the Shure SM7B or Electro-Voice RE20 are highly regarded for vocals, especially for rock, metal, rap, or broadcast-style voices, offering warmth, clarity, and excellent off-axis rejection.
4. What’s the difference between large and small-diaphragm condensers?
Large-diaphragm condensers (LDCs) are known for their warm, rich sound and often have multiple polar patterns, making them versatile for vocals and many instruments. Small-diaphragm condensers (SDCs) are typically more accurate, have better transient response, and are favored for capturing fine details on instruments or for stereo applications.
5. How do I reduce background noise when recording?
To reduce background noise, use a directional microphone (like a cardioid dynamic mic), position it closer to the sound source, use a shock mount to minimize stand-borne vibrations, and record in an acoustically treated room. Pop filters help with plosives, and noise reduction software can be used as a last resort in post-production.
Conclusion
Choosing the best studio mic is a deeply personal and artistic decision, much like selecting the perfect brush for a painter. It’s about understanding the nuances of sound, the characteristics of your recording environment, and the unique qualities of your voice or instrument. We’ve explored the diverse world of dynamic, condenser, and ribbon microphones, delved into essential recording techniques, and touched upon crucial maintenance tips, all to empower you on your sonic journey. Remember, the “best” mic isn’t necessarily the most expensive; it’s the one that captures your vision most effectively. So, take these insights, experiment fearlessly, and most importantly, trust your ears. Dive in, explore the possibilities, and confidently capture the sounds that truly move you. We at Tmava are here to support your creative passion every step of the way, helping you unlock the full potential of your studio setup.