Hey there, fellow music makers and content creators! If you’re anything like me, your home studio is more than just a room; it’s your creative sanctuary, a place where ideas come to life. And when it comes to capturing those ideas, choosing the Best Recording Mic For Home Studio use is absolutely crucial. Forget the days when professional sound was only achievable in expensive, big-city studios. Today, with the right gear and a bit of know-how, your home setup can deliver truly astonishing results.
But with countless microphones on the market, how do you pick the one that’s perfect for your unique sound? That’s what we’re diving into today. We’ll break down the different types, share top recommendations, and give you the inside scoop on how to get that polished, studio-quality sound right from your personal space.
Understanding Microphone Types for Home Studios
Before we get to specific recommendations for the best recording mic for home studio, let’s talk a little about the science behind these sound-capturing wonders. Each microphone type has its own personality, influencing how it hears and translates your sound. Understanding these differences is key to making an informed choice.
Large-Diaphragm Condenser Microphones
|
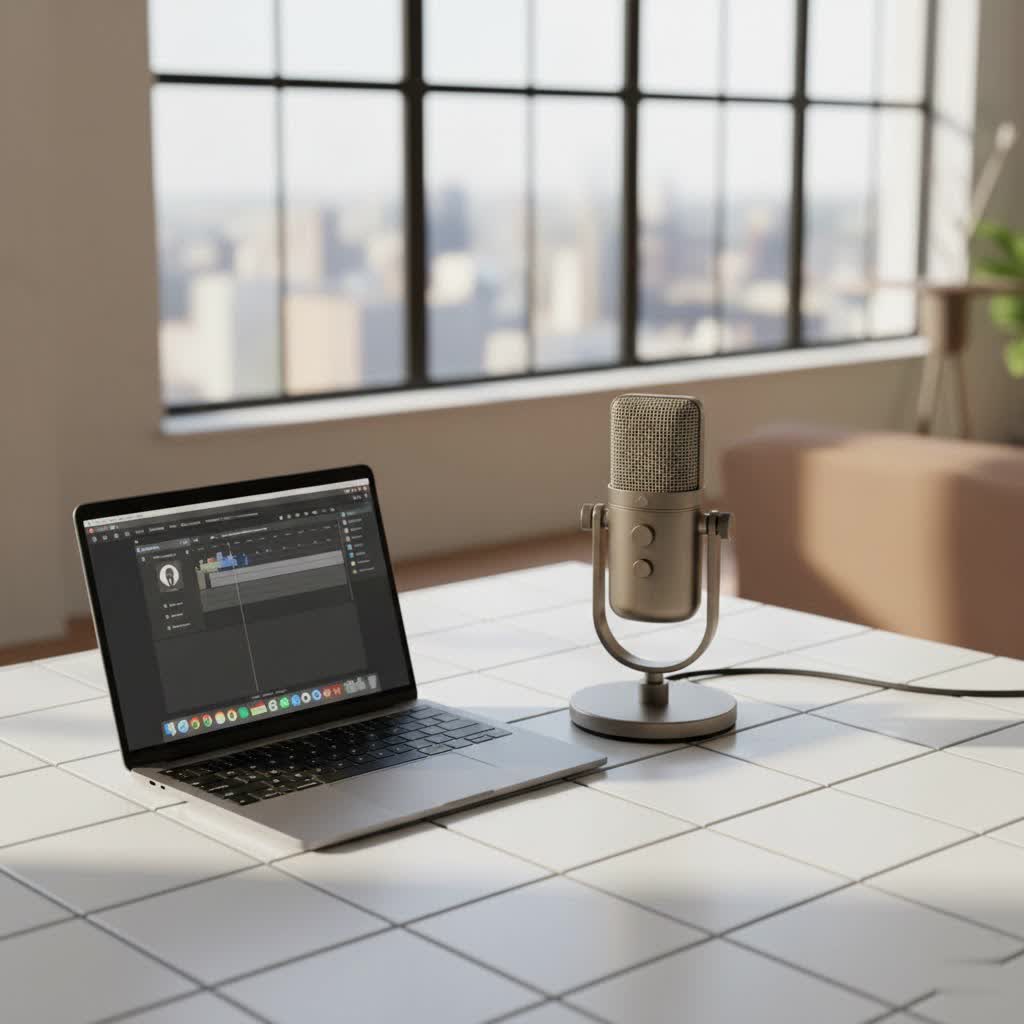
Our Picks for the Best Studio Mic in 2026
As an Amazon Associate I earn from qualifying purchases.
|
||
| Num | Product | Action |
|---|---|---|
| 1 | RØDE NT1 5th Generation Large-diaphragm Studio Condenser Microphone with XLR and USB Outputs, Shock Mount and Pop Filter for Music Production, Vocal Recording and Podcasting (Black) |

|
| 2 | AKG Pro Audio P120 - Affordable 2/3-Inch Diaphragm Condenser Microphone for Clear Vocals & Instruments. Studio Recording or Live. XLR Connector. Black |
|
| 3 | USB Microphone, MAONO 192KHZ/24Bit Plug & Play PC Computer Podcast Condenser Cardioid Metal Mic Kit with Professional Sound Chipset for Recording, Gaming, Singing, YouTube (AU-A04) |
|
| 4 | Audio-Technica AT2020 Cardioid Condenser Studio XLR Microphone, Ideal for Project/Home Studio Applications, Black |
|
| 5 | RØDE NT1 Signature Series Large-Diaphragm Condenser Microphone with Shock Mount, Pop Filter and XLR Cable for Music Production, Vocal Recording, Streaming and Podcasting (Black) |
|
| 6 | Shure SM4 Studio Recording Microphone Kit, XLR Home Studio Condenser Mic with Mix-Ready Audio - All-Metal Construction, Includes Detachable Magnetic Pop Filter & Shock Mount (SM4-K-KIT) |
|
| 7 | Upgraded Studio Recording Microphone with Isolation Shield & Pop Filter - Music Condenser Mic for Podcasting, Singing, Home Studio - Sound for PC, Laptop, Smartphone |
|
| 8 | Condenser Microphone,PC Computer Podcast USB Condenser Microphone Cardioid Metal Mic Kit for Recording, Podcasting, Home Studio, YouTube, Black, BM-800 |
|
| 9 | Studio Recording Microphone Isolation Shield with Pop Filter and Metal Tripod Stand, Studio Mic to PC Laptop Smartphone, Music Microphone for Recording Singing Podcasting |
|
| 10 | Shure SM7B Vocal Dynamic Microphone – XLR Studio Mic for Podcasting, Recording, Broadcasting, Streaming & Gaming – Smooth, Warm Sound, Rugged Build, Detachable Windscreen, Wide Frequency Range, Black |
|
These are often the darlings of home and professional studios alike, and for good reason. Large-diaphragm condensers are incredibly sensitive, picking up intricate details and a wide frequency range. They rely on capacitance, using a thin diaphragm that vibrates in response to sound waves, converting them into an electrical signal. This sensitivity makes them fantastic for capturing nuanced vocals, acoustic guitars, pianos, and even the subtle ambiance of a room. You’ll often find them praised for their ability to reproduce sound faithfully, adding a smooth, “airy” quality to recordings. Just remember, they typically require phantom power from your audio interface to operate.
Dynamic Microphones
Think “workhorse.” Dynamic microphones are robust, durable, and can handle high sound pressure levels (SPL) without breaking a sweat. Inside, a simple coil attached to a diaphragm moves within a magnetic field, generating the electrical signal. This no-nonsense design makes them less sensitive than condensers, which can be a huge advantage in untreated home studios where you want to minimize background noise and room reflections. They’re legendary for miking loud sources like guitar amps, drums, and powerful vocals. The Shure SM57 and SM58 are prime examples, practically indestructible and loved by engineers worldwide.
Small-Diaphragm Condenser Microphones
While their large-diaphragm siblings get a lot of attention, small-diaphragm condensers are transparent and accurate. They’re excellent for capturing transient details – the sharp attack of a drum cymbal or the intricate strumming of an acoustic guitar. Often sold in matched pairs, they’re ideal for stereo recording techniques, providing a natural, uncolored sound that’s perfect for instruments where precise detail is paramount.
Ribbon Microphones
These vintage beauties are making a serious comeback. Ribbon mics use a thin, metallic ribbon suspended in a magnetic field. They offer a wonderfully smooth, warm, and natural tone, often described as having a “vintage” character. While traditionally more delicate and requiring a high-gain preamp, modern active ribbon mics have overcome some of these limitations, making them more practical for today’s home studio. They excel on vocals, brass, and guitar amps, adding a rich, classic vibe.
Tube Microphones
Ah, the warmth of a tube mic! These condenser microphones incorporate a vacuum tube in their circuitry, which imparts a distinct sonic character – often a pleasing warmth and subtle compression that can make vocals and acoustic instruments sound incredibly rich and present. They tend to be higher-end and require a dedicated power supply, but the sound they deliver can be truly magical, especially if you’re chasing that classic, analog feel.
USB Microphones
For beginners or those needing a simple, plug-and-play solution, USB microphones are a fantastic starting point. They integrate an analog-to-digital converter and preamplifier, allowing them to connect directly to your computer without an audio interface. While they might not offer the same flexibility or ultimate sound quality as professional XLR mics, models like the Shure MV7 or Blue Yeti can deliver surprisingly good results for podcasts, voiceovers, and even musical demos.
Top Picks for Your Home Studio Recording Needs
Now that we’ve explored the types, let’s dive into some specific recommendations for the best recording mic for home studio applications. These are tried-and-true favorites that deliver excellent performance for their price points.
Best All-Rounder: Audio-Technica AT2020
If you’re looking for a versatile condenser microphone that won’t break the bank, the Audio-Technica AT2020 is a perennial favorite. It offers excellent value, delivering clear, detailed sound that flatters vocals, acoustic guitars, and even room ambience. Its cardioid polar pattern helps reject off-axis noise, which is great for less-than-perfect home studio environments.
Best for Vocals: Neumann TLM 102 (Mid-Range) or Shure SM7dB (Treated/Untreated Rooms)
For pristine, professional-grade vocals, the Neumann TLM 102 stands out. It’s a compact large-diaphragm condenser that offers superb clarity and warmth, making voices sound articulate and full. For those recording in untreated rooms, the Shure SM7dB is a game-changer. This active dynamic mic boasts incredible noise rejection and a rich, smooth sound, beloved by broadcasters and vocalists alike. Its integrated preamp means you don’t need a super high-gain interface.
Best for Acoustic Instruments: Lewitt Pure Tube or Rode M5 (Matched Pair)
The Lewitt Pure Tube delivers an incredible warmth and harmonic richness that beautifully captures acoustic guitars, making them sound lush and vibrant. If you need stereo capabilities, a matched pair of Rode M5 small-diaphragm condensers offers fantastic detail and imaging for acoustic pianos, guitars, or drum overheads at a surprisingly affordable price.
Best for Electric Guitars & Loud Sources: Shure SM57
A true legend! The Shure SM57 is practically indestructible and delivers that iconic, punchy sound for electric guitar cabinets and snare drums. Every pro engineer has several of these, and for good reason – it’s versatile, affordable, and handles extreme sound pressure levels with ease. It’s the kind of mic you buy once and use forever.
Best Budget Option: Audio-Technica AT2020
(Yes, it gets another mention!) For a fantastic first condenser that’s highly versatile and won’t require a second mortgage, the Audio-Technica AT2020 remains a top choice. It’s built well and offers excellent sound quality for its price, making it an ideal entry point for anyone building their home studio mic locker.
Professional Recording Techniques for Your Home Studio Mic
Having the best recording mic for home studio setups is only half the battle. How you use it makes all the difference. Even a budget mic can sound amazing with proper technique, while a high-end mic can sound terrible if mishandled.
Microphone Placement: Your Secret Weapon
Microphone placement is perhaps the most critical skill to develop. Small adjustments can drastically alter your sound.
- Proximity Effect: Many directional mics (like cardioids) exhibit a “proximity effect,” where bass frequencies are boosted as the mic gets closer to the sound source. This can add warmth to vocals but can also make instruments sound muddy if overdone. Experiment with distance!
- Off-Axis Rejection: Pay attention to where the mic is not picking up sound. For cardioid mics, this is typically directly behind the capsule. Use this to your advantage to minimize unwanted room reflections or instrument bleed.
- Sweet Spot: For vocals, try starting with the mic about 6-12 inches from the singer, slightly above or below their mouth, pointed at their nose or chin to minimize plosives. For acoustic guitar, try pointing it at the 12th fret or towards the bridge for different tonal characteristics.
Gain Staging and Levels
This is about setting the right input volume for your microphone. Too low, and your recording will be noisy; too high, and it will distort.
- Start Low: Begin with your audio interface’s gain knob turned all the way down.
- Perform: Have the artist perform at their loudest level.
- Increase Gain Gradually: Slowly turn up the gain until your input meter is consistently hitting between -18dB and -10dB (peaking around -6dB at most). This leaves you plenty of “headroom” to avoid clipping during performance peaks.
Using Pop Filters and Shock Mounts
These aren’t optional accessories; they are essential for clean recordings, especially with sensitive condenser microphones.
- Pop Filter: A mesh screen placed between the vocalist and the microphone, a pop filter reduces harsh “p” and “b” sounds (plosives) that can create an unpleasant popping noise. It also helps protect your mic from moisture.
- Shock Mount: A device that suspends the microphone using elastic bands, isolating it from vibrations and handling noise. This is vital for condenser mics, preventing rumble from footsteps, desk bumps, or stand vibrations from being picked up.
Dealing with Room Acoustics and Noise
Your room is part of your instrument! An untreated room can make even the best recording mic for home studio sound mediocre due to echoes and reflections.
- Minimize Hard Surfaces: Soft furnishings, rugs, curtains, and even bookshelves can help absorb sound and reduce harsh reflections.
- Strategic Placement: Avoid recording in the dead center of a square room. Positioning your mic and source slightly off-center can help mitigate standing waves.
- Sound Barriers: Use blankets, duvets, or even portable acoustic panels (if your budget allows) to create a drier, more controlled recording environment around your mic.
- Identify Noise Sources: Turn off fans, air conditioners, refrigerators, and silence phone notifications. Every little bit of external noise will be picked up!
Audio Processing Essentials with Your Studio Mic
Once you’ve captured a great take with your home studio mic, a little post-processing can truly make it shine. You don’t need to be a seasoned audio engineer to apply these fundamental techniques.
Basic EQ and Compression
- EQ (Equalization): This is your tone sculptor. Use EQ to cut unwanted frequencies (e.g., muddy low-mids in vocals, harsh highs in cymbals) and subtly boost pleasing ones (e.g., presence in vocals, clarity in acoustic guitars). Less is often more with EQ.
- Compression: This tool reduces the dynamic range of a sound, making the quiet parts louder and the loud parts quieter. It creates a more consistent and “glued together” sound. Apply it gently to vocals to make them sit better in the mix, or to drums for more punch.
Noise Reduction Techniques
Even with careful mic placement, some background noise can sneak in.
- Gate/Expander: A gate mutes sound below a certain threshold, effectively cutting out silence where only noise is present. An expander subtly reduces the level of quiet sounds. Use these judiciously to clean up tracks without making them sound unnatural.
- Spectral Repair Tools: Software like iZotope RX can perform miraculous noise reduction, but for home studio use, focus on preventing noise at the source first.
Reverb and Other Effects
Used subtly, effects can add depth and character.
- Reverb: Simulates an acoustic space, making your dry recording sound like it was performed in a hall, room, or plate. Use a small amount to add realism and blend elements into the mix.
- Delay: Creates echoes, which can add rhythmic interest or simply widen a sound.
- Saturation/Harmonic Excitement: These plugins add subtle distortion or harmonic content to make sounds feel richer, warmer, or brighter.
As my colleague, renowned audio engineer Dr. Elara Vance, often says, “The real magic of any recording doesn’t just lie in the microphone’s capsule, but in the synergy between the performer, the space, and the engineer’s ear. Even with the best recording mic for home studio setups, mindful technique elevates every sound.”
Choosing the Right Recording Mic: A Practical Guide
So, how do you decide which is the best recording mic for home studio for your specific journey? It’s all about aligning your needs with the microphone’s characteristics.
Consider Your Primary Recording Goals
- Vocals? If your main focus is singing or voiceovers, a large-diaphragm condenser or a high-quality dynamic mic designed for vocals (like the SM7dB) is a strong contender.
- Acoustic Instruments? Condensers (large or small diaphragm, or even a tube mic) are usually preferred for their detail and extended frequency response.
- Loud Instruments/Drums? Dynamics like the SM57 or specialized kick drum mics are your best bet.
- Podcasting/Streaming? A good dynamic mic with excellent off-axis rejection (like the Shure MV7 or SM7dB) or a quality USB mic can be ideal, especially in untreated rooms.
Budget vs. Quality
While you generally get what you pay for, there are incredible budget-friendly options that deliver professional results.
- Under $200: Look at dynamic mics (SM57, SM58), entry-level condensers (AT2020), or quality USB mics (Blue Yeti, Shure MV7).
- $200-$500: You open up to more advanced condensers (Rode NT1, AKG C214) and versatile dynamics (Electro-Voice RE20).
- $500+: This range includes professional condensers (Neumann TLM 102, AKG C414) and specialized tube/ribbon mics. Remember, investing in room treatment and an audio interface might yield more immediate improvements than just buying a super expensive mic for an untreated room.
Matching Mic to Your Voice/Instrument
Every voice and instrument is unique. A mic that sounds amazing on one singer might not suit another.
- Warmth: If your voice is naturally bright or harsh, a mic known for warmth (like a tube condenser or the SM7dB) can be a great complement.
- Clarity: If you have a deep, resonant voice that needs to cut through a mix, a condenser with a clear high-end might be perfect.
- Experimentation: The best approach is to try out different mics if possible. Visit a local music store or borrow from friends to hear how various options interact with your sound source.
What Else Do You Need?
A microphone is just one piece of the puzzle.
- Audio Interface: For XLR microphones, an audio interface is essential. It converts the analog mic signal to a digital one your computer can understand and provides phantom power for condensers.
- Cables: Good quality XLR cables are a must.
- Mic Stand: A sturdy stand is crucial to position your mic correctly and avoid unwanted vibrations.
- Headphones: Closed-back headphones are necessary for monitoring your recording without feedback.
Maintaining Your Home Studio Recording Mic
Taking good care of your best recording mic for home studio will ensure it serves you well for years to come. These delicate instruments deserve a little TLC.
Cleaning and Storage
- Pop Filter Usage: Always use a pop filter to protect the mic capsule from moisture (saliva) and dust.
- Wipe Down: After each use, gently wipe down the mic body with a clean, dry microfiber cloth. Avoid getting moisture into the grille or capsule.
- Storage: When not in use, store your microphone in its original case or a dedicated mic pouch. This protects it from dust, humidity, and accidental bumps. Never leave it on a stand exposed to the elements.
Environmental Factors
- Humidity and Temperature: Extreme fluctuations can damage mic capsules, especially in condensers and ribbons. Store your mics in a stable environment. A desiccant packet in the mic case can help in humid climates.
- Dust: Dust can accumulate on the diaphragm, affecting sound quality over time. Regular storage in a case is the best defense.
- Physical Shocks: Dropping a microphone, especially a condenser or ribbon, can cause irreparable damage. Handle with care!
Frequently Asked Questions (FAQ)
What’s the biggest mistake people make when choosing a home studio mic?
Many people prioritize brand name or price over suitability for their specific needs and recording environment. The biggest mistake is often getting a highly sensitive condenser mic for an untreated, noisy room, which will pick up every unwanted sound.
Do I really need an audio interface for my home studio recording mic?
If you’re using an XLR microphone, yes, absolutely. An audio interface converts the analog signal to digital, provides necessary phantom power for condenser mics, and often includes good preamps that boost the signal without adding noise. USB mics are the exception, as they have a built-in interface.
Can a cheap mic truly deliver professional results in a home studio?
Yes, absolutely! While high-end mics offer nuanced improvements, a well-chosen budget mic combined with excellent recording technique, proper room treatment (even DIY solutions), and good post-processing can yield professional-sounding results. Performance and acoustics often matter more than the mic’s price tag.
What’s the difference between cardioid and omnidirectional polar patterns for home recording?
A cardioid mic primarily picks up sound from the front, rejecting most sound from the sides and rear, making it ideal for isolating a single source in an untreated room. An omnidirectional mic picks up sound from all directions, offering a more natural, open sound but also capturing more room ambience and background noise.
How important is room treatment for my home studio recordings?
Room treatment is incredibly important. Even the best recording mic for home studio use will sound poor in a room with excessive echoes or standing waves. Simple solutions like blankets, duvets, and strategically placed furniture can make a significant difference, preventing harsh reflections that muddy your sound.
Conclusion
Finding the best recording mic for home studio setups is an exciting journey, and I hope this guide gives you the confidence to make the right choice. Remember, it’s not just about the mic itself, but how it integrates with your unique voice, instruments, techniques, and the space you’re working in.
By understanding microphone types, investing wisely in accessories, practicing good recording techniques, and applying thoughtful post-processing, you’ll be well on your way to capturing incredible sound in your own creative sanctuary. So go ahead, experiment, explore, and let your passion for sound shine through. Happy recording!