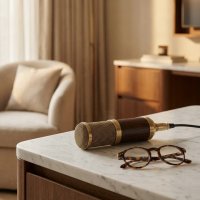
Welcome, future sound architects and recording enthusiasts! If you’re stepping into the vibrant world of home recording, chances are you’ve encountered the “Scarlett Studio Mic.” This isn’t just a microphone; it’s often the gateway to professional-sounding audio for countless musicians, podcasters, and content creators worldwide. At Tmava.com, we pride ourselves on demystifying complex audio gear, and today, we’re diving deep into what makes the Scarlett Studio mic a cornerstone for aspiring producers.

What is the Scarlett Studio Mic? Unpacking the CM25 MkIII
When we talk about the Scarlett Studio mic, we’re primarily referring to the CM25 MkIII condenser microphone (or its earlier CM25 iterations) that comes packaged within Focusrite’s popular Scarlett Studio bundles. Think of it as the vocal workhorse in a carefully curated starter kit. For best home roundups on this site.
The Heart of the Bundle: CM25 MkIII Explained
The CM25 MkIII is a condenser microphone, known for its sensitivity and ability to capture intricate details in sound. This makes it ideal for vocals, acoustic guitars, and other instruments where clarity and nuance are key. It features a cardioid polar pattern, meaning it’s most sensitive to sounds coming from directly in front of it and rejects sounds from the sides and rear. This is crucial for minimizing room noise and focusing on your sound source. It boasts a frequency response from 30 Hz to 20 kHz, ensuring a wide capture of audio frequencies.
Crucially, as a condenser microphone, the CM25 MkIII requires phantom power (typically +48V) to operate. This power is supplied directly from your audio interface, which, in the case of the Scarlett Studio bundles, is a Focusrite Scarlett Solo or 2i2. The mic’s “bright and detailed character” makes it a favorite for adding presence to vocals and instruments right out of the box.
The Scarlett Advantage: Why Beginners Love It
The Scarlett Studio mic isn’t just a standalone piece of equipment; it’s part of a well-thought-out ecosystem designed to get you recording high-quality audio quickly and efficiently. The typical Scarlett Studio bundle includes the Scarlett audio interface, the CM25 MkIII microphone, and a pair of SH-450 closed-back headphones. This comprehensive approach is a massive win for anyone just starting their recording journey.
Plug In and Play: Ease of Use
Focusrite has engineered these bundles with beginners in mind. The Scarlett interfaces, especially the 4th Generation, come with features like Auto Gain and Clip Safe, which take the guesswork out of setting your input levels. “Trust us, you’ll never want to record without it,” says the team at Focusrite about these intelligent features, designed to help you achieve perfect levels and great recordings every time. Additionally, Dynamic Gain Halos provide visual feedback, making it easy to see when your levels are just right. This means less time fiddling with knobs and more time creating.
Superior Sound, Right Away
|
Our Picks for the Best Studio Mic in 2026
As an Amazon Associate I earn from qualifying purchases.
|
||
| Num | Product | Action |
|---|---|---|
| 1 | RØDE NT1 Signature Series Large-Diaphragm Condenser Microphone with Shock Mount, Pop Filter and XLR Cable for Music Production, Vocal Recording, Streaming and Podcasting (Black) |

|
| 2 | Shure SM7B Vocal Dynamic Microphone – XLR Studio Mic for Podcasting, Recording, Broadcasting, Streaming & Gaming – Smooth, Warm Sound, Rugged Build, Detachable Windscreen, Wide Frequency Range, Black |
|
| 3 | Shure SM4 Studio Recording Microphone Kit, XLR Home Studio Condenser Mic with Mix-Ready Audio - All-Metal Construction, Includes Detachable Magnetic Pop Filter & Shock Mount (SM4-K-KIT) |
|
| 4 | Audio-Technica AT2020 Cardioid Condenser Studio XLR Microphone, Ideal for Project/Home Studio Applications, Black |
|
| 5 | USB Microphone, MAONO 192KHZ/24Bit Plug & Play PC Computer Podcast Condenser Cardioid Metal Mic Kit with Professional Sound Chipset for Recording, Gaming, Singing, YouTube (AU-A04) |
|
| 6 | Condenser Microphone,PC Computer Podcast USB Condenser Microphone Cardioid Metal Mic Kit for Recording, Podcasting, Home Studio, YouTube, Black, BM-800 |
|
| 7 | Upgraded Studio Recording Microphone with Isolation Shield & Pop Filter - Music Condenser Mic for Podcasting, Singing, Home Studio - Sound for PC, Laptop, Smartphone |
|
| 8 | AKG Pro Audio P120 - Affordable 2/3-Inch Diaphragm Condenser Microphone for Clear Vocals & Instruments. Studio Recording or Live. XLR Connector. Black |
|
| 9 | RØDE NT1 5th Generation Large-diaphragm Studio Condenser Microphone with XLR and USB Outputs, Shock Mount and Pop Filter for Music Production, Vocal Recording and Podcasting (Black) |
|
| 10 | Studio Recording Microphone Isolation Shield with Pop Filter and Metal Tripod Stand, Studio Mic to PC Laptop Smartphone, Music Microphone for Recording Singing Podcasting |
|
Many users, myself included, find the Scarlett Studio mic to be a significant leap in audio quality compared to built-in computer microphones or even smartphone recordings. While it’s not designed to compete with high-end, thousand-dollar studio microphones, its “bright and detailed character” makes it remarkably versatile for a variety of sources, particularly vocals and acoustic guitars. It captures sound with a clarity that truly elevates your projects.
Unbeatable Value
For a relatively modest investment, the Scarlett Studio bundles offer a complete recording solution. This value proposition is hard to beat, making it an accessible entry point into professional audio production. It’s an investment that truly “ups your game” if you’re upgrading from basic recording setups.
Unlocking Its Potential: Professional Recording Techniques with Your Scarlett Studio Mic
Having a great microphone like the Scarlett Studio mic is only half the battle; knowing how to use it effectively is where the magic happens. Even with its user-friendly design, a few pro techniques can make a world of difference.
Optimal Mic Placement for Stellar Sound
- Vocals: For most singers, starting with the mic about 6-12 inches (15-30 cm) away from the mouth is a good baseline. Experiment with slight adjustments. Closer will give you more bass (proximity effect), while further away will capture more of the room. Aim the mic slightly off-axis (not directly into the mouth) to reduce harsh plosives.
- Acoustic Guitar: Try placing the mic around 6-12 inches from where the neck meets the body for a balanced sound, or closer to the sound hole for more bass and body. Experiment with angles to find the sweet spot.
- Beyond the basics: “The key to great mic placement is always experimentation,” advises renowned audio engineer, Emily Carter. “Don’t be afraid to move the mic, even an inch can change the tone dramatically.”
Gain Staging: The Foundation of Clean Audio
Your Scarlett interface features intuitive Dynamic Gain Halos. These glow green when your signal is healthy, amber when it’s getting hot, and red when it’s clipping. Aim for a healthy green level – not too low (which introduces noise when boosted later) and not too high (to avoid distortion). The 4th Gen’s Auto Gain and Clip Safe features are game-changers here, helping you achieve optimal levels effortlessly.
Essential Accessories: Pop Filters & Shock Mounts
- Pop Filter: This is a must-have for vocal recordings. It sits between you and the mic, diffusing “plosive” sounds (P and B sounds) that cause an unpleasant “pop” in your recording.
- Shock Mount: A shock mount cradles your microphone, isolating it from vibrations caused by bumps to the mic stand, footsteps, or desk tremors. Many Scarlett Studio bundles come with a basic mount, but an upgrade might be beneficial for serious recording.
Taming Your Room: Basic Acoustic Considerations
Even the best mic can sound bad in a poor room. While full acoustic treatment can be expensive, you can make significant improvements:
- Record in a room with soft furnishings (couches, curtains, rugs) to absorb reflections.
- Hang blankets or moving pads behind you and the mic to reduce echoes.
- Avoid recording in small, square rooms with bare walls, which often create harsh, boxy sounds.
Monitoring with Clarity
The SH-450 closed-back headphones included in Scarlett Studio bundles are designed for monitoring your recordings without bleed into the microphone. They provide a detailed and accurate representation of your sound, which is essential for making informed recording and mixing decisions.
Polishing Your Tracks: Audio Processing with the Scarlett Studio Mic
Once you’ve captured your audio, the next step is shaping it into a professional-sounding track. The raw sound from your Scarlett Studio mic provides an excellent foundation for post-processing. Your Scarlett bundle typically includes valuable software like the Hitmaker Expansion, Pro Tools Intro, and Ableton Live Lite, giving you powerful tools to start with.
Essential Processing Techniques
- Equalization (EQ): Use EQ to refine the tonal balance.
- Taming Harshness: If your vocals sound a bit too bright or sibilant (sharp “S” sounds), gently cut frequencies around 4-8 kHz.
- Adding Clarity: A slight boost in the upper midrange (2-5 kHz) can help vocals cut through a mix.
- Removing Muddiness: Roll off some low-end (below 80-100 Hz) to clean up unwanted rumble or boominess.
- Compression: This reduces the dynamic range of your audio, making quiet parts louder and loud parts quieter, resulting in a more consistent and present sound. It helps vocals sit better in a mix.
- Noise Reduction: If you have some residual room noise, subtle noise reduction plugins can help, but use them sparingly to avoid making your audio sound unnatural. Good mic technique and room treatment are always the first line of defense.
- Reverb and Delay: These time-based effects add space, depth, and character to your sound. Use them subtly to create a sense of environment without muddying the mix.
Beyond the Bundle: When to Consider Upgrading (and Why the Scarlett is Still Great)
The Scarlett Studio mic is an exceptional entry point, but as your skills and needs evolve, you might wonder about upgrading.
Understanding Limitations
While the CM25 MkIII is versatile, it’s not a high-end, specialized studio mic. More expensive microphones offer different tonal characteristics, higher sensitivity, lower self-noise, and greater precision for specific recording tasks. For instance, a very warm ribbon mic or a highly detailed large-diaphragm condenser might offer a different flavor you seek as your sonic palette expands.
Your Upgrade Path
An upgrade typically comes when you have a very specific sound you’re chasing, or if you consistently run into the limitations of your current setup in challenging recording situations. However, remember that the “best” mic is subjective and depends heavily on the source and desired outcome.
Enduring Value
Even after upgrading, your Scarlett Studio mic remains a valuable asset. It can serve as an excellent backup mic, a dedicated mic for a specific instrument, or a second mic for creative multi-mic setups. Its reliability and familiar sound make it a go-to for many experienced engineers in a pinch.
Caring for Your Condenser: Maintenance Tips for Your Scarlett Studio Mic
Condenser microphones are delicate instruments that benefit from proper care. Following these simple steps will extend the life and performance of your Scarlett Studio mic:
- Keep it Clean and Dry: Always store your microphone in its protective pouch or case when not in use. This prevents dust and moisture from accumulating, which can degrade the capsule over time.
- Handle with Care: Condenser mics are sensitive. Avoid dropping or subjecting them to harsh impacts. Always secure them properly on a sturdy mic stand.
- Phantom Power Protocol: While the Scarlett interface handles phantom power well, it’s generally good practice to mute your inputs and lower your monitoring volume before enabling or disabling phantom power to prevent pops or surges that could damage your speakers or headphones.
Frequently Asked Questions (FAQ)
Is the Scarlett Studio mic good for singing?
Yes, the Scarlett Studio mic (CM25 MkIII) is a condenser microphone with a “bright and detailed character” that makes it particularly well-suited for capturing vocals with clarity and presence, especially for beginners and home studio use.
Does the Scarlett Studio mic need phantom power?
Absolutely. As a condenser microphone, the Scarlett Studio mic requires +48V phantom power to operate. This is typically supplied by the Scarlett audio interface included in the bundle.
What’s the best way to set up my Scarlett Studio mic?
Start by connecting it to your Scarlett interface via an XLR cable. Position the mic 6-12 inches from your sound source, use a pop filter for vocals, and set your gain levels to a healthy green using the interface’s Dynamic Gain Halos, or rely on the Auto Gain feature of 4th Gen models.
Can I record instruments with the Scarlett Studio mic?
Yes, the CM25 MkIII is versatile. Its detailed sound makes it excellent for recording acoustic guitars, and it can also be used effectively for other acoustic instruments or as a room mic.
What’s included in a Scarlett Studio bundle?
A typical Scarlett Studio bundle includes a Focusrite Scarlett audio interface (like the Solo or 2i2), the CM25 MkIII condenser microphone, a pair of SH-450 closed-back headphones, and a suite of recording software.
Is the Scarlett Studio mic a condenser or dynamic mic?
The Scarlett Studio mic (CM25 MkIII) is a condenser microphone. This means it offers higher sensitivity and a wider frequency response compared to dynamic microphones, making it excellent for capturing detailed sounds in a studio environment.
Conclusion
The Scarlett Studio mic, especially as part of Focusrite’s comprehensive bundles, stands as a beacon for anyone embarking on their audio recording adventure. It’s a testament to the fact that high-quality sound is within reach, even on a budget. By understanding its capabilities, employing smart recording techniques, and taking good care of your gear, you can unlock its full potential and produce tracks you’re truly proud of. So go ahead, plug in, experiment, and let your creativity flow. Your journey into professional-grade audio starts here, and at Tmava.com, we’re here to guide you every step of the way.
Get our weekly buyer guide
Practical specs, not advice. Unsubscribe anytime.