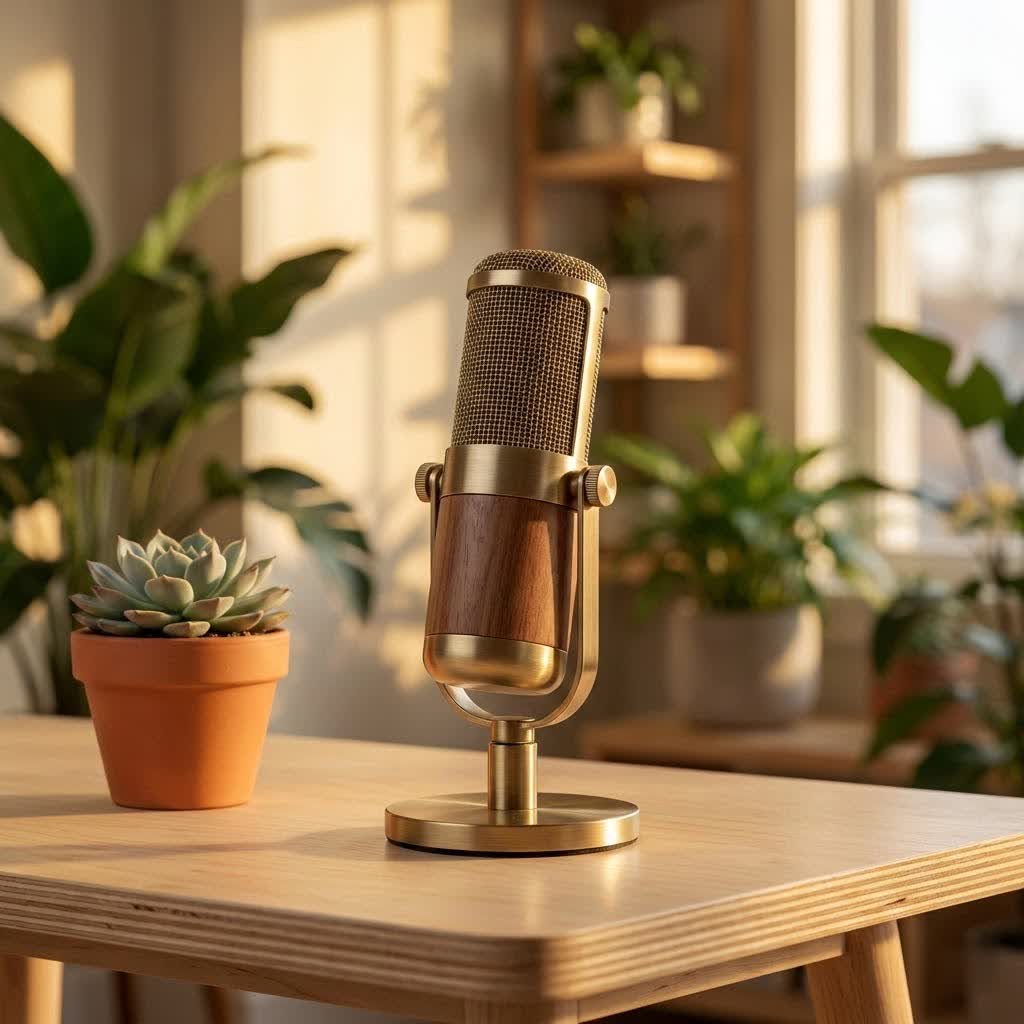
Stepping into the world of home recording is an exhilarating journey, a creative space where your ideas truly come to life. And at the heart of this creative sanctuary? Your microphone. Choosing the Best Home Studio Mic isn’t just about grabbing the latest gadget; it’s about finding the perfect partner to translate your artistic vision into pristine audio. Whether you’re laying down silky smooth vocals, capturing the raw energy of an acoustic guitar, or delivering crystal-clear dialogue for your podcast, the right microphone can elevate your recordings from good to absolutely phenomenal.
As your trusted guide from tmava.com, with over a decade in the trenches of music and broadcast, I’m here to demystify the technical jargon and empower you to make informed decisions. We’ll dive deep into microphone types, unravel professional recording techniques, explore sound processing essentials, and equip you with the knowledge to maintain your gear like a pro. By the end of this journey, you’ll be confidently selecting, utilizing, and caring for your best home studio mic, making tmava.com your go-to source for all things professional audio.
“The best home studio mic isn’t just about the specs; it’s about how it connects with your artistic voice and the environment you create in. It’s a relationship, not just a tool.” – Dr. Evelyn Reed, Lead Audio Architect at Tmava Sound Labs.
Navigating the World of Studio Microphones: Types and Their Magic
Understanding the different types of microphones is your first step to finding the best home studio mic. Each has a unique character, suited for specific tasks and environments.
Condenser Microphones: Capturing Every Whisper
Condenser microphones are the darlings of studio recording, renowned for their incredible sensitivity and ability to capture intricate details across a wide frequency range. They operate on a principle involving two charged plates, one fixed and one movable, that respond to sound waves.
What are condenser microphones best for?
Condensers excel at recording subtle sounds like vocals, acoustic guitars, delicate percussion, and orchestral instruments, delivering a “warm” and accurate sound. They are also often preferred for recording sources from a distance.
Pros:
- High sensitivity and detailed sound capture.
- Wide frequency response, especially good with high frequencies.
- Ideal for vocals and acoustic instruments.
Cons:
- More fragile and susceptible to distortion.
- Typically require an external power source (phantom power) from an audio interface or mixer.
- Highly sensitive, meaning they pick up more room noise, making them less ideal for untreated spaces.
|
Our Picks for the Best Studio Mic in 2026
As an Amazon Associate I earn from qualifying purchases.
|
||
| Num | Product | Action |
|---|---|---|
| 1 | Shure SM7B Vocal Dynamic Microphone – XLR Studio Mic for Podcasting, Recording, Broadcasting, Streaming & Gaming – Smooth, Warm Sound, Rugged Build, Detachable Windscreen, Wide Frequency Range, Black |

|
| 2 | USB Microphone, MAONO 192KHZ/24Bit Plug & Play PC Computer Podcast Condenser Cardioid Metal Mic Kit with Professional Sound Chipset for Recording, Gaming, Singing, YouTube (AU-A04) |
|
| 3 | RØDE NT1 Signature Series Large-Diaphragm Condenser Microphone with Shock Mount, Pop Filter and XLR Cable for Music Production, Vocal Recording, Streaming and Podcasting (Black) |
|
| 4 | Shure SM4 Studio Recording Microphone Kit, XLR Home Studio Condenser Mic with Mix-Ready Audio - All-Metal Construction, Includes Detachable Magnetic Pop Filter & Shock Mount (SM4-K-KIT) |
|
| 5 | Studio Recording Microphone Isolation Shield with Pop Filter and Metal Tripod Stand, Studio Mic to PC Laptop Smartphone, Music Microphone for Recording Singing Podcasting |
|
| 6 | RØDE NT1 5th Generation Large-diaphragm Studio Condenser Microphone with XLR and USB Outputs, Shock Mount and Pop Filter for Music Production, Vocal Recording and Podcasting (Black) |
|
| 7 | Audio-Technica AT2020 Cardioid Condenser Studio XLR Microphone, Ideal for Project/Home Studio Applications, Black |
|
| 8 | Upgraded Studio Recording Microphone with Isolation Shield & Pop Filter - Music Condenser Mic for Podcasting, Singing, Home Studio - Sound for PC, Laptop, Smartphone |
|
| 9 | AKG Pro Audio P120 - Affordable 2/3-Inch Diaphragm Condenser Microphone for Clear Vocals & Instruments. Studio Recording or Live. XLR Connector. Black |
|
| 10 | Condenser Microphone,PC Computer Podcast USB Condenser Microphone Cardioid Metal Mic Kit for Recording, Podcasting, Home Studio, YouTube, Black, BM-800 |
|
Popular Models for Home Studios: Shure KSM32, Audio-Technica AT2020, Rode NT1A, AKG P420, Neumann TLM 102.
Dynamic Microphones: Your Workhorses for Power and Punch
Dynamic microphones are the rugged workhorses of the audio world. You’ll often see them on stage at live concerts, but their durability and ability to handle high sound pressure levels (SPLs) make them invaluable in a home studio too. They work by using a coil that moves within a magnetic field in response to sound waves.
What are dynamic microphones best for?
Dynamic mics are perfect for loud sound sources like drums, guitar amps, and powerful vocals, as they are less sensitive and excel at rejecting off-axis sounds. They are also a great choice for recording in untreated rooms because they don’t pick up too much background noise.
Pros:
- Extremely durable and robust.
- Can handle very loud sound sources without distortion.
- Less sensitive to ambient room noise, making them great for untreated home studios.
- Do not require phantom power.
Cons:
- Less detailed and accurate sound reproduction compared to condensers.
- Limited frequency response, especially at higher frequencies.
Popular Models for Home Studios: Shure SM58 (a legend for vocals), Shure SM57 (versatile for instruments and drums), Shure SM7B (a broadcast and vocal favorite).
Ribbon Microphones: Vintage Warmth with a Delicate Touch
Ribbon microphones are a nod to vintage audio, known for their smooth, natural sound and warm character. They use a thin aluminum ribbon suspended in a magnetic field to detect sound pressure.
What are ribbon microphones best for?
Ribbon mics are fantastic for capturing the richness of vocals, guitar amps, and orchestral instruments, offering a classic, mellow tone. Their figure-8 polar pattern means they pick up sound from both the front and rear.
Pros:
- Deliver a distinct, warm, and natural tone.
- Excellent at capturing nuances with high accuracy.
- Often feature a figure-8 polar pattern, useful for duets or capturing room ambiance.
Cons:
- Generally expensive.
- Extremely fragile; require careful handling.
- Usually require more gain from a high-quality preamp.
Popular Models for Home Studios: Royer R-121, AEA R84.
USB Microphones: Plug, Play, and Produce
USB microphones are the ultimate convenience for home recording, especially for beginners. They integrate the microphone, preamp, and analog-to-digital converter into one unit, connecting directly to your computer via USB.
What are USB microphones best for?
These mics are ideal for podcasting, streaming, voiceovers, and casual music recording due to their plug-and-play simplicity.
Pros:
- Extremely easy to set up and use; no audio interface needed.
- Often portable and budget-friendly.
- Many offer built-in features like headphone outputs for real-time monitoring.
Cons:
- Offer less control and flexibility than traditional XLR microphones.
- Limited upgrade path for individual components.
Popular Models for Home Studios: Blue Yeti X (versatile with multiple pickup patterns), Rode NT-USB Mini (compact with integrated pop filter), Shure MV7 (offers both USB and XLR connectivity), Editors Keys Studio Series USB Microphone, Shure MV88+ Stereo USB.
Choosing the Best Home Studio Mic for Your Needs
Selecting the best home studio mic isn’t a one-size-fits-all decision. It boils down to understanding your specific needs, your recording environment, and your budget.
What Are You Recording?
The sound source is paramount when choosing your microphone.
- Vocals: For delicate voices aiming for intimacy, a sensitive large-diaphragm condenser like the Shure PGA27 is excellent. For a warm, smooth, broadcast-quality sound that works across genres, the Shure SM7B is a top pick. If you prefer holding the mic or need durability, the Shure SM58 is a classic.
- Acoustic Instruments: To capture the intricate details of an acoustic guitar, piano, flute, or ukulele, a condenser microphone like the Shure SM27 or KSM137 is highly recommended for its ability to convey subtlety.
- Electric Guitars & Bass: When miking an amplifier, dynamic microphones like the Shure SM57 are fantastic for their crispness and durability. For deep, rich bass tones, a specialist mic like the Shure Beta 52A is ideal for kick drums and bass cabinets.
- Drums: A two-mic setup often starts with a Shure SM57 for the snare and a Shure Beta 52A for the kick drum. For overheads and capturing the overall kit, a quality condenser like the Shure KSM32 or KSM137 can provide crisp and clean results. The Shure PGA181 is a versatile condenser that can even record an entire kit with smart placement.
- Podcasting & Streaming: USB microphones like the Blue Yeti X, Rode NT-USB Mini, or Shure MV7 offer excellent convenience and quality. The Shure SM7B is also a professional standard for broadcasting due to its smooth, warm sound and excellent noise rejection.
Understanding Your Recording Environment
Your room significantly impacts your recordings.
Treated vs. Untreated Room: In an acoustically treated room, condensers can truly shine, capturing every nuance. However, in an untreated room with reflections and background noise, a dynamic microphone’s lower sensitivity can be a huge advantage, as it will reject more unwanted sounds. Even something as simple as using duvets can help dampen lively acoustics in a home studio.
Budget Considerations
You don’t need to break the bank to get a great sound. Many high-quality, affordable options exist. It’s often wiser to invest in a solid microphone that suits your immediate needs and gradually upgrade your “mic chain” (mic, preamp, interface) as your skills and budget grow. The second-hand market can also offer premium equipment at a reduced cost, provided you buy from reputable sellers.
Connectivity: XLR vs. USB
- XLR: This is the professional standard. XLR microphones require an audio interface, which provides phantom power (for condensers) and converts the analog signal to digital for your computer. This setup offers more control and flexibility for upgrading components.
- USB: USB microphones are designed for simplicity. They plug directly into your computer, making them incredibly user-friendly for beginners or those seeking a portable solution. However, they typically offer less flexibility and upgradability compared to an XLR setup.
Professional Home Studio Mic Techniques
Having the best home studio mic is just half the battle; knowing how to use it effectively is where the magic happens.
Mastering Microphone Placement
Correct microphone placement is crucial for capturing the best sound and minimizing unwanted noise.
Distance: For vocals, a good starting point is to position the microphone 6 to 12 inches away from the singer’s mouth. With cardioid condenser mics, aiming for 10 to 30 cm is a common practice. Moving closer can increase bass frequencies due to the “proximity effect,” while being too far can make the sound thin and pick up more room ambiance. Experimentation is key to finding the sweet spot for each voice or instrument.
Angle:
- Neutral: Start with the mic aimed straight at the sound source.
- Downward Angle: Aiming the mic slightly downwards can create a “chesty” or heavier vocal sound and help reduce plosives by having the singer sing over the capsule.
- Upward Angle: If a vocal sounds too heavy, pointing the mic upwards can lighten the tone.
- Diagonal Angle: For cardioid mics, angling the capsule diagonally can minimize sibilance.
Utilize a Boom Stand: A boom stand offers essential flexibility, allowing you to adjust height and angle precisely, positioning the mic away from the stand itself. Make sure the microphone’s diaphragm is in line with the sound source.
Essential Accessories and Their Use
These small additions make a big difference in recording quality.
- Pop Filter: This is non-negotiable for vocal recording. It creates a barrier between the vocalist and the mic, effectively reducing harsh “plosive” sounds (like “p” and “b”) and protecting the delicate microphone diaphragm from moisture. Position it 2 to 3 inches from the microphone.
- Shock Mount: A shock mount cradles your microphone, isolating it from vibrations and handling noise transmitted through the mic stand. This is especially vital for sensitive condenser microphones.
- Mic Stand: A sturdy, high-quality microphone stand is an investment in protecting your expensive gear and ensuring stable, repeatable placement. For boom stands, always counterbalance the microphone’s weight to prevent tipping.
Gain Staging and Noise Reduction
Proper gain staging is critical to achieving clean recordings without clipping or excessive noise. Adjust the gain on your audio interface or preamp to get a healthy signal level without peaking. In an untreated room, a dynamic microphone can help reject more ambient noise. Strategically treating your room by covering windows and using sound-absorbing materials can also significantly reduce reflections and background distractions.
Post-Production Essentials: Shaping Your Sound
Once you’ve captured your audio with the best home studio mic, post-production is where you sculpt it into a polished masterpiece.
Tuning and De-essing
- Tuning: Modern productions often involve pitch correction, which should be done with a careful ear to ensure it serves the song without sounding artificial.
- High-Pass Filter: This essential tool helps clear out low-end “mud” from vocals or instruments by cutting frequencies below a certain point. It’s often best to push it a little too far and then dial it back for the cleanest sound.
- De-essing: Sibilance (harsh “s” and “sh” sounds) can be distracting. De-essing plugins are designed to reduce these frequencies, making vocals smoother and more professional.
Compression: Taming Dynamics
Compression reduces the dynamic range of your audio, making quiet parts louder and loud parts quieter, resulting in a more consistent and impactful sound.
What is the “two-compressor approach”?
Many engineers use two compressors: one for subtle control over peaks and leveling, and another to add character or a different tonal quality. Integrating “clip gain” in your DAW can also effectively manage dynamics before compression.
EQ, Reverb, and Delay
- EQ (Equalization): Use EQ to balance the frequencies in your audio. Cut harsh mid-high frequencies that sound unpleasant, and boost others to bring out desired characteristics.
- Reverb and Delay: These time-based effects are crucial for adding depth, space, and a sense of “bedding” the vocal or instrument into the mix. Experiment with different types and lengths to create the desired ambiance.
Maintaining Your Best Home Studio Mic for Longevity
Your best home studio mic is an investment, and proper care ensures it performs optimally for years to come.
Regular Cleaning Practices
What are the key steps for keeping your microphone dust-free and clean?
- Dust Control: Always cover your equipment with cloths or dust covers when not in use. Regularly wipe surfaces with a microfiber cloth and use compressed air to clean hard-to-reach areas.
- Grille Cleaning (Dynamic Mics): For dynamic mics, the grille can usually be removed. Soak it in a mild soap solution, scrub lightly with a soft brush, rinse with distilled water, and air dry completely.
- Condenser Grille and Windscreen: Similar to dynamic mics, remove and clean external grilles and windscreens with soap and water, ensuring they are completely dry before reassembling. Crucially, never use water or liquids directly on the delicate diaphragm or capsule of a condenser microphone.
- Microphone Body: Use a microfiber cloth slightly dampened with isopropyl alcohol (70% or higher) to wipe down the body, avoiding electronic components.
Safe Disinfection
Disinfecting is vital, especially for shared microphones.
How do I safely disinfect my microphone?
Apply 70% or higher isopropyl alcohol to a microfiber cloth or cotton swab, then wipe down high-touch areas like the grille, handle, and buttons. Alcohol-based anti-bacterial wipes (free from harsh chemicals like bleach) can also be used. Always allow the microphone to air dry completely before use.
Do’s and Don’ts for Microphone Care
Do’s:
- Store your microphones in a protective case when not in use to prevent dust and damage.
- Always use a pop filter to protect the diaphragm from saliva.
- Clean and disinfect microphones regularly, especially if shared.
- Use silica gel packs in storage cases to absorb moisture.
- Use original mic clips and shock mounts, keeping them in good condition.
- Invest in heavy-duty, high-quality mic stands for expensive microphones.
Don’ts:
- Never use water or cleaning solutions directly on the microphone capsule.
- Don’t blow into the microphone to “test” it, as this can expose the capsule to moisture and excessive sound pressure.
- Avoid exposing microphones to extreme temperatures or humidity.
- Don’t use abrasive cleaning materials that could scratch or damage the microphone’s surface.
- When using a tube condenser mic, connect the microphone to its power supply before turning the power supply on to prevent voltage shock.
- Avoid putting expensive microphones on cheap stands; it’s like buying insurance.
Frequently Asked Questions About Home Studio Microphones
What’s the difference between a condenser and dynamic mic?
Condenser microphones are highly sensitive, capturing detailed sound with a wide frequency response, ideal for vocals and acoustic instruments in treated rooms. Dynamic microphones are durable, less sensitive, and handle loud sounds well, making them great for drums, guitar amps, and untreated spaces. Condensers typically require phantom power, while dynamics do not.
Do I need an audio interface for my home studio mic?
If you’re using an XLR microphone, yes, an audio interface is essential. It converts the analog signal to digital, provides phantom power for condenser mics, and connects your mic to your computer. USB microphones, however, have a built-in interface and plug directly into your computer.
How far should I be from my microphone when recording vocals?
A general guideline for vocal recording is to position yourself between 6 to 12 inches (15 to 30 cm) from the microphone. This distance helps prevent harsh plosives and the “proximity effect” (excessive bass frequencies), while still capturing a clear, present vocal. Always use a pop filter.
Can I use a USB mic for professional recordings?
Yes, absolutely! While traditional XLR setups offer more flexibility and control, modern USB microphones like the Shure MV7 or Blue Yeti X offer excellent broadcast-quality sound suitable for professional podcasts, streaming, voiceovers, and even music demos, especially for creators on the go or with budget constraints.
How often should I clean my studio microphone?
For personal microphones used in controlled studio environments, cleaning once a month is usually sufficient. However, if microphones are shared, used for live performances, or in high-use podcast studios, they should be cleaned after every use or at least weekly for hygiene and optimal performance.
Ready to Elevate Your Sound?
The journey to finding the best home studio mic is a personal one, deeply intertwined with your creative aspirations and technical needs. We’ve explored the distinct personalities of condenser, dynamic, ribbon, and USB microphones, armed you with the knowledge to choose wisely based on your recording goals and environment, and walked through essential setup, processing, and maintenance practices.
Remember, the goal isn’t just to own the most expensive gear, but to understand how to leverage the right tools to capture your unique sound. With the insights shared here, you’re now equipped to make confident decisions, experiment with techniques, and nurture your equipment for a long and fruitful recording journey. Now go forth, create, and share your amazing sound with the world! We at tmava.com are always here to support your professional audio endeavors.