Stepping into the world of music production with FL Studio is an exciting journey, and at the heart of capturing your creative vision lies one crucial piece of gear: the microphone. Choosing the Best Mic For Fl Studio isn’t just about picking any microphone; it’s about selecting a tool that seamlessly integrates with your digital audio workstation, elevates your sound quality, and helps you achieve that professional polish you’re striving for. Whether you’re laying down crisp vocals, recording intricate instrumentals, or crafting unique sound designs, the right microphone can make all the difference, transforming your ideas into vibrant, high-fidelity audio. Let’s dive deep into the essential knowledge you need to make an informed decision and optimize your recording setup.
Understanding Microphone Types for FL Studio
Before you can pick the best mic for FL Studio, it’s vital to understand the fundamental types available and how each one interacts with your recording environment and desired sound.
Condenser Microphones: The Studio Workhorses
|
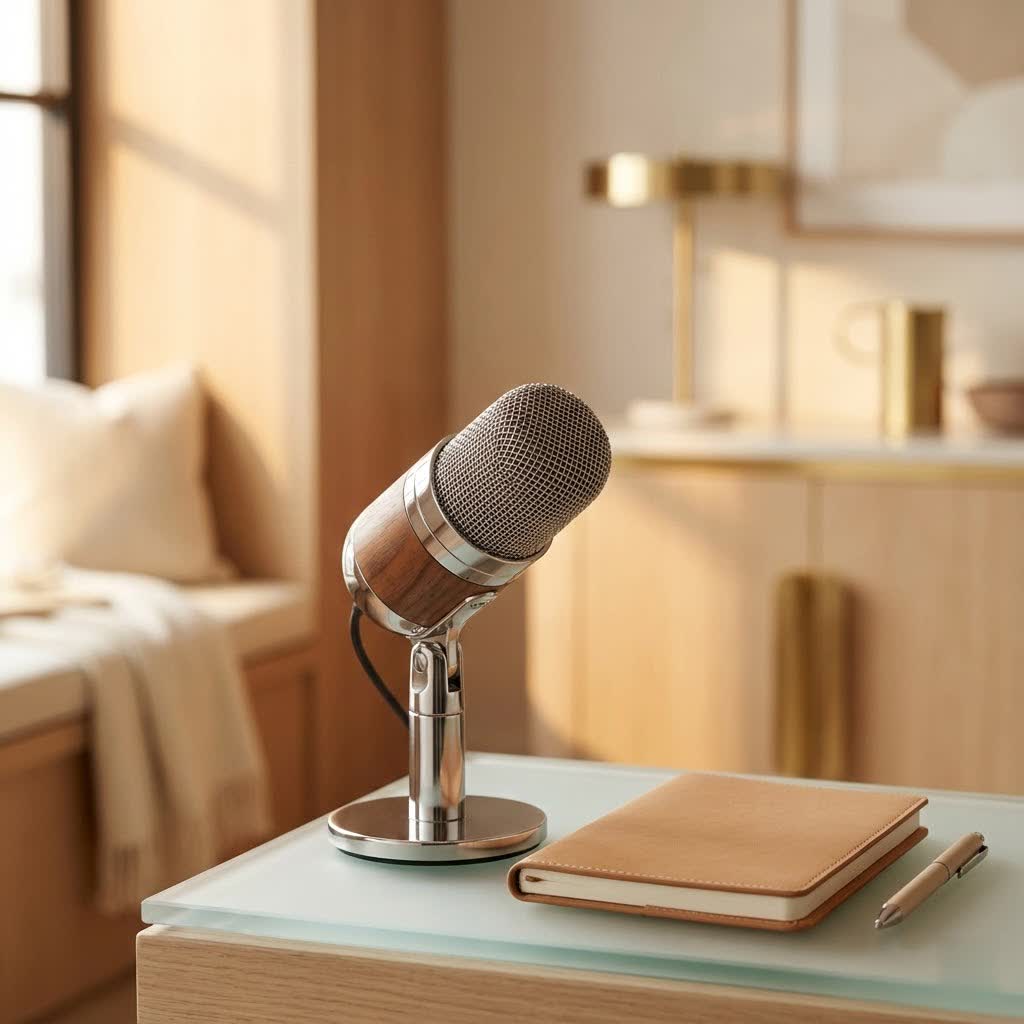
Our Picks for the Best Studio Mic in 2026
As an Amazon Associate I earn from qualifying purchases.
|
||
| Num | Product | Action |
|---|---|---|
| 1 | RØDE NT1 Signature Series Large-Diaphragm Condenser Microphone with Shock Mount, Pop Filter and XLR Cable for Music Production, Vocal Recording, Streaming and Podcasting (Black) |

|
| 2 | Shure SM4 Studio Recording Microphone Kit, XLR Home Studio Condenser Mic with Mix-Ready Audio - All-Metal Construction, Includes Detachable Magnetic Pop Filter & Shock Mount (SM4-K-KIT) |
|
| 3 | Studio Recording Microphone Isolation Shield with Pop Filter and Metal Tripod Stand, Studio Mic to PC Laptop Smartphone, Music Microphone for Recording Singing Podcasting |
|
| 4 | Upgraded Studio Recording Microphone with Isolation Shield & Pop Filter - Music Condenser Mic for Podcasting, Singing, Home Studio - Sound for PC, Laptop, Smartphone |
|
| 5 | Audio-Technica AT2020 Cardioid Condenser Studio XLR Microphone, Ideal for Project/Home Studio Applications, Black |
|
| 6 | RØDE NT1 5th Generation Large-diaphragm Studio Condenser Microphone with XLR and USB Outputs, Shock Mount and Pop Filter for Music Production, Vocal Recording and Podcasting (Black) |
|
| 7 | Shure SM7B Vocal Dynamic Microphone – XLR Studio Mic for Podcasting, Recording, Broadcasting, Streaming & Gaming – Smooth, Warm Sound, Rugged Build, Detachable Windscreen, Wide Frequency Range, Black |
|
| 8 | Condenser Microphone,PC Computer Podcast USB Condenser Microphone Cardioid Metal Mic Kit for Recording, Podcasting, Home Studio, YouTube, Black, BM-800 |
|
| 9 | USB Microphone, MAONO 192KHZ/24Bit Plug & Play PC Computer Podcast Condenser Cardioid Metal Mic Kit with Professional Sound Chipset for Recording, Gaming, Singing, YouTube (AU-A04) |
|
| 10 | AKG Pro Audio P120 - Affordable 2/3-Inch Diaphragm Condenser Microphone for Clear Vocals & Instruments. Studio Recording or Live. XLR Connector. Black |
|
When you envision a “studio microphone,” chances are you’re picturing a condenser mic. These microphones are renowned for their sensitivity, wide frequency response, and ability to capture intricate details and nuances, making them the go-to choice for professional vocal recordings and acoustic instruments.
Condensers operate by using a lightweight diaphragm that vibrates with sound waves, changing the capacitance between it and a fixed backplate. This intricate mechanism allows them to pick up a broad range of frequencies with exceptional clarity. However, this sensitivity also means they require “phantom power” (+48V) to operate, typically supplied by an audio interface. Popular condenser microphones frequently recommended for FL Studio users include the Rode NT1, Audio-Technica AT2020 (or its more advanced sibling, the AT4040), the Lewitt LCT 440 Pure, and Warm Audio WA-47jr. They excel in treated studio environments where capturing every subtle detail is paramount.
Dynamic Microphones: Robust and Versatile
Dynamic microphones are the workhorses of both live sound and many studio applications, known for their durability and ability to handle high sound pressure levels (SPLs) without distortion. Unlike condensers, they don’t require phantom power. They operate on the principle of electromagnetic induction: sound waves cause a diaphragm to vibrate a coil of wire within a magnetic field, generating an electrical signal.
While dynamic mics might not capture the same level of delicate detail as condensers, they offer a warm, punchy sound that can be excellent for powerful vocals, guitar amps, drums, and other loud instruments. Their robust build makes them less sensitive to room acoustics and more forgiving in untreated spaces. The Shure SM57 and SM58 are legendary dynamic microphones, often cited as industry standards that you’ll find in almost any studio or live venue. For those looking for a premium dynamic vocal mic, the Shure SM7B is another highly-regarded option, though it typically requires a powerful preamp or a Cloudlifter to get adequate gain.
USB Microphones: Convenience with Caveats
For beginners or those needing a simple, plug-and-play solution, USB microphones offer unparalleled convenience. They connect directly to your computer via a USB cable, bypassing the need for an audio interface. Models like the Blue Yeti or Blue Snowball are popular for podcasting, streaming, and recording quick demos or samples in FL Studio.
However, for serious music production, USB microphones come with some significant caveats. The most common issue is latency – a delay between when you speak or play into the mic and when you hear it back. This can be incredibly distracting for vocalists trying to stay in time. While some USB mics offer a direct monitoring headphone jack to mitigate this, their internal converters and preamps often can’t match the quality of a dedicated audio interface and XLR microphone setup. They also limit your upgrade path and flexibility in routing and processing audio. If you’re serious about your sound, a traditional XLR microphone paired with an audio interface is almost always the superior choice for the best mic for FL Studio setup.
Essential Gear Beyond the Mic for FL Studio Production
While the microphone is crucial, it’s just one piece of the puzzle. To truly unlock its potential within FL Studio, you’ll need a few other essential components.
The Indispensable Audio Interface
If you opt for an XLR microphone (which we highly recommend for quality FL Studio recording), an audio interface is non-negotiable. This device acts as the bridge between your analog microphone and your digital computer, converting analog audio signals into digital data that FL Studio can understand. But it does so much more than just conversion.
A good audio interface provides clean preamps to boost your microphone’s signal to a usable level without introducing unwanted noise. It supplies the necessary phantom power for condenser microphones. Crucially, it offers low-latency monitoring, allowing you to hear yourself and your track in real-time without distracting delays, which is vital for performance. Interfaces also typically provide dedicated headphone outputs and balanced outputs for connecting studio monitors.
When choosing an interface for FL Studio, look for one with quality preamps, sufficient input/output (I/O) for your needs (e.g., two inputs for a stereo setup or future expansion), and stable drivers (ASIO for Windows, Core Audio for macOS). Renowned brands like Focusrite (the Scarlett series is a popular choice for beginners and pros alike), Native Instruments (Komplete Audio series), Behringer (UMC series), and PreSonus offer excellent options at various price points.
Must-Have Accessories
Beyond your microphone and audio interface, a few key accessories will significantly improve your recording quality and workflow in FL Studio:
- Pop Filter: This simple, inexpensive screen placed between you and your microphone is an absolute game-changer. It diffuses sudden bursts of air from “plosive” consonants (like “P” and “B”), preventing harsh popping sounds and protecting your microphone capsule from moisture. Don’t skip this!
- XLR Cables: High-quality, balanced XLR cables are essential for connecting your microphone to your audio interface. Invest in good cables to ensure a clean, interference-free signal.
- Headphones: Closed-back studio headphones are vital for monitoring your recordings. They prevent sound from bleeding from your headphones back into the microphone, which can ruin a take. Comfortable, accurate headphones like the Beyerdynamic DT 770 Pro or Sennheiser HD 280 Pro are excellent choices.
- Microphone Stand: A sturdy microphone stand is fundamental for proper mic placement and stability. Whether it’s a desk stand or a floor stand, ensure it can securely hold your microphone in the desired position.
Professional Recording Techniques in FL Studio
Having the right gear is only half the battle; knowing how to use it effectively within FL Studio is where the magic truly happens.
Setting Up Your Recording Environment
Even the best mic for FL Studio can sound subpar in a poor recording environment. A quiet, acoustically treated space is ideal. Minimize external noise sources like air conditioners, computer fans, and outside traffic. For vocals, consider using acoustic foam panels, bass traps, or even heavy blankets to dampen reflections and reduce echo. A walk-in closet with clothes can surprisingly serve as an effective makeshift vocal booth.
Connecting Your Mic to FL Studio
The process of getting your microphone signal into FL Studio is straightforward but requires attention to detail:
- Hardware Connection: Connect your XLR microphone to your audio interface using an XLR cable. Power on your audio interface. If using a condenser mic, activate phantom power (+48V) on your interface after connecting the mic. Then, connect your audio interface to your computer via USB or Thunderbolt.
- FL Studio Audio Settings: Open FL Studio, navigate to
Options > Audio Settings(or press F10). Under the “Device” dropdown, select your audio interface’s ASIO driver (Windows) or Core Audio device (macOS). This driver ensures low-latency performance. - Mixer Input Assignment: Open the FL Studio Mixer (F9). Select an empty mixer insert track. In the input section at the top right of the mixer, click the dropdown menu and choose the specific input from your audio interface that your microphone is connected to (e.g., “Input 1 mono”). You should see the level meters on that mixer track react when you speak into the microphone.
- Arm for Recording: At the bottom of the mixer track, there’s a small record arm button (usually a red dot or circle). Click this to “arm” the track, telling FL Studio to record from that input.
Mastering Mic Placement and Gain Staging
Effective mic placement and proper gain staging are crucial for capturing a clean, strong signal without distortion:
- Mic Placement: For vocals, a common starting point is 6-12 inches (15-30 cm) from the pop filter, directly in front of the mic. Experiment with distance and angle to find the “sweet spot” that complements the vocalist’s voice.
- Gain Staging: Adjust the gain knob on your audio interface (this controls the input level) while the source is performing at its loudest. Aim for the input meters in FL Studio to peak around -6dB to -10dB. This provides “headroom,” preventing clipping (digital distortion) while leaving enough signal for mixing.
Tackling Latency Head-On
Latency can be a significant hurdle for real-time monitoring. Here’s how to manage it in FL Studio:
- Buffer Size: In FL Studio’s Audio Settings, adjust the “Buffer Length” (often measured in samples). A smaller buffer reduces latency but demands more CPU power, potentially leading to clicks or dropouts. Find a balance that works for your system.
- ASIO/Core Audio: As mentioned, using your interface’s dedicated ASIO driver (Windows) or Core Audio (macOS) is critical.
- Direct Monitoring: Many audio interfaces offer a “direct monitoring” feature, allowing you to hear your input signal directly from the interface, bypassing your computer’s processing and eliminating software-induced latency. Use this whenever possible.
Processing Your Vocals and Instruments in FL Studio
Once you’ve recorded your audio, FL Studio offers a powerful suite of tools to refine and polish your sound.
Essential EQ Tips for Clarity
Equalization (EQ) is your primary tool for shaping the tonal balance of your recorded tracks.
- High and Low-End Enhancement: For many vocals, a slight boost in the high frequencies (around 8-12kHz) can add “air” and clarity, while a gentle low-end roll-off (below 80-100Hz) can remove muddiness and rumble.
- Taming Harsh Frequencies: Use a parametric EQ (like FL Studio’s Fruity Parametric EQ 2) to identify and surgically cut resonant or harsh frequencies, often found in the mid-range. Sweep a narrow band EQ boost to find offensive frequencies, then cut them.
- Contextual EQ: Remember to EQ tracks within the context of your entire mix. What sounds good in solo might not fit when all instruments are playing.
Taming Dynamics with Compression
Compression helps control the dynamic range of your audio, making quiet parts louder and loud parts quieter, resulting in a more consistent and present sound.
- Start with Moderation: Begin with a mild compression ratio (e.g., 3:1 or 4:1) for vocals.
- Threshold: Set the threshold so the compressor only engages on the louder parts of the performance, indicated by the gain reduction meter.
- Attack and Release: A faster attack (5-10ms) can catch initial transients, while a slower release (50-100ms) allows the vocal to breathe more naturally. Experiment to find the right feel.
Noise Reduction and Polishing
Even with a great mic and setup, some unwanted noise can creep in.
- Minimize Background Noise: The first line of defense is a quiet recording environment. Remove computer fans, hums, or street noise where possible.
- Software Solutions: For stubborn noise, dedicated noise reduction plugins (like those from iZotope RX or even some stock FL Studio options) can help clean up recordings. Use them sparingly to avoid making the audio sound artificial.
- Reverb and Delay: These time-based effects add depth, space, and a sense of realism. Use them subtly to enhance the track without drowning it. A good starting point is to send your vocal track to an effects send on a separate mixer track with a reverb or delay plugin, rather than applying it directly to the vocal track.
The “Record Dry” Golden Rule
While FL Studio offers fantastic real-time effects, a golden rule in professional recording is to record your audio “dry” (without effects). This means you capture the raw, unprocessed signal from your microphone. You can monitor with effects turned on for comfort, but ensure the recorded signal has no effects baked in. This provides maximum flexibility during the mixing stage, allowing you to change effects, adjust parameters, and make creative decisions without being stuck with a processed sound.
Choosing the Best Mic for Your FL Studio Workflow
Selecting the absolute best mic for FL Studio is a personal journey, but here’s how to tailor your choice:
Matching Mic to Music Genre and Vocal Style
- Pop/R&B/Hiphop Vocals: Large-diaphragm condenser mics are typically preferred for their detailed, airy sound, perfect for modern vocal production.
- Rock/Aggressive Vocals: Dynamic mics like the Shure SM7B or SM58 can provide a robust, punchy sound that cuts through a dense mix.
- Acoustic Instruments: Condenser mics (both large and small diaphragm) excel at capturing the full frequency range and intricate nuances of acoustic guitars, strings, and percussion.
- Podcasting/Voiceover: Condensers offer clear, articulate speech, but high-quality dynamic mics are also excellent, especially in untreated rooms.
Budget-Friendly Options vs. Pro-Grade Investments
You don’t need to break the bank to get started. For a budget-conscious FL Studio user, an Audio-Technica AT2020 condenser with a basic Focusrite Scarlett Solo interface is a fantastic entry point. As you grow, you might invest in higher-end condensers like the Rode NT1 or Neumann series, or specialized dynamics like the Shure SM7B, understanding that these often pair best with higher-quality preamps and converters. Think of your microphone as an investment that grows with your skill and dedication.
Maintaining Your Studio Mic for Longevity
Your microphone is a delicate instrument. Proper care and maintenance are essential to ensure its pristine performance and extended lifespan.
Daily Habits for Mic Care
After each recording session, make it a habit to gently wipe down the microphone’s exterior with a soft, dry microfiber cloth to remove fingerprints and surface dust. For the grille, a microfiber cloth lightly dampened with 70% isopropyl alcohol can sanitize and remove residue – never spray directly onto the mic. For hard-to-reach areas, use a soft-bristled brush (like a new, soft toothbrush or camera lens brush). Always ensure the microphone is unplugged and completely dry before reconnecting it.
Deep Cleaning and Storage Best Practices
Regular deep cleaning every 1-3 months (depending on usage) can prevent the buildup of corrosive elements. Disassemble any detachable parts like the grille or windscreen and clean them thoroughly. For condenser diaphragms, use compressed air to gently blow away dust.
When not in use, always store your microphone properly. Keep it in its original case or a dedicated storage bag to protect it from dust and moisture. For sensitive condenser microphones, particularly in humid environments, placing small desiccant packs in their cases can absorb excess moisture, protecting the delicate capsule. Avoid hot-plugging (connecting/disconnecting while phantom power is on) tube condenser mics, as voltage shock can cause damage.
As Johnathan “Jazzy J” Jefferson, a veteran audio engineer with Tmava, always says, “A well-maintained mic isn’t just a tool; it’s an extension of your creative voice. Treat it right, and it’ll sing for you for years.”
Frequently Asked Questions about FL Studio Microphones
Q: Can I use a USB mic for professional recordings in FL Studio?
A: While convenient for simple tasks, USB mics often introduce latency and generally don’t offer the same audio quality, flexibility, or upgrade path as an XLR mic paired with a dedicated audio interface. For professional results in FL Studio, an XLR setup is highly recommended.
Q: Do I need an audio interface if I have a USB mic?
A: No, a USB microphone connects directly to your computer. However, if you plan to use an XLR microphone, an audio interface is essential to convert the analog signal, provide phantom power (for condensers), and ensure low-latency monitoring.
Q: What’s phantom power and why do I need it?
A: Phantom power (+48V) is an electrical current supplied by an audio interface or mixer to power condenser microphones. Condenser mics require this external power to operate their internal circuitry and create a signal. Dynamic microphones typically do not need phantom power.
Q: How do I reduce background noise when recording in FL Studio?
A: Start by creating a quiet recording environment, minimizing external noise. Use acoustic treatment like foam panels or heavy blankets. Position your microphone optimally, potentially using a cardioid polar pattern to reject sound from the sides and rear. In FL Studio, you can use noise reduction plugins, but prioritize a clean recording at the source.
Q: What’s the ideal gain level for recording vocals?
A: Aim for your input meters in FL Studio to peak between -6dB and -10dB during the loudest parts of the performance. This provides sufficient signal strength while leaving enough “headroom” to prevent digital clipping or distortion.
Conclusion
Choosing the best mic for FL Studio is a foundational step in building your home studio and producing high-quality music. By understanding the different microphone types, investing in essential accompanying gear like an audio interface, and mastering effective recording and processing techniques, you’ll be well-equipped to capture your creativity with clarity and impact. Remember that your microphone is an investment in your sound, and with proper care, it will serve as a reliable partner in your musical journey for years to come. So, connect that mic, dial in those settings, and let your unique sound shine through FL Studio!