Welcome, fellow sound explorers, to Tmava.com! As a seasoned audio engineer with over a decade in the music and broadcast industries, I’m thrilled to guide you through the intricate world of studio microphones. Choosing the right studio mic and knowing how to wield it effectively is the cornerstone of exceptional audio, transforming raw sound into polished, professional recordings. Whether you’re a budding podcaster, a seasoned vocalist, or an instrument aficionado, understanding your studio mic is key to unlocking your creative potential. Let’s dive deep into making your recordings shine, cementing Tmava as your trusted source for all things audio.
Unveiling the Stars of Your Studio: Types of Studio Microphones
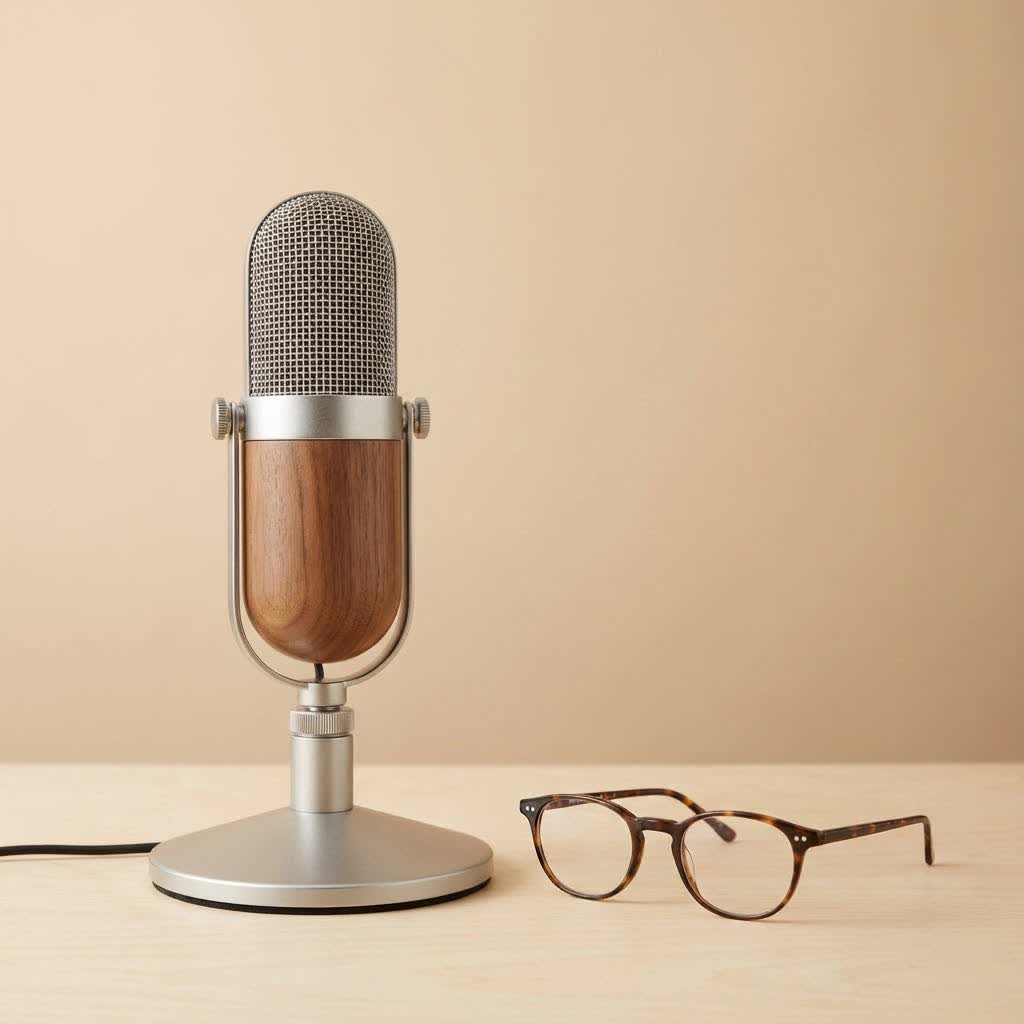
When you think of A Studio Mic, a few iconic shapes probably come to mind. But beneath the surface, there’s a fascinating variety, each with its own sonic personality and ideal applications. Understanding these differences is your first step to making informed choices.
Condenser Microphones: The Detail Whisperers
Condenser microphones are the darlings of the recording studio, celebrated for their incredible sensitivity, wide frequency response, and ability to capture the most minute nuances of sound. They require phantom power (typically +48V) to operate, which usually comes from your audio interface or mixer.
- Large Diaphragm Condensers (LDCs): These are often what people picture when they hear “studio mic.” Known for a warm, full-bodied sound, LDCs excel at capturing vocals, acoustic guitars, and other instruments where you want a rich, detailed, and “larger-than-life” presence. Many professional recording artists swear by their large-diaphragm condenser for main vocal tracks.
- Small Diaphragm Condensers (SDCs): With a reputation for accuracy and a neutral, uncolored sound, SDCs are superb for capturing transient details. Think acoustic guitars, hi-hats, drum overheads, or even as room mics to capture the natural ambience of a space. They often provide a more transparent and precise sonic image.
- Tube vs. Solid-State: Condensers also come in tube (valve) or solid-state varieties. Tube condensers are prized for their subtle warmth and harmonic richness, often adding a pleasing “vintage” character, while solid-state condensers typically offer a cleaner, more transparent sound. The choice often comes down to desired sonic aesthetic.
|
Our Picks for the Best Studio Mic in 2026
As an Amazon Associate I earn from qualifying purchases.
|
||
| Num | Product | Action |
|---|---|---|
| 1 | Upgraded Studio Recording Microphone with Isolation Shield & Pop Filter - Music Condenser Mic for Podcasting, Singing, Home Studio - Sound for PC, Laptop, Smartphone |

|
| 2 | Audio-Technica AT2020 Cardioid Condenser Studio XLR Microphone, Ideal for Project/Home Studio Applications, Black |
|
| 3 | Shure SM7B Vocal Dynamic Microphone – XLR Studio Mic for Podcasting, Recording, Broadcasting, Streaming & Gaming – Smooth, Warm Sound, Rugged Build, Detachable Windscreen, Wide Frequency Range, Black |
|
| 4 | USB Microphone, MAONO 192KHZ/24Bit Plug & Play PC Computer Podcast Condenser Cardioid Metal Mic Kit with Professional Sound Chipset for Recording, Gaming, Singing, YouTube (AU-A04) |
|
| 5 | Studio Recording Microphone Isolation Shield with Pop Filter and Metal Tripod Stand, Studio Mic to PC Laptop Smartphone, Music Microphone for Recording Singing Podcasting |
|
| 6 | AKG Pro Audio P120 - Affordable 2/3-Inch Diaphragm Condenser Microphone for Clear Vocals & Instruments. Studio Recording or Live. XLR Connector. Black |
|
| 7 | RØDE NT1 5th Generation Large-diaphragm Studio Condenser Microphone with XLR and USB Outputs, Shock Mount and Pop Filter for Music Production, Vocal Recording and Podcasting (Black) |
|
| 8 | Condenser Microphone,PC Computer Podcast USB Condenser Microphone Cardioid Metal Mic Kit for Recording, Podcasting, Home Studio, YouTube, Black, BM-800 |
|
| 9 | RØDE NT1 Signature Series Large-Diaphragm Condenser Microphone with Shock Mount, Pop Filter and XLR Cable for Music Production, Vocal Recording, Streaming and Podcasting (Black) |
|
| 10 | Shure SM4 Studio Recording Microphone Kit, XLR Home Studio Condenser Mic with Mix-Ready Audio - All-Metal Construction, Includes Detachable Magnetic Pop Filter & Shock Mount (SM4-K-KIT) |
|
Dynamic Microphones: The Workhorses of Sound
Dynamic microphones are the rugged heroes of the audio world, celebrated for their durability and ability to handle high sound pressure levels (SPLs) without distortion. Unlike condensers, most dynamic mics don’t require phantom power.
- Characteristics and Uses: Dynamic mics are less sensitive than condensers, making them ideal for louder sources like drums, electric guitar amps, and powerful vocals, especially in less-than-perfect acoustic environments. They naturally reject more background noise due to their lower sensitivity, which is a huge plus for home studios or live performances. Their focused mid-range can give vocals a punchy, upfront quality.
Ribbon Microphones: Warmth and Vintage Vibe
Ribbon microphones are a special breed, offering a uniquely warm, smooth, and natural sound that has graced countless classic recordings. They achieve this through a thin, corrugated metallic ribbon suspended in a magnetic field.
- Characteristics and Uses: Ribbons are particularly cherished for recording string instruments, brass, and vocals where a rich, slightly darker, and more “vintage” tone is desired. They often have a figure-8 polar pattern, picking up sound from the front and back while rejecting the sides.
- Delicacy and Phantom Power Warning: Ribbon mics are generally more delicate than dynamic or condenser mics. A crucial safety note: never apply phantom power to older or passively designed ribbon microphones, as it can permanently damage the fragile ribbon element. Always check the manufacturer’s specifications!
Precision in Practice: Professional Studio Mic Recording Techniques
Owning a great studio mic is only half the battle; knowing how to use it effectively is where the magic truly happens. Proper technique can elevate your recordings from good to absolutely captivating.
Setting the Stage: Essential Setup Steps
Before you even hit record, a meticulous setup process ensures you capture the best possible sound.
- Mounting Your Mic: Securely attach your studio mic to a sturdy microphone stand using its shock mount (for condensers) or clip (for dynamics). A shock mount helps isolate the mic from vibrations transmitted through the stand.
- Attach Your Pop Filter: A pop filter is non-negotiable for vocal recordings. Place it 2-3 inches in front of your mic to diffuse plosive sounds (like “p” and “b”) and protect the mic capsule from moisture.
- Adjust Stand Height: Position the mic so it’s comfortably in line with the sound source (e.g., singer’s mouth, instrument’s sound hole) when the performer is relaxed.
- Connect Your XLR Cable: Use a high-quality XLR cable to connect your studio mic to your audio interface or mixer. Ensure a secure connection.
- Enable Phantom Power (If Needed): If you’re using a condenser microphone, activate the +48V phantom power on your interface or mixer after connecting the mic. Remember the caution for ribbon mics!
The Art of Placement: Getting the Perfect Sound
Microphone placement is perhaps the most critical variable in recording. Even a slight adjustment can drastically change the tonal quality.
- Distance is Key (The Proximity Effect): The closer your studio mic is to the sound source, the more pronounced the bass response becomes. This phenomenon, known as the “proximity effect,” can add warmth and intimacy to vocals but can also lead to muddiness if overused. Experiment with distances from 4-12 inches for vocals to find the sweet spot for your voice. For instruments, closer miking generally yields a more direct, isolated sound, while further placement captures more room ambience.
- Angling for Tone: Don’t always point your mic directly at the source.
- On-axis: Directly facing the source, for the brightest and most direct sound.
- Off-axis: Angling the mic slightly away can sometimes smooth out harsh frequencies, reduce plosives, or subtly alter the tone. For example, pointing a vocal mic slightly above or below the mouth can yield different tonal characteristics – higher for a more nasal sound, lower for a chestier tone.
- Understanding Polar Patterns: Your studio mic’s polar pattern dictates how it picks up sound from different directions.
- Cardioid: Picks up sound mainly from the front, rejecting sound from the sides and rear. Ideal for isolating a single source in a noisy environment or for vocals.
- Omnidirectional: Picks up sound equally from all directions. Great for capturing room ambience, group vocals, or instruments that radiate sound evenly. Less susceptible to proximity effect.
- Figure-8 (Bidirectional): Picks up sound from the front and back, rejecting the sides. Excellent for two-person interviews or for capturing the interaction between an instrument and a room.
“Don’t be afraid to move your studio mic around! The perfect spot often isn’t the most obvious one. Trust your ears; they’re your best tool.” – Elena Petrova, Tmava.com Audio Expert
Advanced Miking: Stereo Techniques (Brief Mention)
While often starting with a single mic, experienced engineers leverage stereo techniques to add depth and width to recordings. Techniques like A/B (spaced pair), X/Y (coincident pair), and M/S (mid-side) miking use two or more studio mics to create a coherent stereo image, often used for drum overheads, acoustic ensembles, or capturing room ambience.
Sculpting Your Sound: Audio Processing with A Studio Mic
Once you’ve captured your raw audio with your studio mic, the next step is to shape and refine it. Audio processing is where you take a good recording and make it sound truly professional.
The Foundation: Gain Staging and Noise Reduction
- Setting Levels (Gain Staging): This is paramount. Ensure your input gain is set correctly – not too low (leading to noise), and not too high (leading to clipping/distortion). Aim for peak levels between -18 dBFS and -12 dBFS during recording to leave ample headroom for mixing.
- Gating: A noise gate automatically mutes your studio mic when the signal drops below a certain threshold. It’s fantastic for reducing background noise during silent passages, especially useful for vocals or instruments recorded in a less-than-perfect room.
- High-Pass Filters (HPF): An HPF cuts out low-end frequencies below a set point. Use it to remove unwanted rumble, hum, or excessive bass that can muddy your mix, particularly common with vocals.
Shaping the Tone: Equalization and Compression
- Equalization (EQ): EQ allows you to boost or cut specific frequencies to enhance clarity, add warmth, or remove harshness. For a vocal recorded with a studio mic, you might cut boomy lows, boost presence in the mid-range, or add a touch of “air” in the high frequencies.
- Compression: A compressor reduces the dynamic range of a signal, making loud parts quieter and quiet parts louder. This creates a more consistent and “glued” sound. It’s essential for vocals to ensure they sit well in a mix and for instruments to add punch and sustain.
Polishing the Performance: De-essers and Limiters
- De-essers: Sibilance (harsh “s” and “sh” sounds) can be distracting in vocal recordings. A de-esser is a specialized compressor that targets and reduces these specific high frequencies, making your studio mic’s capture sound smoother.
- Limiters: A limiter is an extreme form of compression that prevents a signal from exceeding a set maximum level (often 0 dBFS). It’s typically used at the final stage of mixing or mastering to maximize loudness without clipping, ensuring your track sounds consistent across various playback systems.
Your Perfect Match: Choosing A Studio Mic for Your Needs
With so many options, how do you pick the right studio mic? It all starts with understanding your specific needs and priorities.
Define Your Purpose: What Are You Recording?
- Vocals: For most studio vocals, a large-diaphragm condenser is the go-to choice due to its sensitivity and detail. However, a dynamic mic like the Shure SM7B is a legendary option for rock vocals or broadcast, offering excellent noise rejection.
- Acoustic Instruments: Small-diaphragm condensers are often preferred for their accurate transient response on instruments like acoustic guitar. Ribbons can add a beautiful warmth to strings and brass.
- Loud Sources (Drums, Amps): Dynamic microphones are built to withstand high SPLs, making them ideal for close-miking drums or guitar cabinets.
- Podcasts/Voiceovers: While a condenser provides high fidelity, a good dynamic mic can be excellent, especially in untreated rooms, due to its ability to focus on the voice and reject background noise.
Key Specifications That Matter
When comparing a studio mic, look beyond just the price tag.
- Polar Patterns: As discussed, cardioid for isolation, omni for ambience, figure-8 for specific stereo techniques or dual sources. Many high-end condensers offer switchable patterns for versatility.
- Frequency Response: This indicates the range of frequencies the mic can capture. A flat response is often desired for accuracy, while a tailored response might complement certain sound sources (e.g., a mic with a slight high-end boost for “air” on vocals).
- Sensitivity: How effectively the mic converts sound pressure into an electrical signal. High sensitivity is crucial for capturing quiet sources with condensers, but lower sensitivity in dynamics can be beneficial for loud sources.
- Self-Noise: The inherent electrical noise generated by the microphone itself. Lower self-noise (especially important for condensers) means cleaner recordings, particularly for subtle sources.
- Durability: Dynamic mics are generally more robust, while condensers and ribbons require more careful handling. Consider where and how you’ll be using your studio mic.
Home Studio vs. Professional Setup
- Home Studio: You might prioritize versatility and affordability. A good quality large-diaphragm condenser is often the best “first” studio mic as it’s suitable for a wide range of sources. A dynamic mic might be a better choice if your room acoustics are challenging.
- Professional Studio: A professional studio will have an arsenal of various studio mics to choose from, tailored to different instruments, voices, and recording scenarios. The emphasis here is on having specialized tools for every job.
Longevity and Liveliness: Maintaining and Caring for Your Studio Mic
Your studio mic is an investment, and like any valuable tool, it deserves proper care. Good maintenance practices ensure your mics perform optimally for years to come.
Keep it Pristine: Cleaning Best Practices
Regular cleaning is crucial to prevent dust, moisture, and debris from affecting performance.
- Gentle Wiping: Use a soft, dry microfiber cloth to gently wipe down the exterior of your studio mic after each use, removing fingerprints and dust.
- Grill Cleaning: For the mic grill, a soft-bristle brush (like a clean toothbrush) can dislodge dust and debris. If the grill is removable, you might gently clean it with a slightly damp cloth (with water or a mild disinfectant), ensuring it’s completely dry before reattaching.
- Avoid Moisture on Capsule: Never spray liquids directly onto the microphone capsule. Moisture is the enemy of sensitive electronic components, especially in condensers.
- Pop Filter and Windscreen: Regularly clean or replace pop filters and windscreens, as they accumulate saliva and dust, protecting your mic capsule.
Safe Storage and Handling
- Protective Cases: Always store your studio mic in its dedicated protective case when not in use. This shields it from dust, impacts, and environmental fluctuations.
- Plastic Bags: For condensers, placing them in a simple plastic bag before storing them in their case can create an extra barrier against airborne particles and humidity.
- Avoid Drops and Bumps: Handle your microphones with care. Dropping a mic, especially a condenser or ribbon, can cause internal damage to the delicate capsule.
- Cable Care: Coil your XLR cables properly to avoid kinks and internal wire damage. Never yank a cable from the mic or interface. Periodically inspect cables for wear and tear.
Phantom Power Caution (Especially for Ribbons)
Reiterating this crucial point: always verify the phantom power requirements of your specific studio mic. While condensers need it, applying phantom power to certain passive ribbon mics can cause irreparable damage. It’s always a good habit to turn off phantom power before connecting or disconnecting any mic.
Frequently Asked Questions About Studio Microphones
Q: What is the best studio mic for vocals?
A: For most studio vocals, a large-diaphragm condenser microphone is highly recommended due to its sensitivity and ability to capture vocal nuances with warmth and detail. However, specialized dynamic mics like the Shure SM7B are also excellent for certain vocal styles, especially in untreated rooms.
Q: Do I need phantom power for a studio mic?
A: Condenser microphones require +48V phantom power to operate. Dynamic microphones typically do not need phantom power. Be extremely cautious and never apply phantom power to older or passively designed ribbon microphones, as it can cause damage.
Q: How far should I be from a studio mic when recording?
A: For vocals, a distance of 4 to 12 inches (10-30 cm) is a good starting point. Closer distances will emphasize bass frequencies (proximity effect) and create a more intimate sound, while further distances will capture more room ambience. Experiment to find what works best for your voice and room.
Q: Can I use a dynamic mic for studio vocals?
A: Absolutely! While condensers are popular, many legendary vocal tracks have been recorded with dynamic microphones. They excel in louder, energetic performances and in rooms with less-than-ideal acoustics, providing a focused sound with good background noise rejection.
Q: How do I reduce background noise when recording with a studio mic?
A: To reduce background noise, use a cardioid polar pattern, record in a treated room (or use acoustic panels), apply a high-pass filter to remove low-end rumble, and use a noise gate in your processing chain. Optimal microphone placement and proper gain staging are also critical.
Conclusion
The journey into the world of studio microphones is a rewarding one, full of subtle nuances and exciting discoveries. From understanding the distinct characteristics of condenser, dynamic, and ribbon mics to mastering placement techniques and essential processing, you now have a comprehensive toolkit to elevate your audio. Remember, the goal isn’t just to record sound, but to capture emotion and clarity with confidence. Experiment, listen, and let your creativity guide you. At Tmava, we’re dedicated to empowering you with the knowledge to make confident choices and achieve professional-grade results. Keep exploring, keep learning, and most importantly, keep making incredible sound!