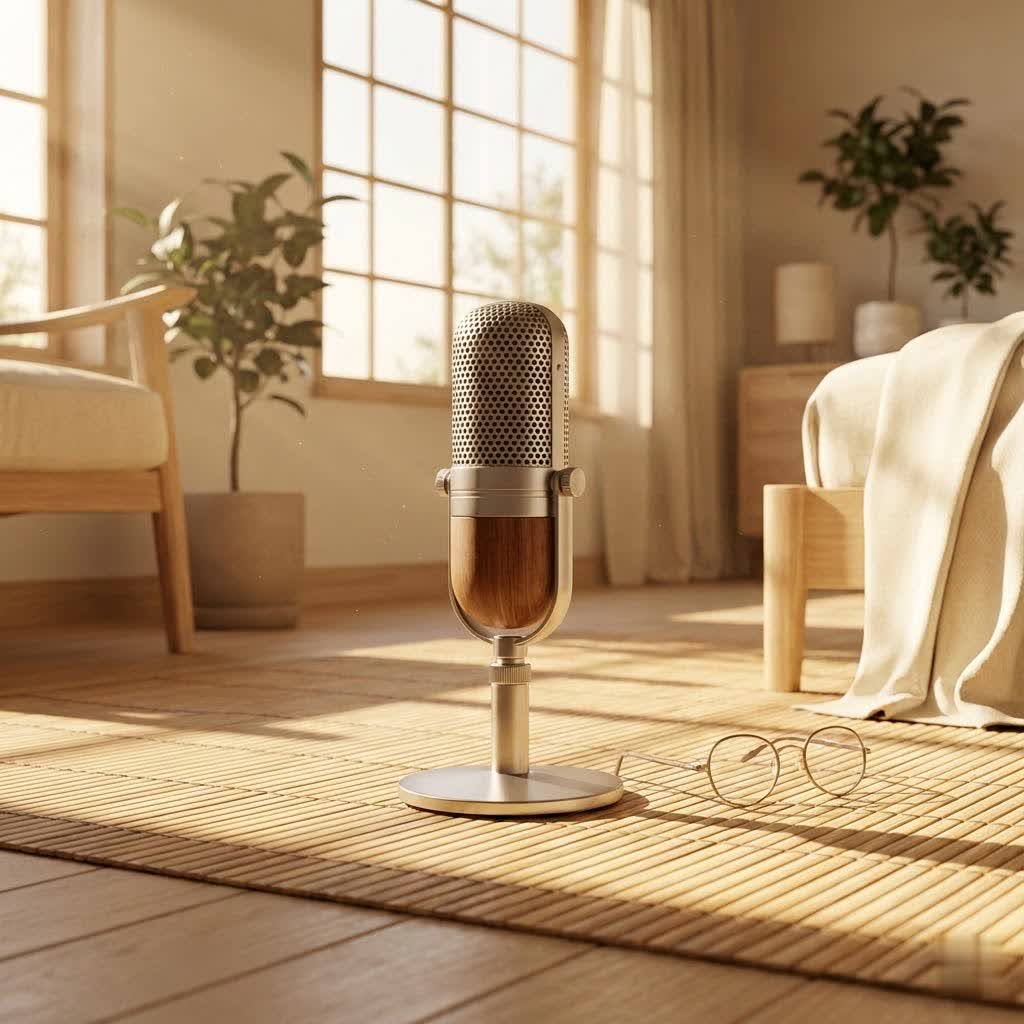
So, you’re ready to take your home recordings from “just okay” to “seriously impressive”? If there’s one piece of gear that can truly elevate your sound, it’s a quality Condenser Mic For Home Studio use. Forget those muddy, lifeless recordings; we’re talking about capturing every nuance, every breath, every shimmering detail that makes your music or voice truly shine. As someone who’s spent over a decade knee-deep in microphones and mixing boards, I can tell you that a condenser microphone isn’t just a piece of equipment; it’s the gateway to professional-grade audio, right from your own creative space. At Tmava.com, we’re all about empowering you with the knowledge to make the best choices, and today, we’re diving deep into why the condenser mic is your home studio’s best friend.
What Makes a Condenser Mic the Heart of a Home Studio?
Ever wondered why those big-budget studio recordings sound so rich and detailed? A huge part of the secret lies in the condenser microphone. Unlike their rugged dynamic cousins, condenser mics are built for sensitivity and precision, capturing a far wider frequency response and the subtlest elements of sound. This makes them absolutely indispensable for tasks where clarity and detail are paramount.
Why Do Condensers Excel at Capturing Detail?
|
Our Picks for the Best Studio Mic in 2026
As an Amazon Associate I earn from qualifying purchases.
|
||
| Num | Product | Action |
|---|---|---|
| 1 | RØDE NT1 5th Generation Large-diaphragm Studio Condenser Microphone with XLR and USB Outputs, Shock Mount and Pop Filter for Music Production, Vocal Recording and Podcasting (Black) |

|
| 2 | AKG Pro Audio P120 - Affordable 2/3-Inch Diaphragm Condenser Microphone for Clear Vocals & Instruments. Studio Recording or Live. XLR Connector. Black |
|
| 3 | Studio Recording Microphone Isolation Shield with Pop Filter and Metal Tripod Stand, Studio Mic to PC Laptop Smartphone, Music Microphone for Recording Singing Podcasting |
|
| 4 | Upgraded Studio Recording Microphone with Isolation Shield & Pop Filter - Music Condenser Mic for Podcasting, Singing, Home Studio - Sound for PC, Laptop, Smartphone |
|
| 5 | Shure SM4 Studio Recording Microphone Kit, XLR Home Studio Condenser Mic with Mix-Ready Audio - All-Metal Construction, Includes Detachable Magnetic Pop Filter & Shock Mount (SM4-K-KIT) |
|
| 6 | Condenser Microphone,PC Computer Podcast USB Condenser Microphone Cardioid Metal Mic Kit for Recording, Podcasting, Home Studio, YouTube, Black, BM-800 |
|
| 7 | Shure SM7B Vocal Dynamic Microphone – XLR Studio Mic for Podcasting, Recording, Broadcasting, Streaming & Gaming – Smooth, Warm Sound, Rugged Build, Detachable Windscreen, Wide Frequency Range, Black |
|
| 8 | USB Microphone, MAONO 192KHZ/24Bit Plug & Play PC Computer Podcast Condenser Cardioid Metal Mic Kit with Professional Sound Chipset for Recording, Gaming, Singing, YouTube (AU-A04) |
|
| 9 | RØDE NT1 Signature Series Large-Diaphragm Condenser Microphone with Shock Mount, Pop Filter and XLR Cable for Music Production, Vocal Recording, Streaming and Podcasting (Black) |
|
| 10 | Audio-Technica AT2020 Cardioid Condenser Studio XLR Microphone, Ideal for Project/Home Studio Applications, Black |
|
Imagine trying to catch delicate snowflakes with a fishing net versus a fine silk cloth. Dynamic mics are like that fishing net – great for robust sounds but missing the subtleties. Condensers are the silk cloth. Their lightweight diaphragm vibrates with the slightest change in air pressure, translating those delicate sound waves into a rich, accurate electrical signal. This heightened sensitivity means they pick up the intricate harmonics of an acoustic guitar, the airy highs of a vocal performance, and the nuanced textures of percussion with breathtaking fidelity. If you want your home recordings to possess that professional “sheen,” a condenser mic for home studio setups is non-negotiable.
The Essential Requirement: Phantom Power
Before you plug in your shiny new condenser, there’s a crucial detail to remember: most require phantom power. What’s that, you ask? It’s a +48V electrical current supplied through your XLR cable, typically from an audio interface or a mixing console. This power is essential to energize the microphone’s internal circuitry and polarize its diaphragm. Without it, your condenser mic won’t even hum. So, if you’re eyeing an XLR condenser mic for home studio work, make sure your audio interface has that “48V” button – it’s non-negotiable!
Choosing Your Weapon: Popular Condenser Mic Types for Home Recording
Navigating the world of condenser mics can feel a bit like exploring a jungle of technical jargon. But don’t worry, I’m here to be your guide. For home studio enthusiasts, two main types often come to mind: large-diaphragm and small-diaphragm, with USB options also gaining traction.
Large-Diaphragm Condensers (LDCs): The Versatile Workhorses
When most people picture a studio microphone, they’re probably imagining a large-diaphragm condenser. These mics, typically with diaphragms an inch or more in diameter, are renowned for their ability to deliver a full, warm sound, particularly in the low frequencies, making them stars for vocals and acoustic instruments. Their higher sensitivity and lower self-noise make them fantastic for capturing nuanced performances without introducing unwanted hiss.
For many home studio owners, an LDC is often the first serious microphone purchase because of its incredible versatility. “A good large-diaphragm condenser can cover so much ground,” explains Dr. Anya Sharma, a renowned acoustician and recording guru at Tmava.com. “From punchy vocals to shimmering acoustic guitars, it’s often the only mic a burgeoning home studio needs to sound genuinely professional.”
Popular LDC examples for home studios include:
- Audio-Technica AT2020: A perennial favorite for beginners, offering remarkable clarity and detail well above its modest price point. It’s a true workhorse for vocals and acoustic guitars.
- Rode NT1 Signature Series: Known for its incredibly low self-noise (one of the quietest in its class), delivering crisp, detailed vocals and excellent results on acoustic instruments. It often comes bundled with a shock mount and pop filter, making it great value.
- Neumann TLM 103: If you’re ready to invest in premium sound, the TLM 103 offers the legendary Neumann vocal clarity and low self-noise at a more accessible price than their flagship models.
- Rode NT2-A: A fantastic multi-pattern option, allowing you to switch between cardioid, omnidirectional, and figure-8 patterns, adding immense flexibility for different recording scenarios.
- Aston Origin: A British-engineered marvel with a unique design, integrated pop filter, and an internally shock-mounted capsule. It delivers a warm, detailed, and musical sound often compared to mics twice its price.
Small-Diaphragm Condensers (SDCs): Precision and Clarity
While LDCs are great all-rounders, small-diaphragm condensers (with diaphragms under three-quarters of an inch) are the champions of precision. They excel at capturing transient details and high frequencies with incredible accuracy, making them ideal for acoustic instruments like cymbals, violins, mandolins, and for use as drum overheads. Their flat frequency response means they provide a very transparent and honest reproduction of the sound source.
If your home studio focuses heavily on detailed instrumental recordings or if you plan to capture a wider stereo image with a matched pair, an SDC is an invaluable addition. While typically less “flattering” for lead vocals than an LDC, their transparency can be perfect for backing vocals or in situations where an uncolored sound is desired.
USB Condenser Mics: Convenience Meets Quality?
For those just starting out, or focused purely on podcasting, streaming, or simple voiceovers, USB condenser microphones have emerged as a convenient alternative. They connect directly to your computer via USB, eliminating the need for a separate audio interface and simplifying your setup.
While historically, USB mics couldn’t compete with their XLR counterparts in terms of raw audio quality and flexibility, some modern USB condenser mics, like the Rode NT-USB+ Pro, are closing the gap, offering impressive sound that can rival a good LDC and interface combo. They’re an excellent plug-and-play solution for tight budgets or minimal setups, but for serious home studio work, an XLR condenser mic for home studio use with an audio interface still offers superior performance, upgradeability, and sonic versatility.
Beyond the Mic: Essential Recording Techniques for Condensers
Having the right condenser mic for home studio is only half the battle. How you use it dramatically impacts your final sound. Even the most expensive microphone can sound terrible if not handled with care and proper technique.
Mic Placement: The Art of Capturing Sound
Microphone placement is perhaps the most critical skill in home recording. A few inches can make the difference between a thin, distant sound and a rich, present one.
- For Vocals: Start with the mic roughly 6-12 inches from the singer’s mouth, slightly off-axis to reduce plosives (those harsh “p” and “b” sounds). Experiment with height and distance to find the sweet spot that flatters the voice. The “proximity effect” – an increase in bass frequencies as you get closer to a directional mic – can be your friend for adding warmth, but too close and it can get boomy.
- For Acoustic Guitar: Often, placing the mic around the 12th fret, 6-12 inches away, works well. You might also try aiming towards the bridge for more brightness or towards the soundhole for more body, but be careful of excessive boominess. For a richer, more detailed sound, you might even consider a second small-diaphragm condenser pointed towards the bridge or as a room mic.
- Room Acoustics: Condenser mics are sensitive; they hear everything. If your room is untreated, they’ll pick up reflections and reverb. Consider using blankets, duvets, or professional acoustic panels to tame reflections for cleaner recordings.
Gain Staging and Levels: Avoiding the Red
Proper gain staging is fundamental. This means setting your input level (gain) on your audio interface correctly so that the signal is strong enough to be clear, but not so strong that it “clips” or distorts. Aim for your signal to peak around -6dB to -10dB on your digital audio workstation (DAW) meter during the loudest parts of your performance. This gives you plenty of headroom for mixing without risking unwanted digital distortion.
Taming Unwanted Sounds: Pop Filters and Shock Mounts
These aren’t optional accessories; they’re essential for a clean condenser mic for home studio recording.
- Pop Filters: A thin mesh screen placed between the vocalist and the microphone, a pop filter stops harsh plosive sounds from overloading the diaphragm, preventing unpleasant “pops” in your recording.
- Shock Mounts: Condenser mics are susceptible to vibrations traveling through the microphone stand – footsteps, desk bumps, even a passing truck. A shock mount suspends the microphone in elastic bands, isolating it from these physical noises and ensuring your recordings are free of distracting rumble. Many quality condenser mics, like the Rode NT1 and Audio-Technica AT2035, even come bundled with them, providing excellent value.
Polishing Your Tracks: Audio Processing with Your Condenser Mic
Once you’ve captured your raw audio with your condenser mic, the real fun begins in the post-production phase. Your DAW (Digital Audio Workstation) and a suite of plugins become your virtual mixing console, allowing you to sculpt your sound to perfection.
DAWs and Plugins: Your Virtual Mixing Console
Using plugins, you can enhance your condenser mic’s already excellent capture.
- EQ (Equalization): To subtly boost pleasing frequencies or cut harsh ones.
- Compression: To control dynamics, making loud parts quieter and quiet parts louder, resulting in a more consistent and impactful sound.
- De-Essing: To reduce sibilance – those sharp “s” and “sh” sounds that can be grating to the ear.
Noise Reduction: Keeping Your Recordings Clean
Even the best condenser mic for home studio setups will pick up some ambient noise if your room isn’t perfectly treated. While good mic technique and placement are the first line of defense, plugins can help.
- Gate/Expander: To reduce background noise during silent passages.
- Noise Reduction Software: Can intelligently remove persistent hums or air conditioning noise, though always use sparingly to avoid making your audio sound unnatural.
Finding Your Perfect Match: How to Select a Condenser Mic for Your Needs
Choosing the “best” condenser mic for home studio applications is subjective, but understanding your needs and budget can guide you to the perfect fit.
Budget Considerations: Where Quality Meets Affordability
You don’t need to break the bank to get a great condenser mic.
- Entry-Level (Under $250): Excellent options like the Audio-Technica AT2020 or AKG P220 offer professional-level sound quality, often including essential accessories like shock mounts. These are perfect for beginners.
- Mid-Range ($250-$500): Here, you’ll find mics like the Aston Origin or sE Electronics X1 S, offering improved build quality, lower self-noise, and often additional features like switchable polar patterns, pads, and high-pass filters.
- High-End ($500+): Mics like the Neumann TLM 103 or AKG C414 XLS provide unparalleled clarity, versatility, and character, often found in professional studios.
Your Primary Recording Source: What Are You Miking?
- Vocals: A large-diaphragm condenser is usually the go-to for its warmth and presence.
- Acoustic Guitar: An LDC can work beautifully, or consider pairing it with an SDC for more detail, or even using a matched pair of SDCs for stereo imaging.
- Podcasting/Streaming: A good LDC (XLR or USB) is ideal for clear, broadcast-quality speech.
- Drums (Overheads): Small-diaphragm condensers like the Neumann KM 184 are frequently chosen for their accurate transient response.
Polar Patterns: Understanding Directionality
The polar pattern describes how sensitive a microphone is to sounds coming from different directions.
- Cardioid: The most common pattern, picking up sound primarily from the front and rejecting much from the sides and rear. This is excellent for isolating a single vocalist or instrument in a less-than-ideal room.
- Omnidirectional: Picks up sound equally from all directions. Useful for capturing room ambience, a group of singers, or minimizing proximity effect. Best used in well-treated rooms.
- Figure-8 (Bidirectional): Picks up sound equally from the front and back, while rejecting sound from the sides. Ideal for recording two vocalists facing each other or for specific stereo miking techniques. Some mid-range and high-end LDCs offer switchable patterns, providing immense flexibility.
Longevity and Performance: Maintaining Your Studio Condenser Mic
A condenser mic is an investment, and like any valuable tool, it needs proper care to perform its best and last for years.
Handle with Care: They’re More Delicate Than You Think
Unlike robust dynamic mics designed for stage abuse, condensers are delicate instruments. The tiny diaphragms and intricate circuitry can be damaged by drops, impacts, or even strong gusts of wind (like blowing directly into them). Always handle your condenser mic gently.
Storage and Environment: Keeping the Elements at Bay
- Dust: Dust is the enemy of microphone capsules. Always store your mic in its case or covered with a dust bag when not in use.
- Humidity: High humidity can affect a condenser microphone’s performance and even cause damage over time. Store your mic in a dry environment. Many come with a desiccant packet in their case; replace it periodically.
- Temperature: Avoid extreme temperature fluctuations.
Cleaning Your Mic: A Gentle Touch
For general cleaning, a soft, dry cloth is usually sufficient for the body of the microphone. Never use harsh chemicals or liquids directly on the capsule or grille. For the grille, a soft toothbrush can gently remove any debris, but be extremely careful not to touch the diaphragm itself. If your pop filter gets dirty, gently hand wash it with mild soap and water, ensuring it’s completely dry before reattaching.
FAQ: Your Condenser Mic Questions Answered
Q: Do I need an audio interface to use a condenser microphone?
A: Yes, for XLR condenser microphones, an audio interface is essential. It provides the necessary phantom power (+48V) and converts the analog signal from the mic into a digital signal your computer can understand. USB condensers, however, connect directly to your computer.
Q: What’s the main difference between a large-diaphragm and a small-diaphragm condenser mic for home studio use?
A: Large-diaphragm condensers typically offer a fuller, warmer sound with higher sensitivity, making them excellent for vocals and general studio work. Small-diaphragm condensers excel at capturing transient detail and high frequencies with greater accuracy, ideal for acoustic instruments and drum overheads.
Q: Can a condenser mic be used for live performances?
A: Generally, it’s not recommended. Condenser mics are very sensitive and can easily pick up unwanted stage noise and feedback in a live setting. They are also more delicate and prone to damage from handling. Dynamic microphones are usually preferred for live use.
Q: Why is a pop filter important for my condenser mic?
A: A pop filter is crucial for reducing plosive sounds (harsh “p” and “b” sounds) that can overload the microphone’s diaphragm and create undesirable “pops” in your recording. It also helps protect the microphone capsule from moisture.
Q: How often should I clean my condenser mic?
A: Regular light cleaning with a soft, dry cloth to remove dust is recommended. Store it in its case or covered when not in use to minimize dust accumulation. Avoid aggressive cleaning or using liquids directly on the capsule.
The Final Word: Unlock Your Home Studio’s True Potential
Choosing the right condenser mic for home studio applications is more than just buying gear; it’s an investment in the quality and professionalism of your sound. Whether you’re recording vocals, acoustic instruments, or crafting podcasts, a quality condenser mic provides the clarity, detail, and warmth that truly makes a difference. Remember, the journey to great audio is a blend of the right tools, smart techniques, and consistent care.
So, go ahead, explore the options, apply these insights, and start capturing the sounds you’ve always dreamed of. Your home studio—and your audience—will thank you for it. Keep experimenting, keep creating, and remember that professional sound is within your reach. And for more in-depth knowledge and insights into the world of recording, keep coming back to Tmava.com – your trusted source for all things studio mic.