Stepping into the world of home recording can feel like a thrilling adventure, but choosing the right equipment, especially your studio microphone, often feels like navigating a dense jungle. As your trusted audio engineer from Tmava.com, I’m here to demystify the process and guide you to the perfect at home studio mic that truly elevates your sound. It’s not just about picking any mic; it’s about finding the one that genuinely resonates with your creative vision and fits your unique recording space.
The right microphone is the cornerstone of any great home studio. It’s the first step in capturing your voice or instrument, transforming acoustic energy into the digital signals that become your masterpiece. Whether you’re a budding podcaster, a singer-songwriter, or a content creator, understanding the nuances of these vital tools will empower you to make informed decisions and achieve professional-quality results right from your living room.
Decoding Your Needs: What Defines the Ideal At Home Studio Mic?
Before we dive into specific models, let’s talk about what makes a microphone truly shine in a home studio environment. It’s not a one-size-fits-all situation; what works for a treated professional studio might actually hinder your progress at home.
First, consider your primary sound source. Are you recording delicate acoustic guitar melodies, powerful vocals, a booming podcast, or maybe a snarling guitar amp? Each scenario benefits from different microphone characteristics. Second, and crucially, evaluate your recording environment. Most home studios aren’t acoustically treated isolation booths. This reality significantly impacts microphone choice, as some mics are far more forgiving of room reflections and background noise than others.
Finally, think about your budget and connectivity. Are you looking for a simple plug-and-play USB solution, or are you ready to invest in an XLR microphone paired with an audio interface for more control and expandability? An audio interface is a device that converts the analog signal from an XLR microphone into a digital signal your computer can understand, often providing crucial features like phantom power and gain control.
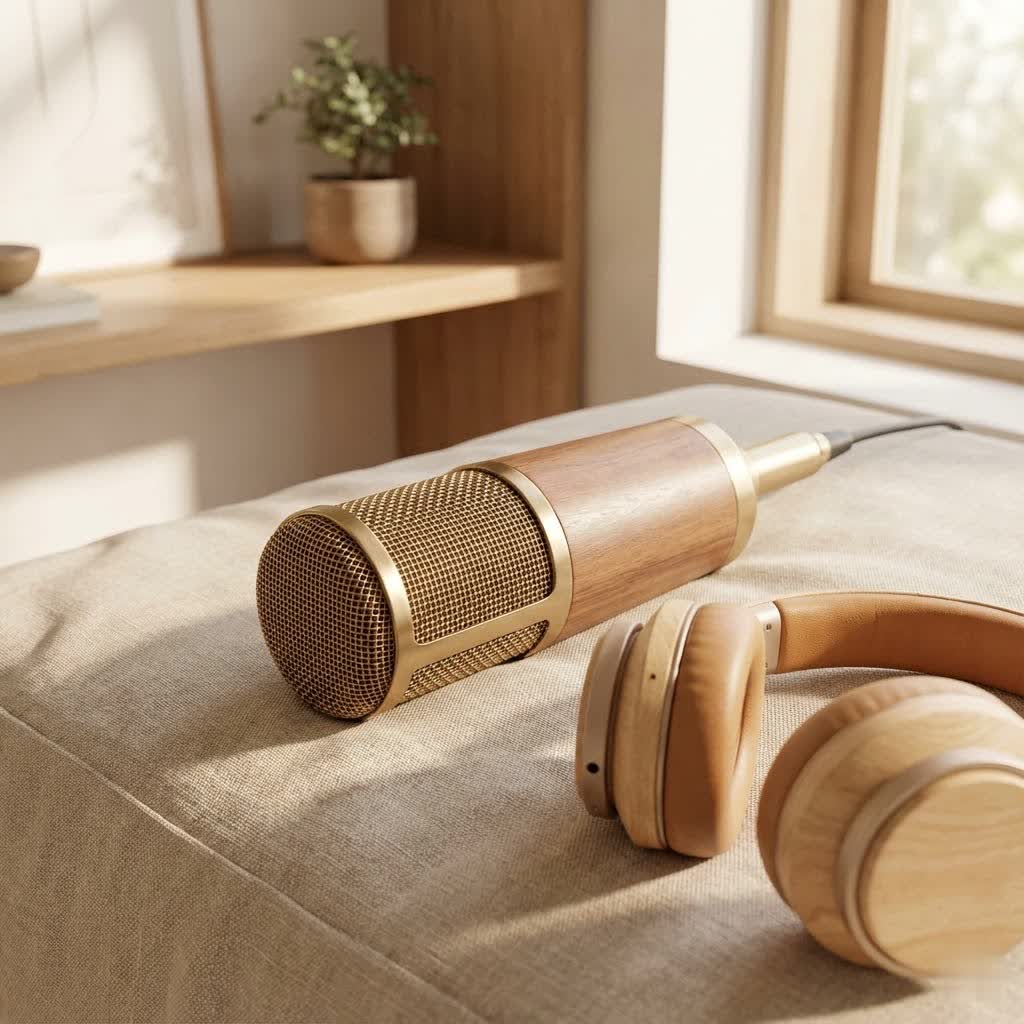
The Core Contenders: Types of At Home Studio Mics
The microphone market is vast, but for home studios, we primarily focus on three main types: condenser, dynamic, and USB. Each has its strengths, weaknesses, and ideal applications.
Condenser Microphones: Capturing Every Nuance
Condenser microphones are often hailed as the kings of the studio for their incredible sensitivity and detailed sound capture. They are adept at picking up the subtle nuances and wide frequency range of vocals, acoustic guitars, and other delicate instruments. If you’re aiming for a pristine, “airy” sound, a large-diaphragm condenser is likely your best bet.
However, their high sensitivity is a double-edged sword. In an untreated home studio, a condenser mic will faithfully capture not just your intended sound, but also every squeak of your chair, hum of your computer, and reflection from your walls. They also require 48V phantom power, typically supplied by an audio interface or mixer.
- Pros: Exceptional detail, wide frequency response, bright and clear sound.
- Cons: Highly sensitive to room acoustics and background noise, require phantom power, generally more fragile.
- Ideal for: Vocals (in treated rooms), acoustic guitars, piano, delicate instruments.
|
Our Picks for the Best Studio Mic in 2026
As an Amazon Associate I earn from qualifying purchases.
|
||
| Num | Product | Action |
|---|---|---|
| 1 | RØDE NT1 Signature Series Large-Diaphragm Condenser Microphone with Shock Mount, Pop Filter and XLR Cable for Music Production, Vocal Recording, Streaming and Podcasting (Black) |

|
| 2 | AKG Pro Audio P120 - Affordable 2/3-Inch Diaphragm Condenser Microphone for Clear Vocals & Instruments. Studio Recording or Live. XLR Connector. Black |
|
| 3 | Condenser Microphone,PC Computer Podcast USB Condenser Microphone Cardioid Metal Mic Kit for Recording, Podcasting, Home Studio, YouTube, Black, BM-800 |
|
| 4 | Studio Recording Microphone Isolation Shield with Pop Filter and Metal Tripod Stand, Studio Mic to PC Laptop Smartphone, Music Microphone for Recording Singing Podcasting |
|
| 5 | Upgraded Studio Recording Microphone with Isolation Shield & Pop Filter - Music Condenser Mic for Podcasting, Singing, Home Studio - Sound for PC, Laptop, Smartphone |
|
| 6 | RØDE NT1 5th Generation Large-diaphragm Studio Condenser Microphone with XLR and USB Outputs, Shock Mount and Pop Filter for Music Production, Vocal Recording and Podcasting (Black) |
|
| 7 | Audio-Technica AT2020 Cardioid Condenser Studio XLR Microphone, Ideal for Project/Home Studio Applications, Black |
|
| 8 | Shure SM4 Studio Recording Microphone Kit, XLR Home Studio Condenser Mic with Mix-Ready Audio - All-Metal Construction, Includes Detachable Magnetic Pop Filter & Shock Mount (SM4-K-KIT) |
|
| 9 | USB Microphone, MAONO 192KHZ/24Bit Plug & Play PC Computer Podcast Condenser Cardioid Metal Mic Kit with Professional Sound Chipset for Recording, Gaming, Singing, YouTube (AU-A04) |
|
| 10 | Shure SM7B Vocal Dynamic Microphone – XLR Studio Mic for Podcasting, Recording, Broadcasting, Streaming & Gaming – Smooth, Warm Sound, Rugged Build, Detachable Windscreen, Wide Frequency Range, Black |
|
“For pristine vocals and acoustic guitars, a good large-diaphragm condenser is often the go-to, but remember, they’re honest about your room’s acoustics!” – Eleanor Vance, Senior Audio Engineer at Tmava.com.
Dynamic Microphones: The Robust Workhorses
Dynamic microphones are the rugged heroes of the audio world. Less sensitive than condensers, they excel at handling high sound pressure levels (SPLs) and are remarkably durable. This makes them perfect for capturing loud sound sources like guitar amps, drums, or even energetic vocals without distortion.
Crucially for home studio users, their lower sensitivity also means they are less prone to picking up unwanted room noise and reflections. If your recording space isn’t acoustically treated, a dynamic mic can be a lifesaver, helping you achieve a cleaner sound by focusing more directly on your source. Most dynamic mics don’t require phantom power, simplifying your setup.
- Pros: Durable, handle loud sounds well, excellent noise rejection (good for untreated rooms), often more affordable, don’t require phantom power.
- Cons: Less detailed capture, narrower frequency response compared to condensers.
- Ideal for: Loud vocals, guitar amps, drums, podcasting, recording in untreated or noisy environments.
USB Microphones: Simplicity Meets Quality
USB microphones have revolutionized home recording by offering unparalleled ease of use. They connect directly to your computer via a single USB cable, bypassing the need for an audio interface. This plug-and-play simplicity makes them incredibly popular for beginners, podcasters, streamers, and anyone looking for a straightforward recording solution.
While traditionally not offering the same level of audio fidelity or control as their XLR counterparts, modern USB microphones have significantly improved in quality. Many now offer excellent sound for voiceovers, podcasts, and even casual music recording. However, they typically offer less flexibility for advanced recording setups and generally don’t allow for multiple microphones to be used simultaneously.
- Pros: Easy to set up and use, no audio interface required, often portable.
- Cons: Limited control over audio parameters, less flexible for multi-mic setups, generally lower upgrade path.
- Ideal for: Podcasting, streaming, voiceovers, beginner vocal/instrument recording.
A Quick Look at Ribbon Microphones (For the Curious)
While less common for a first “at home studio mic,” ribbon microphones deserve a brief mention. Known for their warm, smooth, and natural sound, they offer a vintage character that some engineers adore, especially for vocals and guitar amps. However, they are typically very delicate, require significant preamp gain, and are often a more specialized, higher-end investment.
Top Picks for the Best At Home Studio Mics (2024/2025 Edition)
Now that we understand the types, let’s explore some standout microphones that consistently deliver excellent results for home studio enthusiasts across different budgets.
Entry-Level Excellence: Getting Started on a Budget
When you’re just starting, you want a mic that offers great value without compromising too much on sound quality.
- Audio-Technica AT2020 (XLR & USB versions): This large-diaphragm condenser is a legendary entry-level mic. The XLR version, requiring an interface, delivers a clear, crisp sound perfect for vocals and acoustic instruments. The AT2020USB-XP offers the same great sound with plug-and-play convenience for podcasters and streamers. It’s consistently praised for its fantastic value.
- Shure SM58: While primarily a live vocal mic, the SM58’s robust build and excellent noise rejection make it a surprisingly versatile option for home studios, especially in untreated rooms. It’s incredibly durable and delivers a warm, clear sound for vocals.
Mid-Range Marvels: Upgrading Your Home Sound
Ready to step up your game? These mics offer enhanced performance, versatility, and often come with useful accessories.
- Rode NT1 (5th Generation): The Rode NT1 is renowned for its incredibly low self-noise, making it ideal for capturing subtle details without introducing hiss. The 5th generation even offers both XLR and USB connectivity, providing the best of both worlds. It delivers a clean, warm sound perfect for vocals, acoustic guitars, and voiceovers.
- Shure MV7: A true hybrid, the Shure MV7 combines both XLR and USB outputs, giving you flexibility as your studio grows. This dynamic microphone is fantastic for vocals and spoken word, offering excellent background noise rejection, making it a stellar choice for less-than-perfect acoustic environments. Its built-in preamp (in the SM7dB version) is a game-changer for many home users.
- Lewitt LCT 240 PRO: This budget-friendly condenser mic offers exceptional vocal clarity and a high dynamic range. It’s known for capturing impressive detail, particularly in the upper-midrange, making vocals stand out in a mix. It handles high SPLs well, preventing distortion even with louder sources.
Professional Performance: Investing in Your Passion
If your budget allows, these microphones bring truly professional-grade sound to your home studio, often seen in top-tier setups.
- Shure SM7B (or SM7dB): This dynamic microphone is a broadcast and recording legend. While it requires a good preamp (or the SM7dB’s built-in preamp), its ability to reject room noise and deliver a rich, smooth vocal tone is unparalleled. It’s the go-to for many professional podcasters and vocalists in untreated spaces.
- Neumann TLM 103: Modeled after the iconic Neumann U87, the TLM 103 is a large-diaphragm condenser known for its pristine sound, exceptionally low self-noise, and “radio-ready” clarity. It’s an investment, but it delivers a luxurious, detailed sound for vocals and acoustic instruments.
- AKG C414 XLII: A highly versatile multi-pattern condenser, the C414 has been a studio staple for decades. With nine switchable polar patterns, it offers incredible flexibility for capturing various sound sources and adapting to different recording situations. Its accuracy and detailed sound make it a top choice for vocals and instruments alike.
Here’s a quick comparison of some popular home studio mics:
| Microphone | Type | Connectivity | Best For | Key Features | Price Range (Approx.) |
|---|---|---|---|---|---|
| Audio-Technica AT2020 | Condenser | XLR / USB | Vocals, Acoustic Guitar (Beginner) | Clear, detailed sound, great value | $99 – $179 |
| Shure SM58 | Dynamic | XLR | Vocals (Live & Untreated Rooms) | Durable, excellent noise rejection | $100 – $120 |
| Rode NT1 (5th Gen) | Condenser | XLR / USB | Vocals, Acoustic Instruments (Quiet) | Extremely low self-noise, clean sound | $250 – $300 |
| Shure MV7 | Dynamic | XLR / USB | Vocals, Podcasting, Streaming | Hybrid connectivity, excellent noise rejection | $250 – $300 |
| Lewitt LCT 240 PRO | Condenser | XLR | Vocals, Home Recording | Clear, detailed vocals, high dynamic range | $150 – $200 |
| Shure SM7B | Dynamic | XLR | Pro Vocals, Broadcasting (Untreated) | Broadcast quality, superb noise rejection | $400 – $450 |
| Neumann TLM 103 | Condenser | XLR | High-End Vocals, Acoustic Instruments | Pristine clarity, low self-noise | $1200 – $1400 |
| AKG C414 XLII | Condenser | XLR | Versatile Studio Use | Multi-pattern, accurate, detailed sound | $1300 – $1500 |
Elevate Your Recordings: Pro Techniques with Your At Home Studio Mic
A great microphone is only half the battle; how you use it makes all the difference. Mastering these simple techniques will dramatically improve your home studio recordings.
Mic Placement Matters: Finding the Sweet Spot
The distance and angle of your microphone can profoundly impact the captured sound. For vocals, a good starting point is about 6-12 inches from the mic, angled slightly off-axis to reduce harsh “plosives” (P and B sounds). For acoustic guitars, experimenting with placement around the 12th fret or near the soundhole can yield different tones. Always use a pop filter for vocals to prevent those harsh plosives and protect your mic.
Gain Staging and Monitoring: The Foundation of Good Sound
Proper gain staging is crucial to avoid clipping and achieve a strong, clean signal. Set your input gain on your audio interface (or mic itself for USB mics) so that your loudest peaks hit around -6dB to -3dB. This leaves headroom and prevents distortion. Always monitor your sound through quality headphones to catch any unwanted noises or issues before they ruin your take.
Taming Your Room: Acoustic Treatment Basics
While dynamic mics are forgiving, no microphone can completely negate a bad-sounding room. Simple acoustic treatments like moving blankets, foam panels, or even strategically placed furniture can significantly reduce harsh reflections and standing waves, leading to a much clearer and more professional recording. Consider placing absorbent materials behind the mic and at first-reflection points.
Beyond the Capture: Essential Audio Processing for At Home Studio Mics
Once your audio is recorded, it enters the exciting world of post-production. Digital Audio Workstations (DAWs) like Ableton Live, Logic Pro, or Pro Tools offer a suite of tools to refine your sound. Common processing techniques include:
- EQ (Equalization): Shaping the tone by boosting or cutting specific frequencies.
- Compression: Taming dynamic range, making loud parts quieter and quiet parts louder for a more consistent sound.
- Noise Reduction: Utilizing plugins to minimize unwanted hums, hisses, or room noise.
- Reverb/Delay: Adding spatial effects to give your sound depth and atmosphere.
Learning the basics of these processes will help you sculpt the raw audio from your at home studio mic into polished, professional-sounding tracks.
Longevity Guaranteed: Maintaining Your At Home Studio Mic
Your microphone is an investment; treat it well, and it will serve you for years.
- Cleanliness: Gently clean the grille and body with a soft, dry cloth. Avoid moisture, especially with condenser mics.
- Storage: Store your mic in its original case or a protective pouch when not in use to shield it from dust and physical damage.
- Handling: Always handle your microphone with care. Avoid dropping it, especially condensers and ribbon mics, as their delicate internal components can be easily damaged.
- Phantom Power: Remember to turn off phantom power on your audio interface before connecting or disconnecting condenser microphones to prevent potential damage.
Frequently Asked Questions About At Home Studio Mics
Q: Do I need an audio interface for my home studio mic?
A: If you’re using an XLR microphone (condenser or dynamic), yes, an audio interface is essential. It converts the analog signal to digital, provides phantom power for condensers, and allows you to control input gain. USB microphones, however, plug directly into your computer and do not require an interface.
Q: Can I use a dynamic mic for vocals in a home studio?
A: Absolutely! Dynamic microphones like the Shure SM7B are legendary for vocal recording, especially in untreated rooms, due to their excellent noise rejection and ability to handle loud performances. Even more affordable dynamics like the Shure SM58 can yield great results for home studio vocals.
Q: What’s the best microphone for a small, untreated room?
A: For small, untreated rooms, a dynamic microphone is often the best choice. Their lower sensitivity means they’ll pick up less of your room’s undesirable acoustics and background noise, focusing more on your direct sound source. The Shure SM7B and Shure MV7 are prime examples.
Q: How much should I spend on an at home studio mic?
A: The “best” amount to spend depends on your budget and needs. You can get excellent entry-level microphones for $100-$200 (e.g., Audio-Technica AT2020). Mid-range options from $200-$400 (e.g., Rode NT1, Shure MV7) offer significant upgrades in sound quality and features. Professional-grade home studio mics can range from $400 to over $1000. Start with what you can comfortably afford and upgrade as your skills and needs evolve.
Q: What is phantom power and do I need it?
A: Phantom power (+48V) is a direct current that powers condenser microphones. Unlike dynamic microphones, condensers require external power to operate. If you’re using an XLR condenser mic, you will need an audio interface or mixer capable of supplying phantom power. Dynamic and USB microphones typically do not require phantom power.
Conclusion
Choosing the Best At Home Studio Mic is a journey of discovery, blending technical specifications with your unique creative needs and environment. From the detailed clarity of a condenser to the robust reliability of a dynamic mic, and the straightforward convenience of a USB option, there’s a perfect microphone out there for every home producer. By understanding the different types, considering your recording space, and practicing good recording techniques, you’re well on your way to capturing incredible sound. So go forth, experiment, and let your creativity flow – your perfect home studio sound is within reach. For more in-depth guides and expert insights, keep exploring Tmava.com, your trusted resource for all things professional audio.